REVIEW · MOSHI
6 Days Kilimanjaro Trekking – Machame Route
Book on Viator →Operated by Afrishare Trekking and Safaris · Bookable on Viator
Kilimanjaro is a climb with a schedule. This 6-day Machame trek from Moshi pairs professional guides (people like Peter and Alex are repeatedly praised) with porter support and a strong kitchen team, including chef Daniel, for meals that help you keep moving. The main thing to plan for is the midnight-to-2am summit start—cold, dark, and mentally tough before the sunrise.
I like that the trip feels structured from the moment you’re picked up, and the inclusion list is clear: 5 nights of accommodation, all fees and taxes, lunch, and both guide and porter. You’ll also get a private setup, so you’re not sharing your climbing rhythm with a random crowd, and you can keep communication direct.
One small heads-up: this route runs in all weather, and that means your clothing strategy has to handle rain and cold, especially on the descent when conditions can turn wet and muddy.
In This Review
- Key Highlights of the Machame Route Trek
- Moshi to Kilimanjaro: Why the Machame Route Gets Chosen
- Price and Value: What $1,715 Covers (and What It Doesn’t)
- Day 1: Machame Hut and the First Big Night
- Day 2: Machame Kusini to Shira Campsite (Rain Forest to Heather)
- Day 3: Shira Plateau to Lava Tower and Down to Barranco Hut
- Day 4: Barranco Wall, Karanga Valley Lunch, and Barafu Camp
- Day 5: Midnight to Stella Point for Sunrise, then Uhuru Peak
- Day 6: Mweka Gate Certificates, Mud, and the Final Descent
- Guides, Porters, and Chef Daniel: The Human Part You Pay For
- Packing and Pace Tips That Fit This Exact Trek
- Should You Book This 6-Day Machame Trek?
- FAQ
- How long is the Kilimanjaro trek on the Machame route?
- Where does the tour start and what meeting point is listed?
- What’s included in the price?
- Are alcoholic drinks included?
- Can you accommodate vegetarian diets?
- Will there be pickup and drop-off?
- Is tipping expected?
- Do I need special fitness for this trek?
- Is there free cancellation?
Key Highlights of the Machame Route Trek
- Coffee-and-banana farmland drive to the gate in the Moshi region, before you ever hit the trail
- Rainforest to heather slopes to Shira Plateau camps, with solid walking variety on day 1 and day 2
- Arrow Glacier up and Barranco down (a smart acclimatization pattern) before the big push
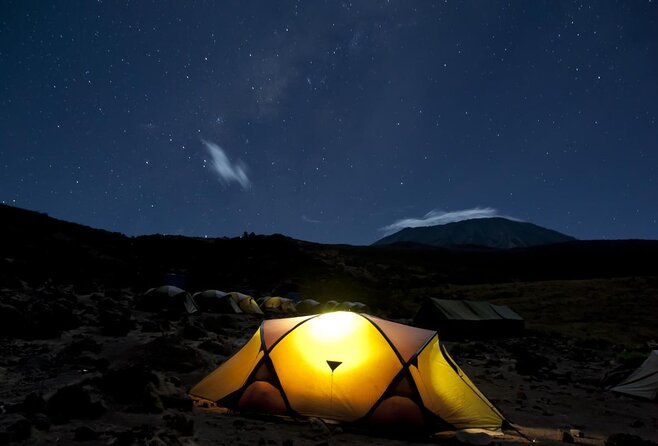
- South Circuit viewpoints with Kibo and Mawenzi visible from Barafu camp
- Stella Point at 5,685m/18,652ft for a sunrise moment when weather allows
- Guide support that adjusts to you, including pacing help and plant explanations mentioned in the feedback
Moshi to Kilimanjaro: Why the Machame Route Gets Chosen
Most people don’t pick Machame just because it’s famous. They pick it because it gives you a gradual on-ramp to altitude. The trek starts around Moshi and works its way upward through very different walking environments, so your body gets time to adapt while your mind gets a changing scenery reward.
On this route, day one begins with that familiar Kilimanjaro rhythm: a drive from Moshi to the gate, a quick look at local life along the way, and then a first night at Machame hut so you can sleep early. From there, the trek leans into the climb: you move out of the rain forest and spend day two transitioning through ascending paths, rocky ridges, and heather-covered sections before reaching the Shira area.
Then you get the classic Machame design: more climbing, some high points, and purposeful dips in elevation. That matters because altitude isn’t only about going higher. It’s about your pattern—how your body handles the stress and how often you give it a chance to reset.
You can also read our reviews of more tours and experiences in Moshi.
Price and Value: What $1,715 Covers (and What It Doesn’t)
At $1,715 per person, you’re paying for more than a walking itinerary. The value is strongest if you care about having the core logistics handled: guide + porter, 5 nights of accommodation, all fees and taxes, and lunch are included.
Two details help this feel practical, not just expensive on paper:
- You get both the guide and a porter, which takes weight off you and keeps navigation and timing in the team’s control.
- All fees and taxes are listed as included, so you’re less likely to get hit with surprise add-ons once the trek starts.
What’s not included is also clearly stated:
- Alcoholic drinks are extra (available to purchase).
- Tipping for the driver is not included.
Also, you’ll want to plan for what you carry. Gear needs vary by person, but the trek description makes it clear you should be ready for cold and wet conditions, and that you’ll benefit from items like gaiters and trekking poles for muddy stretches.
Day 1: Machame Hut and the First Big Night
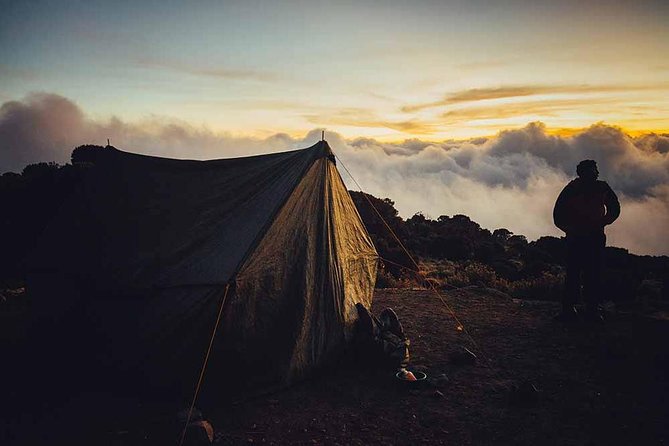
The trek proper starts after you’re driven from Moshi to the park gate. You’ll pass coffee and banana plantations, which is a nice real-world reminder that Kilimanjaro sits inside lived-in farmland—not just a remote nature poster.
Then it’s straight into the rhythm that works on Kilimanjaro:
- Walk toward the Machame area.
- Arrive, eat dinner, and sleep early so you can wake up with energy for day two.
Why this first day matters: you’re not just building legs. You’re setting your routine. If you treat night one as a real recovery block—sleep, eat well, hydrate—you’ll feel it later when the climb turns more demanding.
Day 2: Machame Kusini to Shira Campsite (Rain Forest to Heather)
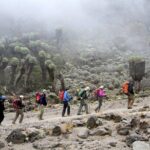
Day two is where the route shifts from lush to more rugged. After breakfast, you leave the rain forest. The trail becomes an ascending path with a few distinct moments:
- Cross a small valley.
- Walk along a steep rocky ridge.
- Look for heather-covered sections until the ridge ends.
- Turn west onto a river gorge.
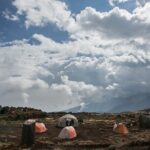
The walking time is long enough that you’ll want the break schedule to be taken seriously. The route description suggests you’ll arrive after about three to four hours to rest, eat dinner, and overnight at the Shira campsite.
What I like about this setup for most people: you get real climbing effort, but you’re also given a structured arrival point for recovery. It’s also a good day to practice how you’ll move uphill—steady steps, not rushed strides.
Day 3: Shira Plateau to Lava Tower and Down to Barranco Hut
This is an excellent day for acclimatization because it uses altitude in a smart way. You start from the Shira Plateau and continue east up a ridge, passing junctions that lead toward the Kibo area. Then the route turns south east toward a landmark called the Shark’s Tooth—the Lava Tower.
Shortly after, you reach the Arrow Glacier area. The description gives a clear altitude reference: Arrow Glacier around 4,876m/15,997ft. From there, instead of staying high all day, you continue down to Barranco Hut at 3,860m/12,664ft.
This up-then-down structure helps your body learn the new altitude without forcing you to stay at the highest stress levels longer than needed. The day ends with dinner and overnight at what’s listed as Millennium camp.
If you’re the type who worries about whether you’re doing enough: this is one of those days that feels like hard work but pays off later. You’re building acclimatization through rhythm, not by suffering nonstop.
Day 4: Barranco Wall, Karanga Valley Lunch, and Barafu Camp
Day four ramps up the challenge while rewarding you with wide-angle views. After breakfast, you leave the Barranco area and climb a steep ridge up the Barranco Wall.
Then you pass through the Karanga Valley. Lunch happens around 4,200m/13,779ft, which is high enough that timing and pacing matter. After lunch you reach a junction that connects with the Mweka Trail, then continue up to Barafu Hut.
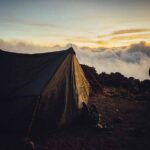
At Barafu camp, you’ve completed the South Circuit. This is where the scenery takes on a bigger role: the route description notes you can see Mawenzi and Kibo from this position. For many hikers, this is also the emotional turning point—because your summit day preparation becomes real.
You rest, eat dinner, and prepare for the final push. On Kilimanjaro, preparation isn’t just packing. It’s getting sleep, eating enough, and making peace with the fact that summit day starts early.
Day 5: Midnight to Stella Point for Sunrise, then Uhuru Peak
This is the day people remember most—and it’s the day you should respect the most.
You start very early, in the midnight to 2am window. The route climbs between the Rebmann and Ratzel glaciers and heads in a northwesterly direction. The ascent is described as moving through heavy scree toward Stella Point on the crater rim.
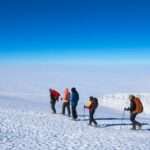
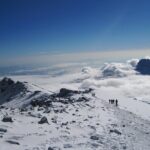
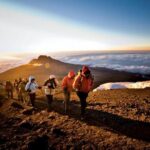
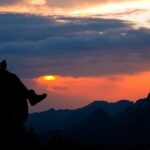
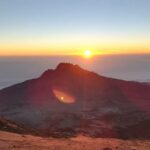
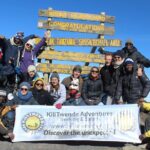
Stella Point is at 5,685m/18,652ft. You’ll stop briefly for rest and, if the weather cooperates, you get a sunrise that’s often the highlight of the entire trek. The description also notes you may encounter snow all the way on the final one-hour push to Uhuru Peak.
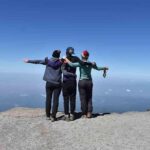
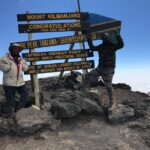
Uhuru Peak is the highest point on Kilimanjaro and on the continent of Africa. This stretch is repeatedly described as the most mentally and physically challenging portion of the trek, and that’s exactly why the guide and pacing matter so much.
One practical note: if you’re relying on motivation alone, you’ll burn out. Save your energy for controlled steps and steady breathing. Your team’s job is to help you find that pace.
Day 6: Mweka Gate Certificates, Mud, and the Final Descent
After breakfast, you descend down to the Mweka Park Gate to receive your summit certificates. This part can be slower than people expect because lower elevations often bring wet conditions.
The trek details call out that it can be wet and muddy at this stage. This is where gaiters and trekking poles are more than optional. They help you stay stable and avoid soaking your feet—plus they make long downhill stretches easier on your knees.
In terms of clothing, the description suggests shorts and t-shirts will probably work at lower elevations, but you should keep rain gear and warmer layers handy. Even if you feel hot on the descent, morning weather and mist can switch things fast at altitude.
After the gate, you continue about another hour to Mweka Village. A vehicle meets you there and drives you back to your hotel in Moshi or Arusha, or to the airport drop-off. And yes—this is the moment you celebrate, but also the moment to follow through on tipping for your guides and porters.
Guides, Porters, and Chef Daniel: The Human Part You Pay For
Kilimanjaro is tough, but it’s not only physical. It’s also communication, timing, and morale. The most praised side of this trekking style is how the team shows up day after day.
You’ll see names like Peter and Alex attached to feedback about clear communication and being on time. Guides are also described as motivating people to reach the summit and adjusting the pace to individual capabilities. That pacing detail matters because Kilimanjaro success often comes down to how quietly you manage your effort at altitude.
There are also mentions of guides like Habibu and Kijaji as professional, with good sleeping and good meals. Another guide, Adam, shows up in the feedback too, linked with a fun, encouraging presence. And at the operations end, Ibrahim is noted for communication before and during the experience, which helps reduce stress before you ever reach the first hut.
Then there’s the chef side. Chef Daniel gets credit for meals with surprising variety given mountain conditions. That isn’t just comfort—it’s fuel. When you’re climbing hard, a meal that’s satisfying and different from the same bland routine can be the difference between feeling flat and feeling ready for the next day.
Packing and Pace Tips That Fit This Exact Trek
Because the route operates in all weather conditions, your packing plan should assume rain and cold can happen. The trek notes recommend dressing appropriately and carrying the right layers for different conditions across days.
Here are the practical priorities based on what’s stated:
- Gaiters and trekking poles help a lot on muddy descent.
- Rain gear and warmer clothing should be kept handy, even if shorts and t-shirts will likely be fine at lower elevations.
- Plan for early mornings and a midnight summit start. That means your sleep and warm layers need to work fast.
- If you have dietary needs, you should advise the team at booking. A vegetarian option is available, if you request it.
For fitness, the description asks for moderate physical fitness. That doesn’t mean you need to be an athlete, but it does mean you should be comfortable with sustained walking, including steeper uphill sections like Barranco Wall and heavy scree near Stella Point.
Should You Book This 6-Day Machame Trek?
I’d book this if you want a route with a clear acclimatization pattern, you’re okay with the hard-but-structured summit night, and you value having the heavy logistics handled. The included package is a big part of the appeal—especially guide and porter support plus 5 nights accommodation and all fees and taxes.
You might want to reconsider if you strongly dislike early midnight starts or if you’re not confident you can handle wet, muddy footing on the final descent. Also take the weather reality seriously: this is an all-conditions climb, so your clothing strategy needs to be solid.
If you’re the kind of hiker who takes pacing seriously and wants a team that helps you get there, this Machame route is a strong match.
FAQ
How long is the Kilimanjaro trek on the Machame route?
The trek runs about 6 days, with 5 nights of accommodation.
Where does the tour start and what meeting point is listed?
The listed start point is Kilimanjaro Airport in Kilimanjaro National Park, Tanzania.
What’s included in the price?
Included items are 5 nights accommodation, all fees and taxes, lunch, a professional guide, porter support, hotel pickup and drop-off, and a private tour.
Are alcoholic drinks included?
No. Alcoholic drinks are not included and are available to purchase.
Can you accommodate vegetarian diets?
Yes. A vegetarian option is available if you advise the operator at the time of booking.
Will there be pickup and drop-off?
Yes. Hotel pickup and drop-off are included, and after the trek you’ll be driven back to your hotel in Moshi or Arusha or to the airport drop-off.
Is tipping expected?
Tipping for the driver is not included, and you are also advised not to forget to tip your guides and porters.
Do I need special fitness for this trek?
The trek description asks for travelers with a moderate physical fitness level.
Is there free cancellation?
Yes. Free cancellation is available up to 24 hours in advance for a full refund.