REVIEW · KATHMANDU
Gokyo Valley Trek
Book on Viator →Operated by Ace the Himalaya · Bookable on Viator
A quiet airport greeting in Kathmandu is the start of a big mountain story. This trek gives you Gokyo Ri views over the Ngozumpa Glacier and a front-row seat to the Khumbu peaks as you gain altitude step by step. I love how the route mixes classic Everest-trail rhythm with Sherpa village life, and I also love that you get at least one truly summit-style payoff at 5,483m without turning the whole trip into a technical climb.
What makes the Gokyo Valley part so special for you is the long stretch of high views once you reach Gokyo (4,790m), plus the chance to hike early to beat the clouds. Another big win is support: you’re trekking with a licensed English-speaking guide, and the porter plan is built around a 2-to-1 client-to-porter ratio. One consideration: the trek still asks for serious stamina, and the early, steep push to Gokyo Ri can feel tough if you’re not used to high altitude.
In This Review
- Key Things to Know Before You Go
- A View That Feels Like a Map: Gokyo Valley and the Ngozumpa Glacier
- Kathmandu Days 1–2: Temples, Stupas, and a Quick Reality Check
- From Kathmandu to Lukla to Phakding: Getting Your Legs Going
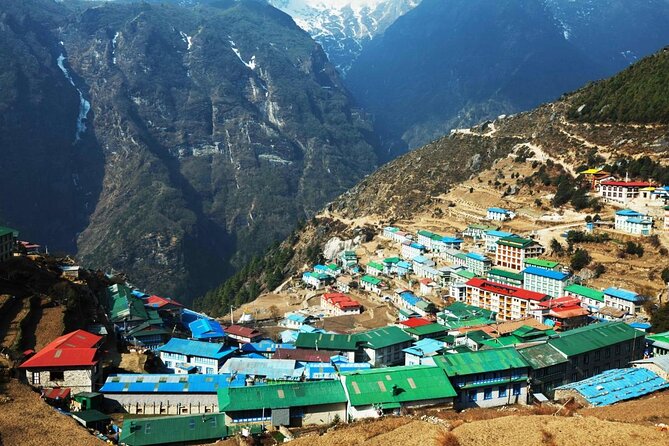
- Namche Bazaar Acclimatization: The Gateway Town You Can Actually Live In
- Phortse and Machhermo: Rhododendron Trails and Glacier-Edge Moments
- Arriving in Gokyo: Base Camp at 4,790m
- Gokyo Ri at 5,483m: The Early Climb That Earns Its Place
- Dole, Back to Namche, and the Return to Lukla
- Price and Logistics: What $1,514.67 Buys You (and What It Doesn’t)
- The Guide and Porter Difference: Real Support on Tough Days
- What You’ll Need to Pack (Since Not Everything Is Included)
- Who Should Do the Gokyo Valley Trek (and Who Should Rethink)
- Should You Book the Gokyo Valley Trek with Ace the Himalaya?
- FAQ
- How long is the Gokyo Valley Trek?
- Where does the trek start and end?
- How do you get to the trekking region?
- What’s included for trekking accommodations and guiding?
- What cold-weather gear is provided?
- Do I need a travel insurance policy?
- Is cancellation allowed if the weather is bad?
Key Things to Know Before You Go
- Lukla is the gateway: the trip is structured around Kathmandu to Lukla flying in and out.
- Gokyo Ri is the headline: a morning climb to 5,483m for panorama views of multiple 8,000m peaks.
- Ngozumpa Glacier dominates: you’ll see the largest glacier in Nepal’s Himalayas from multiple vantage points.
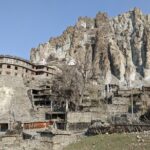
- Sherpa villages aren’t a side quest: you walk through places where monasteries and daily life sit close to the trail.
- Acclimatization is part of the design: you gain altitude slowly and build in a Namche rest day.
- Support is real: you travel with a guide plus porters, and you’re given key cold-weather gear for the trek.
A View That Feels Like a Map: Gokyo Valley and the Ngozumpa Glacier
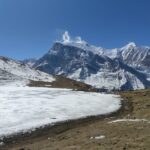
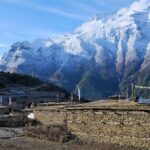
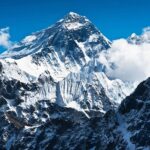
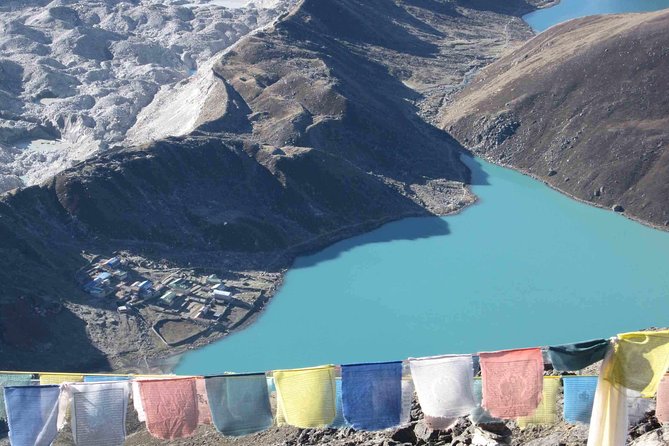
Gokyo Valley is one of those places where you realize Nepal’s big peaks aren’t just far away. From the time you reach the high basin, the mountains look close enough to point at with your hand, and the Ngozumpa Glacier feels like an entire world on its own. You’re also in striking sightlines to Everest-region icons—Cho Oyu, Everest, Lhotse, Makalu—especially once you’re up at Gokyo Ri above Gokyo Lake.
Here’s what I think you’ll like most: the views don’t stay locked behind a single viewpoint. Even before the big morning climb, you start noticing how the terrain changes—ridges, icy edges, and glacier mass—until the valley feels like it’s been built for photos and awe.
You can also read our reviews of more tours and experiences in Kathmandu.
Kathmandu Days 1–2: Temples, Stupas, and a Quick Reality Check
Before you go up, you go cultural. Day 1 is airport pickup and a transfer to your hotel, then you’ll have a pre-trek meeting either on Day 1 or Day 2. That meeting is practical: you meet the trek leader, you confirm details, and you bring what they ask for—your passport, three passport-size photos, and a readable copy of your travel insurance policy—so the trek can run smoothly once you’re in the air.
Day 2 focuses on three major stops in the Kathmandu Valley: Pashupatinath Temple, Boudhanath Stupa, and Bhaktapur Durbar Square. Pashupatinath is a major Shiva site on the Bagmati River, and even though you can’t go inside the temple, you can watch the activity from the riverbank. Boudhanath is one of the holiest Buddhist sites here, with pilgrims doing the prayer-wheel rounds. In Bhaktapur you get a packed dose of architecture: Nyatapola’s pagoda style, the famous Palace of 55 windows area, and several historic temple complexes.
If you want a smooth trek later, these two days help you get your bearings fast—culturally and logistically.
From Kathmandu to Lukla to Phakding: Getting Your Legs Going
The classic Everest-region trick is that the trek begins right after the flight. You fly from Kathmandu to Lukla (2,804m), then your guide briefs you and introduces your porters. After that, the day shifts into trekking mode with a descent toward the Dudh Kosi River, where you’ll join the main trail to Namche.
Phakding (near 2,550m) is a good first-night location because it keeps the walking “manageable” after the flight day. The walking style here is also a preview: you’ll cross several suspension bridges, many with prayer flags, and you’ll feel the trail thread through small settlements rather than isolated wilderness.
You don’t need to treat this day like a fitness test. Think of it as a warm-up so you can save energy for the higher days.
Namche Bazaar Acclimatization: The Gateway Town You Can Actually Live In
Namche Bazaar is your first big altitude checkpoint, and it’s more than a place to sleep. At this stage you’ll spend time adjusting to thinning air, and you’ll get a real rest-day format instead of just “walk more, suffer more.”
You’ll trek along the Dudh Kosi corridor and cross suspension bridges as the trail enters Sagarmatha National Park area. Then comes Namche—the biggest town on the Everest trail. The town is loaded with services that matter when you’re on a trek: lodges, restaurants, shops, money exchange, and internet cafes.
On the acclimatization day, you’ll do two practical add-ons: a visit to a museum focused on Sherpa culture and customs, and a hike up toward Syangboche Airport near the Everest View Hotel. From there, sunrise and sunset views over the Khumbu peaks are part of the deal. Even if you’re not a “sunrise person,” this hike helps your body adapt while you enjoy big-panoramic rewards.
Phortse and Machhermo: Rhododendron Trails and Glacier-Edge Moments
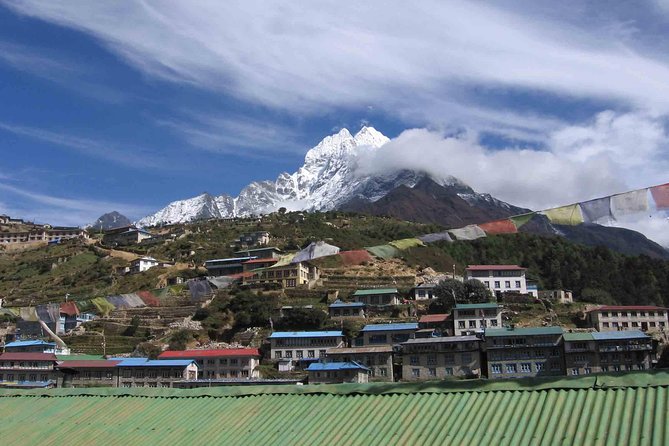
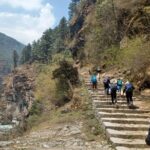
After Namche you climb out of the valley. The trail gains altitude through rhododendron forest, juniper, and larger conifers—so the air and shade feel different compared with lower elevations. You’ll also pass through places tied to seasonal settlement patterns as you go, including Yak Kharkas, which gives you a sense of how people use these landscapes.
Phortse is a key day because it transitions you toward the high glacier zone. Then the route continues toward Machhermo. This stretch includes a ridge walk with a strong valley view, plus moments where glacier terrain becomes the main character. When you reach the terminal moraine area near the Ngozumpa Glacier, you can feel you’ve moved from “Everest trail” into “Gokyo basin” territory.
This is also where the trek tone shifts from sightseeing to endurance. If you’re the kind of traveler who tends to go fast early, rein it in. You want steady effort, not a sprint.
Arriving in Gokyo: Base Camp at 4,790m
Once you reach Gokyo (4,790m), it becomes your base for two nights. That matters because it gives your body time to catch up with the altitude gain. It also changes your daily experience from “walk until the next place” to “walk because you choose to.”
Gokyo is built around Gokyo Lake and the surrounding high country, so even relaxed hours feel tied to views. You’ll have couple of sightseeing and hiking options from camp, which helps you avoid the usual problem where travelers cram all the fun into one day and then regret it when their legs get heavy.
This is also the phase where cold becomes real. Even with provided gear later, you’ll want to manage layers well and keep moving when your body starts to cool down.
Gokyo Ri at 5,483m: The Early Climb That Earns Its Place
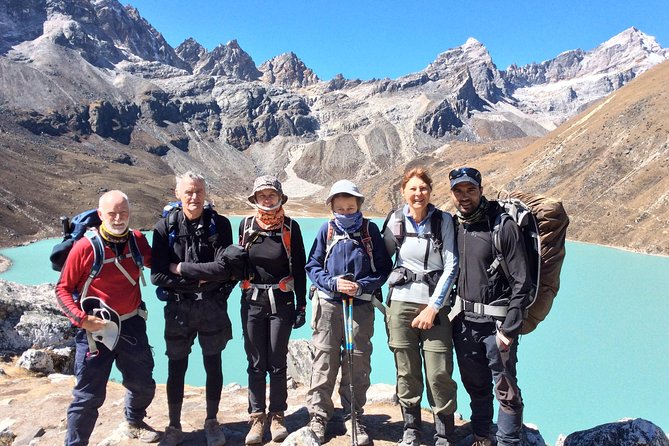
If you only care about one day, make it Gokyo Ri. You go early and you climb steeply to the viewpoint at 5,483m. This is not a leisurely walk. It’s a “put your head down, breathe, and go” kind of hike.
The payoff is exactly the kind of thing that makes the whole trek worth it: you’ll get panoramic views of the Khumbu region including Everest, Lhotse, Makalu, Cho Oyu, and Gyachung Kang, plus you’ll see the massive Ngozumpa Glacier below. The view also captures the dramatic ice ridge between Cho Oyu and Gyachung area—one of those details that makes the geography feel almost unreal.
Practical note: start early, move steadily, and expect you’ll be windier and colder near the top. The goal is to arrive, look around, and enjoy the view without trying to race the rest of your group.
Dole, Back to Namche, and the Return to Lukla
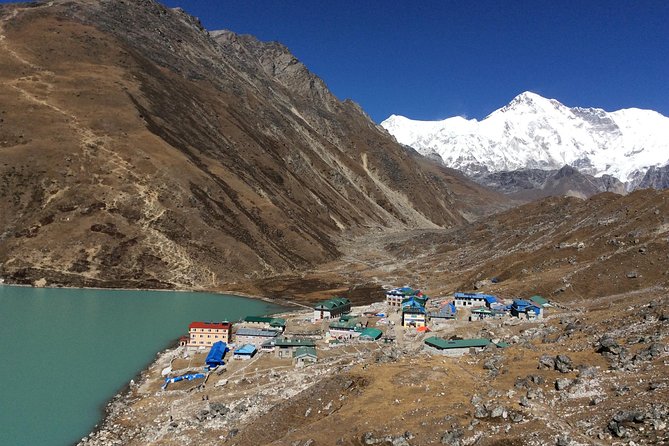
After Gokyo Ri, the trek turns into a descent-and-recovery rhythm. You head down toward Dole, walking a route that helps your body adjust while keeping views in play. Dole is the kind of stop that feels like a breather after the high day.
Then you work your way back through Sherpa villages to Namche Bazaar, leaving some of the mountains behind as you descend. Past the Khumjung area, it feels like the trail is becoming familiar again: you recognize the patterns of homes, paths, and the way the valley opens and tightens.
Finally you reach Lukla again. This closing day isn’t just logistics—it’s reflection time. You’ve earned that sense of having completed something hard, and the group dynamic usually gets stronger as you head back downhill.
Price and Logistics: What $1,514.67 Buys You (and What It Doesn’t)
At about $1,514.67 per person, the value is tied to what’s included rather than just the days on the calendar. You get Kathmandu hotel lodging (4 nights in a three-star property), 10 nights of guesthouse trekking accommodations, guided sightseeing in Kathmandu with entrance fees, and a licensed English-speaking guide. The trek also includes permits, plus a strong support setup with a porter for every two clients.
Then there’s the big ticket item people underestimate: Kathmandu–Lukla–Kathmandu airfare. Flights make the Everest region accessible, and they also change the experience from a long trek “to get there” into an actual high-altitude trek with a clear beginning and end.
On the plus side, they also provide important cold gear for the trek: a down jacket and sleeping bag (you return them at the end). You’re also given an Ace the Himalaya duffel/kit bag and a sun hat, which reduces what you have to carry and buy.
Not included is where you should pay attention: travel insurance that covers emergency high-altitude rescue and evacuation, your Nepal entry visa, international airfare, alcohol and drinks, and personal trekking equipment. Also plan for tips for trekking staff and drivers—tipping is expected.
If you want a clean budget, add: your personal clothing/layers, your visa cost, and an insurance plan that explicitly covers the altitude and evacuation you might need.
The Guide and Porter Difference: Real Support on Tough Days
This kind of trek lives or dies on how well your team manages pace, altitude, and daily details. The good news is the structure is there: a licensed English-speaking guide plus porters who carry your loads based on the 2 clients per porter ratio.
In reports tied to Ace the Himalaya’s Gokyo treks, names like Ngima, Ramesh Karki, Nimesh, Aamod Nepal, Bishnu, Milan, Santosh, and Prem show up as guides who helped keep groups feeling safe and on track. Even more important than name recognition is what those accounts signal: responsiveness and flexibility when the day needs it—like adjusting routes when conditions shift.
When I’m evaluating a trekking operator, I look for that mix: professional guide guidance plus porters who make the physical load realistic. With this setup, you can focus on walking and enjoying the mountain, not on carrying more than your body should handle.
What You’ll Need to Pack (Since Not Everything Is Included)
You’ll get some key gear, but you still need to show up prepared. You’re provided a down jacket and sleeping bag for the trek, so you don’t need to source those items yourself. You’ll also receive a duffel/kit bag and a sun hat.
But your trip still requires personal trekking equipment. Based on the nature of the terrain and the altitude, you’ll want the usual essentials: layers for cold mornings and windy ridgelines, rain protection, reliable boots/shoes, and a daypack for snacks, water, and your extra layers. If you run cold easily, plan for it—Gokyo days and especially Gokyo Ri mornings can bite.
Also plan your documents early. The pre-trek meeting requires passport and photos plus a readable insurance copy. Don’t treat this like paperwork you can do at the last minute.
Who Should Do the Gokyo Valley Trek (and Who Should Rethink)
This trek is listed for travelers with moderate physical fitness. That’s a fair match if you’re comfortable with multi-day hikes, long walking days, and altitude changes. You should especially be ready for the steep climb to Gokyo Ri and the fact that high altitude makes everything feel harder.
It’s also designed for small groups: a maximum of 15 travelers. That tends to mean less chaos at lodges, easier pacing, and more chances to connect with your guide and porter team.
If you want a trek that’s truly about mountain views, Sherpa villages, monasteries, and glacier geography—not just a long walk with a quick photo stop—Gokyo fits you.
Should You Book the Gokyo Valley Trek with Ace the Himalaya?
I’d book this trek if you want a classic high-altitude route with strong support and one unforgettable viewpoint day. The combo of Gokyo Ri, the Ngozumpa Glacier, and the slower acclimatization rhythm around Namche gives you a better shot at enjoying the experience instead of just surviving it.
I wouldn’t book it if you’re seeking an easy vacation hike or if you know you struggle with steep climbs and altitude. Also budget wisely: the trek includes a lot, but it still requires insurance, a visa, and personal gear you’ll have to bring.
If you’re ready to work for the views and you want an organized, Sherpa-focused trekking experience, this is a solid choice.
FAQ
How long is the Gokyo Valley Trek?
It’s listed as 15 days (approx.).
Where does the trek start and end?
It starts at Tribhuvan International Airport in Kathmandu and ends back at the same meeting point.
How do you get to the trekking region?
The trek includes Kathmandu–Lukla–Kathmandu airfare.
What’s included for trekking accommodations and guiding?
You get guesthouse accommodation for 10 nights on the trek, plus a licensed English-speaking trekking guide. You also have a porter for every two clients.
What cold-weather gear is provided?
The package includes a down jacket and sleeping bag for the trek (returned at the end).
Do I need a travel insurance policy?
Yes. Travel insurance is not included, and the pre-trek meeting asks for a readable copy of your travel insurance policy. The package also states that you should have insurance that covers emergency high-altitude rescue and evacuation.
Is cancellation allowed if the weather is bad?
The experience requires good weather. If it’s canceled due to poor weather, you’ll be offered a different date or a full refund. You can cancel for a full refund if you cancel at least 6 days before the start time.