REVIEW · KATHMANDU
Everest Three Pass Trek
Book on Viator →Operated by Base Camp Adventure Pvt. Ltd. · Bookable on Viator
Three passes, three big altitude tests.
What makes the Everest Three Pass Trek so compelling is how it ties serious high-mountain walking to classic Khumbu beats: Lukla’s arrival drama, Sherpa towns, and those wide, Himalayan views you remember for years. I especially love the way the route builds in acclimatization stops in Namche and Gokyo, so you’re not just climbing for the sake of climbing.
I also like that the trek is run with clear logistics: an English-speaking guide, porters to carry your luggage, and loaner cold-weather gear like a down jacket and sleeping bag. The one drawback to be honest about: this is not a casual hike. You’ll be walking steep, rough, and snow/ice terrain at high elevations, so you really need strong fitness and a calm, patient mindset.
In This Review
- Key Things I’d Watch Before You Go
- Why the Everest Three Pass Trek Feels Different in the Khumbu
- Lukla Flight: Where the Trip Really Starts (and It Starts Early)
- Dudh Koshi to Namche: Prayer Flags, Suspension Bridges, and Getting Your Legs Working
- What I’d be thinking about here
- Tengboche and Dingboche: Rhododendron, Prayer Wheels, and Everest Views at Higher Altitude
- A realistic consideration
- Chhukung Before Kongma La: Smart Pacing for a Hard Crossing
- Kongma La (5535m): Your First Snow-Covered Pass Day
- Gorakshep and Kala Patthar: Sunrise Views, Stony Trails, and Cold Reward
- What I’d advise you to plan for
- Cho La (5420m) to Gokyo Lakes: Ice-Covered Footing and a Different View System
- Renjo La (5360m) and the Run Toward the Home Stretch
- Price and Value: What You’re Really Paying for at $1,800
- Guides and the Small Details That Make or Break Pass Days
- What It Means for Your Body: Fitness, Altitude, and Mental Calm
- Should You Book This Everest Three Pass Trek?
- FAQ
- How long is the Everest Three Pass Trek?
- Where does the trek start, and what time does it begin?
- What permits are included?
- What trekking gear is provided?
- Are meals and lodging included?
- Is the trek private, and what fitness or weather do I need?
Key Things I’d Watch Before You Go
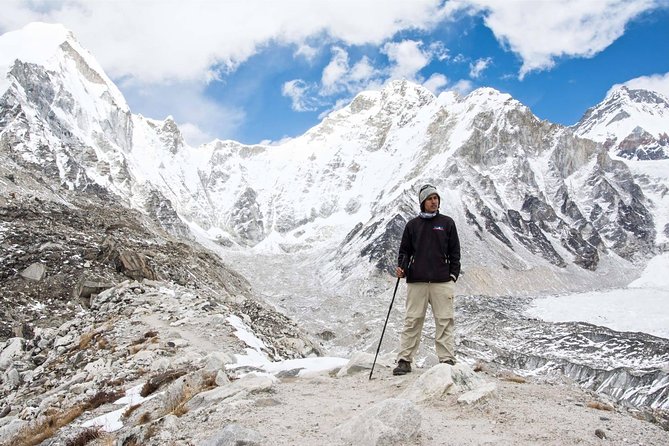
- Three major passes at 5,000m+: Kongma La (5535m), Cho La (5420m), and Renjo La (5360m)
- Acclimatization built in: rest/exploration in Namche and a rest day in Gokyo before you push higher
- Sunrise payoff options: Kala Patthar (5550m) for early light and sweeping views toward Everest
- Real conditions on Cho La: an ice-covered trail segment means careful footing matters
- Gear support included: a down jacket and sleeping bag are provided (and returned after the trek)
Why the Everest Three Pass Trek Feels Different in the Khumbu
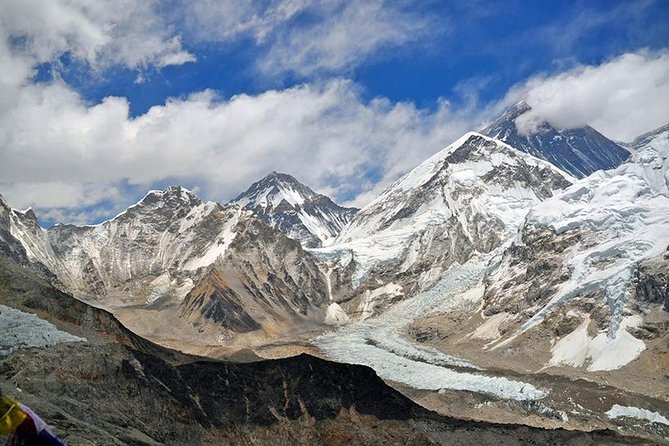
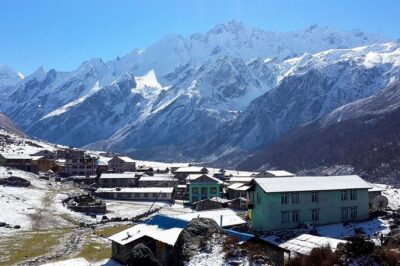
This trek is for people who want more than the standard Everest-region routine. The three passes are the headline, but the real magic is how the days connect different worlds: river valleys with suspension bridges and prayer flags, Sherpa villages with temple-and-market energy, and high, cold crossing days where your rhythm is everything.
You’re moving through the Mahalangur Himalaya region with repeated chances to see Everest and neighbors. And because the itinerary includes both sunrise-style viewpoints and multiple 5,000m passes, you get more than one “big moment.” The trek rewards consistency: getting up early, walking steadily, and handling altitude without rushing.
One more practical note: the trek is designed for experienced physical effort. The route is described as rough terrain to reach each pass, plus steep uphill sections and snow-filled paths. That means you don’t just need endurance; you need footwork and mental steadiness.
You can also read our reviews of more tours and experiences in Kathmandu.
Lukla Flight: Where the Trip Really Starts (and It Starts Early)
Day 1 is an early shot to Lukla. The flight itself is part of the attraction—flying above lush hills and snow-capped peaks before landing at Tenzing-Hillary Airport.
This matters for two reasons. First, it sets expectations. You’re not easing in with a relaxed travel day; you’re stepping into mountain timing right away. Second, the Lukla-to-region logistics are a huge part of what makes the Everest area feel remote. You’re immediately in a place where the days are planned around trail conditions and altitude.
If you’re the kind of person who wants to control everything, this might feel intense. But if you like a clean plan and a clear start, you’ll appreciate that the trek is structured around those flights and the days that follow.
Dudh Koshi to Namche: Prayer Flags, Suspension Bridges, and Getting Your Legs Working
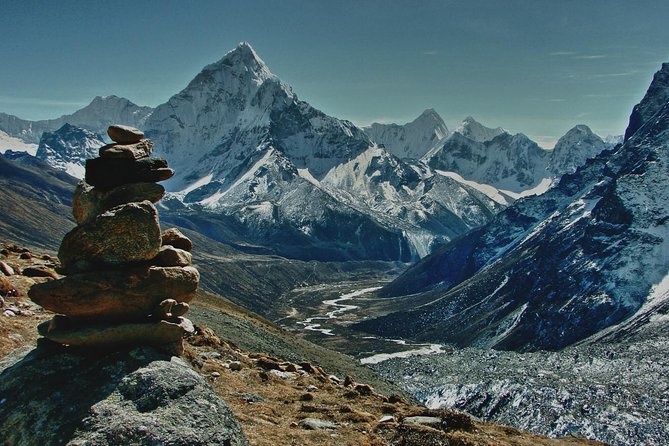
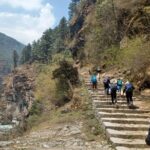
Day 2 moves along the Dudh Koshi River. The description highlights crossing the river multiple times on suspension bridges, decorated with prayer flags. It’s a great way to start because it’s active but not all-at-once brutal. You’re walking, gaining elevation gradually, and getting used to the rhythm of thin air.
Then you enter Sagarmatha National Park. That’s not just a permit checkbox; it’s a reminder that your trek is happening inside a protected region with official rules. The itinerary also includes National Park entry permit in the package.
Day 3 is your big acclimatization and Sherpa-town day in Namche. You’ll explore Namche, and the itinerary calls out a short uphill to Everest View Hotel for views of peaks like Nuptse (7861m) and Thamserku (the text cuts off, but those types of named peaks are exactly what you’re there to see). This kind of planned “look around” day is the difference between feeling managed and feeling wrecked.
What I’d be thinking about here
- You’re not trying to win miles. You’re teaching your body how to work at altitude.
- If you tend to overdo it when you feel good early, this is where you hold back.
Tengboche and Dingboche: Rhododendron, Prayer Wheels, and Everest Views at Higher Altitude
After Namche, Day 4 follows the Dudh Koshi upstream and includes water-driven prayer wheels near Phunke Tenga. Then you move above Imja Khola for a while and continue onward to Tengboche. There’s a brief stop at Tengboche in the plan, and this area is typically where the trek starts to feel more spiritual and less like a workout route.
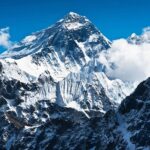
Day 5 ascends to Dingboche, with a strong emphasis on views. The itinerary calls out Ama Dablam (6856m), Lhotse (8414m), and Everest (8848m). You’ll also pass Pangboche village and walk through rhododendron forest. That mix matters: you get both the visual reward and a change in terrain that keeps your attention from turning into pure suffering.
A realistic consideration
Dingboche is high. Even when your legs feel fine, your breathing can feel different. The trek’s pacing (and the fact that it routes you toward Chhukung after Dingboche) is meant to reduce stress before the first pass day.
Chhukung Before Kongma La: Smart Pacing for a Hard Crossing
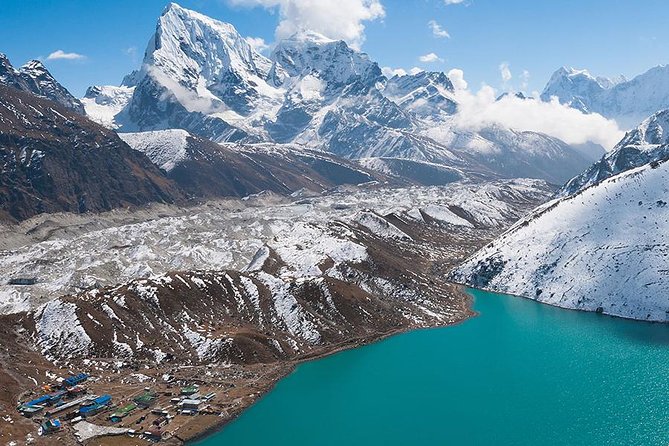
Day 6 is a strategic move. Instead of staying an extra day in Dingboche, you go to Chhukung to avoid a long walk while crossing Kongma La. The plan describes a short uphill day and mentions the trail running along the Imja Khola area (text is cut, but that’s the general direction the trek takes).
This is the kind of choice that makes a huge difference. If you’re tired from travel plus altitude, long pre-pass walking can turn the pass day into a grind. By positioning you in Chhukung, the trek reduces the odds that you’ll arrive at Kongma La depleted.
For you, this is practical value: less exhaustion before the highest of the three passes means you keep better control of pace and footing.
Kongma La (5535m): Your First Snow-Covered Pass Day
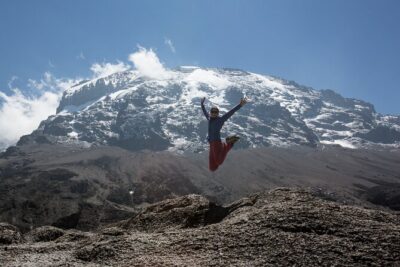
Day 7 is the first crossing: Kongma La (5535m), described as the highest of the three passes. You prepare after breakfast, then tackle steep uphill walking with difficulties.
This is where you want a steady approach: short steps, calm breathing, and a steady head. Pass days aren’t about speed. They’re about staying coordinated when the terrain gets rough and your body gets tired.
Even if you feel strong earlier, remember that the difficulty here is a combination: altitude + steep climbing + snow terrain. You’ll get glorious views on the other side, but the win is finishing the crossing with your energy still functional.
Gorakshep and Kala Patthar: Sunrise Views, Stony Trails, and Cold Reward
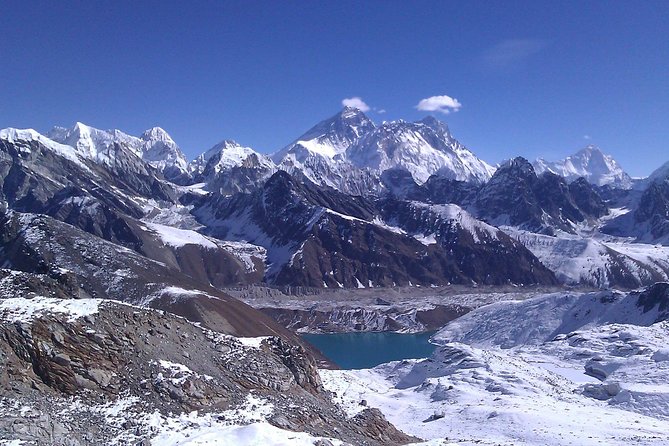
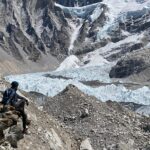
Day 8 walks to Gorakshep after breakfast. It’s described as stony tracks and a rewarding experience where you see snow-capped peaks and glaciers until reaching Gorakshep.
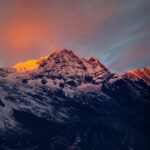
Then comes Day 9: early in the morning, hike Kala Patthar (5550m) for sunrise. This is one of those days where the effort feels worth it fast. The plan specifically highlights the first rays of sun caressing Mt. Everest and views of valleys.
What I’d advise you to plan for
- Start early even if you’re not a morning person. The whole value is tied to that early timing.
- Bring a sensible layer strategy. Even if you don’t know the exact temperature, you can count on cold at this altitude and elevation-exposed routes.
From a “value per hour” standpoint, sunrise days are often the best return on effort in Everest-region treks, and Kala Patthar is exactly that type of payoff.
Cho La (5420m) to Gokyo Lakes: Ice-Covered Footing and a Different View System
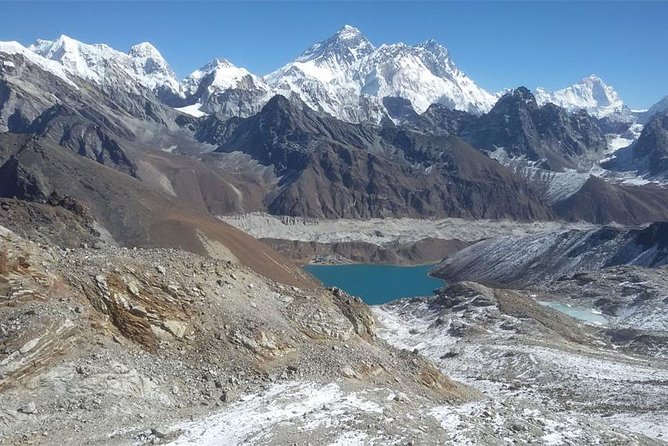
Day 10 is another tough one. You climb across Cho La (5420m) to reach Gokyo lakes. The itinerary calls out a steep uphill on an ice-covered trail to the top of Cho La.
That ice note matters. It means you should treat footing like the main job. One careful step at a time is how you protect your knees, ankles, and patience.
After the pass, you reach Gokyo lakes. This part of the region feels visually different from the Everest-side river valleys. It’s still mountain drama, but the lakes and the way the terrain opens up give you a fresh kind of perspective on the Khumbu.
Day 11 is a rest day in Gokyo. You hike up to Gokyo Ri (5360m) in the morning for views of the entire Gokyo valley and its many small lakes, plus wider mountain views. This is a smart recovery move: you get a viewpoint day, but it’s not another full pass scramble.
Renjo La (5360m) and the Run Toward the Home Stretch
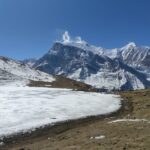
Day 12 begins early to cross Renjo La (5360m), the last of the three passes. The plan describes hiking gradually on a snow-filled path and finishing at the top with views toward the Cho La area and the bigger Khumbu picture.
After three pass days, your body may feel like it’s negotiating. This is where good pacing shows up. If you push too hard on a later pass day, you’ll pay for it on the descent and next trekking days.
Day 13 returns to Namche on a relatively easier trail. It’s not a “walk in the park,” but it’s a calmer day compared with the pass terrain. The itinerary notes distant Everest views, which is a nice reminder: you’re still in the center of the action even when the trail is easier.
Day 14 takes you from Namche to Lukla. You cross villages, forests, and rivers over suspension bridges, then reach Lukla for rest and a chance to explore the market. That market time is underrated. After long stretches of trail routine, it’s a chance to reset your senses without needing another big day hike.
Day 15 flies back to Kathmandu from Lukla early. You’ll see snow-capped mountains and lush green hills from the air. Then you land in Kathmandu and continue on with your trip.
Price and Value: What You’re Really Paying for at $1,800
The price is $1,800 per person for a trek lasting about 15 days. That number can look steep until you break down what’s included.
Here’s what your money covers:
- Logistics and manpower: a local government licensed English-speaking guide, plus the required staff and porters to carry luggage
- Permits: National Park entry permit and TIMS (Trekker’s Information Management System)
- Lodging and meals: best available guesthouses (mainly twin sharing), plus 14 breakfasts, 14 lunches, and 14 dinners
- Cold-weather gear support: a down jacket, sleeping bag, and duffel/kit bag (returned after the trek)
- Transportation: domestic airfare Kathmandu–Lukla–Kathmandu and airport tax, plus necessary land transport
- Safety basics: first aid medical kits, and insurance/equipment/transport for trekking staff are included as part of the staff overhead
What you don’t pay for:
- International airfare and departure tax
- Alcoholic and many personal extras like laundry and hot showers
- Personal trekking equipment
- Tips for trekking staff
So the value question becomes: are you getting a fully managed system rather than a DIY scramble? With porter support, official permits, domestic flights, and cold-weather gear included, this package is designed to remove a lot of planning stress. For a three-pass trek, that matters.
Also, it’s private, so your group doesn’t share the experience with random others. That often improves coordination, especially for pass days and early morning departures.
Guides and the Small Details That Make or Break Pass Days
Base Camp Adventure Pvt. Ltd. runs the trek, and the plan includes an English-speaking guide who’s government licensed. The experience is also described as private, meaning you’re dealing with one coordinated group and a clear plan.
The reviews tied to this type of service highlight real strengths: organization that feels smooth, guides who explain places clearly, and teams that handle the schedule well even in challenging conditions. I’d treat that as a sign to ask the operator a couple questions before you leave—like what your walking plan looks like on pass days and how they handle slowdowns.
Even the mention of starting early to avoid rain in late monsoon season gives you a useful takeaway: timing is a tool. When weather is unstable, leaving early can help you avoid the worst of it.
As for food, included meals often come down to staples like dal bhat, and the trek is planned with that rhythm in mind. You’re not hunting restaurants at 5,000 meters. You’re eating what works and moving on.
What It Means for Your Body: Fitness, Altitude, and Mental Calm
The itinerary is built around high passes: Kongma La (5535m), Cho La (5420m), and Renjo La (5360m). It also includes Kala Patthar (5550m) at sunrise and Gokyo Ri (5360m). That means you should expect:
- Thin air over multiple days
- Steep uphill segments, especially on the pass days
- Stony footing in places like the run to Gorakshep
- Snow-filled or ice-covered route segments, especially Cho La
Your best preparation is less about hero workouts and more about consistency. Build leg endurance. Train for long days. Practice controlled pacing.
Mentally, this trek rewards people who can stick to a plan even when conditions or weather shift. Pass days are high-stakes. If you rush, you’ll suffer. If you slow down, you’ll likely enjoy it more.
Should You Book This Everest Three Pass Trek?
Book it if:
- You want the three-pass challenge in one connected itinerary
- You like a structured plan with acclimatization stops in Namche and Gokyo
- You value support—guide, porters, permits, and included cold-weather gear—so you can focus on walking safely
Think twice (or talk to the operator first) if:
- You’re not ready for snow/ice and steep high-altitude terrain
- You’re easily stressed by early mornings and long climbing days
- You’re expecting a light, scenery-only hike
One more decision tip: this trek is often booked about 39 days in advance on average. For something this specific, I’d plan ahead rather than trying to grab a last-minute slot.
If you’re mentally and physically ready, this is the kind of trek where the hard days turn into the best stories—especially those sunrise hours on Kala Patthar and the long, slow work of crossing the passes.
FAQ
How long is the Everest Three Pass Trek?
It’s listed as about 15 days.
Where does the trek start, and what time does it begin?
The start point is Kathmandu, Nepal, at BASE CAMP ADVENTURE PVT. LTD., Tridevi Sadak. The start time is 6:15 am.
What permits are included?
The package includes a National Park entry permit and a TIMS permit (Trekker’s Information Management System).
What trekking gear is provided?
You’re provided a down jacket, a sleeping bag, and a duffel/kit bag. The sleeping bag, down jacket, and kit bag need to be returned after the trek.
Are meals and lodging included?
Yes. The trek includes meals for 14 days (breakfast, lunch, and dinner) and accommodation in best available guesthouses, mainly in twin sharing.
Is the trek private, and what fitness or weather do I need?
This is a private tour, meaning only your group participates. It also states travelers should have strong physical fitness, and the experience requires good weather; if canceled due to poor weather, you’ll be offered a different date or a full refund.