REVIEW · ARUSHA
8 Days Lemosho Route Kilimanjaro Trekking
Book on Viator →Operated by Mafie Adventures · Bookable on Viator
Kilimanjaro starts with quiet forests. The Lemosho Route is interesting because it strings together big habitat changes from rainforest to moorland and semi-desert before you ever reach ice-and-scree country. I love how the early days feel more spacious thanks to low crowds before the route joins others in the southern circuit.
What I like most, beyond the scenery, is the human side. The trip is run by Mafie Adventures, with Erastus handling the planning and communication and guides such as Oliver leading from the front, plus support from the wider team (including John, in the crew notes). One thing to consider: this experience is non-refundable and can’t be changed, so you’ll want solid travel dates before you pay.
In This Review
- Key Highlights You’ll Actually Feel on the Trail
- Lemosho’s Advantage: Big Variety, Better Crowd Timing
- Arusha to Londorossi Park Gate: Getting There Without Guesswork
- Day 1 Rainforest Hike to the First Camp: Warm-Up with Real “Wow”
- Day 2 into Shira Ridge and Shira 1: When Kibo Comes Into View
- Day 3 Shira 2 and Moir Hut: Lent Hills Acclimatization Pays Off
- Day 4 Lava Tower, Arrow Glacier, and the Barranco Hut Drop
- Day 5 Great Barranco Wall to Karanga Camp: Short Day, Big Confidence Boost
- Day 6 Barafu Hut: The Windy Ridge, and Why Water Stops Early
- Day 7 Summit Night to Uhuru Peak and Down to Mweka
- Day 8 Celebration at Mweka Gate: Certificates, Tips, and a Forest Finish
- The Team Behind the Trip: Why Local Leadership Matters
- Price and Value: What You’re Paying For at $2,700.52
- Packing and Gear: The Stuff That Keeps You Warm and Moving
- Who Should Choose This 8-Day Lemosho Trek
- Should You Book This Lemosho Route with Mafie Adventures?
- FAQ
- What city does the trek start from?
- Where does the trek end?
- What time does the trek start?
- How long is the Kilimanjaro trek?
- Is pickup included?
- What meals and camping support are included?
- Do I need to bring my own climbing gear and sleeping bag?
- How do the certificates work at the end?
Key Highlights You’ll Actually Feel on the Trail
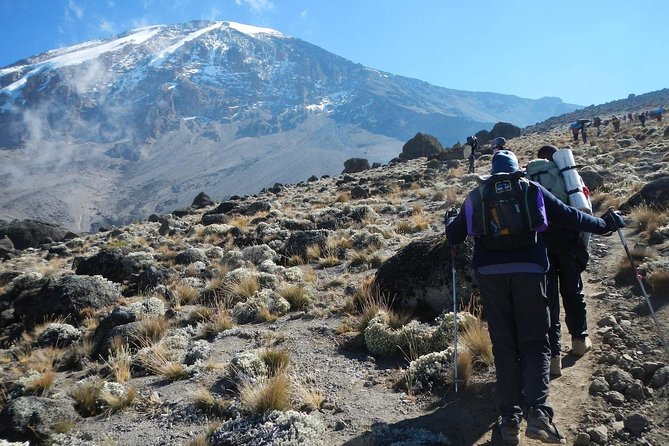
- Rainforest entry on Day 1: warm start, shaded hiking, then you begin rising into cooler zones
- Shira Plateau views: you get a Kibo reveal across the plateau and keep gaining perspective
- Lent Hills acclimatization day (Moir Hut area): a gentle approach that helps your body adjust
- Lava Tower and Arrow Glacier area: “Shark’s Tooth” and high-altitude geology on one route day
- Great Barranco Wall (Class 2 feel): short, steeper work with a view payoff
- Summit push rhythm: a late wake-up (around 23:30) to reach Stella Point for sunrise
Lemosho’s Advantage: Big Variety, Better Crowd Timing
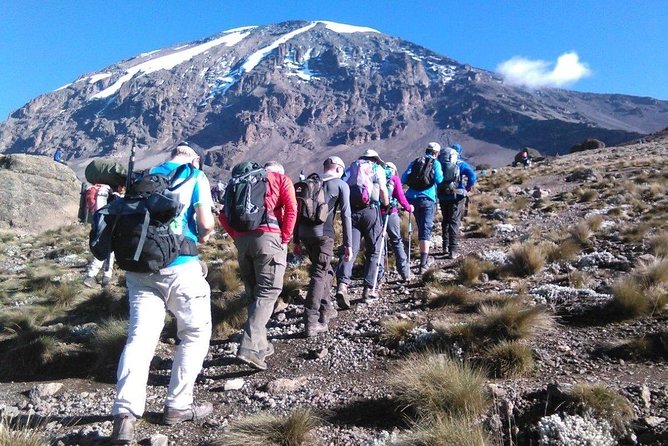
Lemosho is often chosen for a reason: it’s not one long straight grind. You start in the rain forest and then climb through different ecological zones that change the air, the footing, and the kind of effort you’re using. That matters when you’re on a multi-day trek—your pace can stay steadier because the trail “resets” your senses.
You’ll also benefit from timing. Lemosho is considered to have low crowds early, and the route only picks up once it combines with Machame. In real life, that can mean fewer people on your photos, quieter camps, and less jostling for space when you’re moving through scenic sections.
If you like your Kilimanjaro experience to feel like a journey—rather than a line from A to B—this route is a strong fit.
You can also read our reviews of more tours and experiences in Arusha.
Arusha to Londorossi Park Gate: Getting There Without Guesswork
Your day begins with breakfast at your hotel in Arusha, then you’re driving about two hours to Londorossi Park Gate (around 2100m). After you complete entry formalities near the gate area, there’s another drive—about an hour—to reach the Lemosho trailhead.
Two practical notes here:
- The drive is long enough that you’ll want to travel light in your vehicle essentials (you don’t want to be digging through bags all day).
- Doing formalities near the start keeps the first hiking day from feeling like paperwork after paperwork.
This trip also starts at 6:00 am and includes pickup, which helps if you’re staying in Arusha and don’t want to coordinate transport yourself.
Day 1 Rainforest Hike to the First Camp: Warm-Up with Real “Wow”
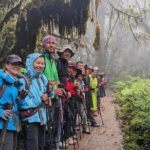
Day 1 is designed to ease you in. You’ll eat lunch after reaching the trailhead, then start hiking through undisturbed forest that winds toward your first camp site. The time on the trail is around 3–4 hours over about 6 km.
What I like about this start: you’re climbing, but not yet in the harsh, exposed zone that can rattle you mentally. Forest hiking also means less glare and less wind, so you can focus on rhythm—small steady steps and a controlled breathing pace.
If you tend to start fast, this is the day to resist it. Saving energy pays off later, especially before the summit night.
Day 2 into Shira Ridge and Shira 1: When Kibo Comes Into View
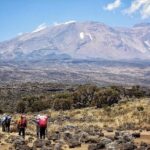
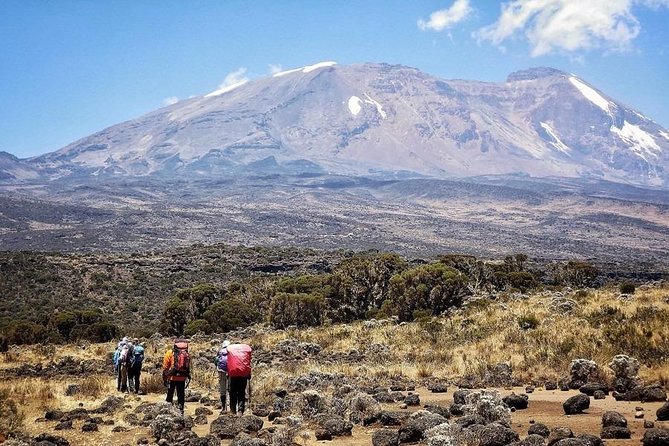
On Day 2 you head from forest into moorland. Distance is about 8 km and hiking time is roughly 5.5 hours. The trail rises through rolling hills and crosses streams, then you reach Shira Ridge before descending gently to Shira 1 camp.
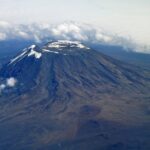
The highlight is the view of Kibo from across the plateau. That’s a big psychological marker: once you can visually connect the mountain you’re climbing with the trail you’re walking, your effort starts to feel more real.
Trail-wise, expect tall grasses, heather, and volcanic rock with lichen beards. That’s a classic Kilimanjaro texture—earthy, rugged, and different from the soft green of Day 1.
Day 3 Shira 2 and Moir Hut: Lent Hills Acclimatization Pays Off
Day 3 is a longer push (around 5–7 hours, about 15 km), moving through moorland and aiming for a camp area beneath the northern ice fields region. You’ll walk east toward Kibo’s glaciered peak across the plateau to Shira 2 camp, then continue toward Moir Hut near the base of the Lent Hills.
Here’s why this day is valuable: it gives you altitude work without jumping straight into the hardest climbing segments. From Moir Hut you have acclimatization opportunities around the Lent Hills, and Shira is described as one of the highest plateaus on earth—so you’ll feel the altitude, even when the pace is controlled.
If you’re trying to maximize summit chances, this kind of gradual adjustment is the backbone of smart climbing. It’s not glamorous, but it works.
Day 4 Lava Tower, Arrow Glacier, and the Barranco Hut Drop
Day 4 is about moving through high-altitude drama. You’ll hike around 7 hours over about 7 km in semi-desert terrain.
Starting from Moir Hut, you continue east up a ridge, pass a junction toward the Kibo peak direction, then shift south-east toward the feature called Lava Tower, often nicknamed the “Shark’s Tooth.” After Lava Tower you reach another junction that brings you up toward the Arrow Glacier area at around 16,000 ft. Then you descend to Barranco Hut at around 13,000 ft.
This day matters even though your final camp elevation ends up similar to where you started in the general arc. The reason is acclimatization: you’re stressing your body at high altitude and then lowering it again—one of the classic ways your body learns the mountain’s altitude rhythm.
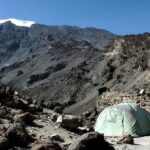
Expect stony footing and a more open, windswept feel as the forest cover disappears.
Day 5 Great Barranco Wall to Karanga Camp: Short Day, Big Confidence Boost
Day 5 is a shorter hiking day (about 4–5 hours, around 5 km) in alpine desert. After breakfast you work on one of Kilimanjaro’s famous obstacles: the Great Barranco Wall.
Even though it can look intimidating at the start, this is described as a Class 2 hike for most people—meaning it’s manageable, but still requires focus. At the top you’re rewarded with a view of Heim Glacier, often with the sense that you’re above the clouds.
After that, the trail winds up and down through the Karanga Valley to Karanga Camp at about 3950m. You’ll have dinner and washing at the site.
This day is one of those mental “hinge” moments. If you get over Barranco Wall, your confidence tends to rise fast—and that matters when the summit night arrives.
Day 6 Barafu Hut: The Windy Ridge, and Why Water Stops Early
Day 6 moves back into the steeper grind, though the hike length is still moderate: around 3–4 hours over about 4 km in alpine desert.
After breakfast you climb, intersecting with the Mweka Route (the route used to descend later). After about an hour you reach Barafu Hut (around 4550m). This is described as the last water stop for the porters because there’s no accessible water at Barafu Camp.
Also, Barafu Camp is rocky and exposed. It’s noted that tents can be subject to wind and rocks, so it’s smart to get familiar with the campsite setup before dark. Early dinner comes so you can rest, since the summit window starts late tonight.
Practical takeaway: treat hydration seriously on this day. And keep your warm layers ready early, not after you’re already shivering.
Day 7 Summit Night to Uhuru Peak and Down to Mweka
This is the hardest day—mostly because it tests patience. You’re woken around 23:30 for tea and biscuits, then you begin the summit attempt.
The route heads northwest and you ascend over stone scree. The description is clear that this part can feel the most mentally and physically challenging segment. After about 6 hours, you reach Stella Point at 5685m on the crater rim, enjoy sunrise, and then continue for roughly 2 more hours on a snow-covered trail to Uhuru (around 5895m).
Then comes the long descent. You hike down toward the Mweka route area—about 7–8 hours of descending. The route distance is roughly 7 km ascent and 23 km descent.
What to expect emotionally: summit day isn’t one single challenge. It’s a sequence—late-night cold, steady uphill effort, then a slow grind down with your legs under strain. If you pace well on the ascent and keep your focus on the next step, you’ll handle it better.
Day 8 Celebration at Mweka Gate: Certificates, Tips, and a Forest Finish
After a well-deserved breakfast, the staff holds a celebration with dancing and singing. This is also when you present tips to your guide, assistant guides, chef(s), and porters.
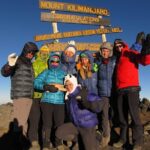
Then you descend back to Mweka Gate for about 3 hours. After that, the National Park requires you to sign your names to receive certificates. A key detail: reaching Stella Point (5685m) earns a green certificate, while reaching Uhuru Peak (5895m) earns a gold certificate.
Finally, there’s a descent into the Mweka village for about an hour. You’ll feel tired, but it’s the kind of tired that comes with relief—your mountain is behind you and the paperwork is done.
The Team Behind the Trip: Why Local Leadership Matters
This trek isn’t only about your feet. It’s about how well the team runs the mountain logistics and how people handle you when you’re tired.
From the trip’s organizer and crew notes, Erastus is responsive in communication and has been able to help make adjustments even at the last moment. On the mountain side, guides like Oliver are highlighted for friendliness and leadership, and the support team includes assistant guides such as John, plus chefs and porters who keep the whole setup moving.
What I like about a crew like this (in plain terms): you’ll be less stressed if someone is clearly steering the ship. When you’re dealing with altitude, food timing, and equipment checks, that confidence matters.
Also, this is a private tour/activity, so it’s only your group. If you value a calmer pace and less crowding inside your hike rhythm, private can be a real advantage.
Price and Value: What You’re Paying For at $2,700.52
The price is $2,700.52 per person for an 8-day Lemosho route. That can sound like a lot until you break down what’s included.
Included items cover:
- Camping equipment (mess tent, mattress, and cooking equipment)
- All accommodation during the trek
- Meals: breakfast (7), lunch (8), and dinner (7)
- Porterage and a professional driver/guide
- Parking fees, rescue fees, and all taxes/VAT
Big value point: porterage and food are not small line items. They’re the difference between a trip that feels heavy and one that feels like a guided effort.
What’s not included:
- Climbing gear (available for rent)
- Sleeping bag (available for rent)
- Bath towels
- Tips
- Personal items
- International flights plus accommodation before and after the trek
My advice on value: if you already own proper gear and can cover the gap items, your money goes mostly into the logistics and staff. If you don’t own gear, ask early about rentals and what sizes/qualities you can expect so you’re not improvising on summit night.
Packing and Gear: The Stuff That Keeps You Warm and Moving
Your tour includes camping equipment, but you still need personal gear. Since climbing gear and sleeping bags are listed as rental options, plan to confirm availability and what’s covered.
Here’s what you should take seriously for Kilimanjaro without inventing anything fancy:
- A headlamp (you’ll start early on summit day around 23:30)
- Warm layers for exposed nights and Barafu wind
- Gloves and a hat (stony, cold zones make your hands regret choices quickly)
- Sturdy boots with proven traction (stone scree and rocky sections are real)
- Any personal hygiene items you normally rely on, since bath towels aren’t included
Even if you’re renting some gear, you’ll still be responsible for your comfort items and how you manage cold after sundown.
Who Should Choose This 8-Day Lemosho Trek
This is a good match if you want:
- Variety: rainforest to plateau to alpine desert to summit terrain
- Better early-crowd timing (low crowds until the route joins others)
- A trek with built-in acclimatization days, including the Moir Hut/Lent Hills segment and the high-altitude swing toward Arrow Glacier before dropping to Barranco Hut
- A guided, organized experience with porter support and full meals
It may not be the best fit if you’re unsure about committing to fixed dates, because the booking is non-refundable and changes aren’t allowed.
Also, be honest with yourself about the physical demands. Summit night is late, long, and cold, with a steep mental load.
Should You Book This Lemosho Route with Mafie Adventures?
If you’re choosing Lemosho for the right reasons—variety, lower crowds early, and a clear acclimatization rhythm—this is a solid option. The included package is strong: camping setup, meals, porterage, rescue fees, and taxes handled for you.
I’d book if:
- You can lock in your travel dates and won’t need changes later
- You want a crew-led mountain experience, with responsive local organization like Erastus and on-trail guidance like Oliver
- You’re ready for the summit day schedule and the long descent afterward
I’d pause if:
- You’re still floating your dates or can’t afford a non-refundable commitment
- You don’t yet have a plan for required rentals like climbing gear and a sleeping bag
FAQ
What city does the trek start from?
The trek starts in Arusha, Tanzania.
Where does the trek end?
It ends back at the meeting point.
What time does the trek start?
The start time is 6:00 am.
How long is the Kilimanjaro trek?
The duration is about 8 days.
Is pickup included?
Pickup is offered.
What meals and camping support are included?
The package includes 7 breakfasts, 8 lunches, and 7 dinners, plus camping equipment (mess tent, mattress, and cooking equipment) and all accommodation during the trek.
Do I need to bring my own climbing gear and sleeping bag?
Climbing gear and a sleeping bag are not included, but they are listed as available for rent.
How do the certificates work at the end?
You sign your name to receive a completion certificate: reaching Stella Point (5685m) earns a green certificate, and reaching Uhuru Peak (5895m) earns a gold certificate.