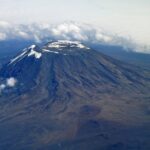
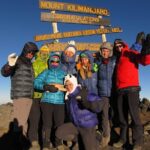
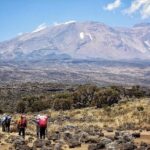
Eight days, one big altitude lesson. This private 8-day Kilimanjaro trek via the Lemosho route is built for acclimatization, moving you through different climatic zones before the high push. Starting from the western side (via the Londorossi gate), you get a long on-foot ramp-up to low oxygen, which helps explain why this route is known for a very high summit rate.
I especially like two parts of this program. First, the mountain team feels like the heart of the trip—people highlight leaders such as Gasto, along with team members like Joe and Jeff, and they talk about staying safe and focused. Second, the trip doesn’t starve you for comfort: waterproof four-season tents, mess tents with table and chairs, and large portions of fresh, healthy meals keep you fueled while you’re living outdoors.
One consideration: the final days are serious work. The midnight summit start is steep (non-technical, but tough), and Day 6 includes camping on an exposed ridge at Kosovo—so if you’re sensitive to cold or uneven terrain, you’ll want to prepare well. Also, tips and personal climbing gear aren’t included.
In This Review
- Key highlights worth your attention
- Entering Kilimanjaro via the Londorossi gate on Lemosho
- Day 1 on the trail to Mti Mkubwa (forest walking, then camp setup)
- Day 2 into the Shira ridge (rain forest fades, high plains begin)
- Day 3: Shira plateau exploration and the option to visit the Shira cone
- Day 4 acclimatization to Lava Tower and the road toward Barranco
- Day 5 conquering Barranco Valley and stepping into the arctic zone
- Day 6 to Kosovo Camp: slow pace, exposed ridge, summit prep
- Day 7 midnight summit to Stella Point and Uhuru Peak
- Day 8: Mweka Gate walk-out and the shower payoff
- Guides, safety, and why the team vibe shows up
- Camp comforts and meal planning: the included value that matters
- Price and logistics: what $2,480 buys you
- Who this trek suits—and who should pause
- Should you book this 8-Day Private Lemosho trek?
- FAQ
- FAQ
- What time does the trek start?
- How long is the trek?
- How much does it cost?
- Is this a private tour?
- What’s included in the price?
- What isn’t included?
Key highlights worth your attention
- Lemosho route pacing that builds acclimatization before the summit night
- Experienced mountain guides known for safety, motivation, and practical care
- Comfort basics included like waterproof four-season tents and mess setups
- Park and rescue fees covered, so you don’t have surprise costs mid-trek
- Guided summit night route to Stella Point, then onward to Uhuru Peak
Entering Kilimanjaro via the Londorossi gate on Lemosho
If you want Kilimanjaro to feel like a trek you can actually manage, route choice matters. Lemosho is popular because it’s a slower “step-by-step” approach rather than a quick hit. You enter Kilimanjaro National Park through the Londorossi gate on the western side, then start walking through montane forest.
You’re not just hiking for views right away. Early days are about breathing time and learning your rhythm. That matters because the mountain doesn’t care how tough you are if you rush the altitude. The Lemosho schedule gives you several days to move upward gradually and let your body adjust, which is exactly what helps when you reach colder, thinner-air camps later.
You’ll also like that this is a private experience for your group. That typically means the pace and logistics are more tailored than on bigger group treks, and it makes the summit night feel more like teamwork than chaos.
You can also read our reviews of more tours and experiences in Arusha.
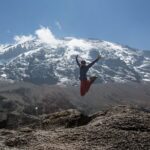
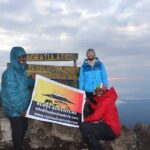
Day 1 on the trail to Mti Mkubwa (forest walking, then camp setup)
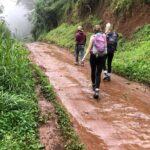
Day 1 starts after a restful night at your hotel, then the trek begins with check-in at Londorossi gate. From there, you hike a gentle ascend through the montane forest for about 3–4 hours on the first stretch.
Key details you’ll feel immediately:
- Altitude rises to around 7,742 ft / 2,360 m
- It’s long enough to get your legs working, but not a “break yourself” day
- Your campsite is at Mti Mkubwa, which means Big Tree in Swahili
What I like here is the camp transition. You arrive, tents are set up under the Climb Kili banner with personal belongings inside, and you get a real base to start thinking about the next day instead of scrambling around in the dark.
Potential drawback? Day 1 is calmer than later days, but forest walking can still mean damp footing and steady effort. You’re building habits: slow steps, steady breathing, and drinking enough water even when you don’t feel “thirsty yet.”
Day 2 into the Shira ridge (rain forest fades, high plains begin)
Day 2 is when the scenery shifts hard. The trail leads out of the forest and into a savannah of tall grasses, heather, and volcanic rock with lichen “beards.” In the afternoon, you follow the Shira ridge—a high-altitude desert plateau where Mt Kilimanjaro starts showing on the horizon.
This day is listed at about 11,500 ft / 3,505 m, with roughly 5–6 hours hiking (about 8 km / 4.9 miles). You’re looking at tall, open terrain compared with Day 1, and that changes the feel of the climb:
- More wind exposure
- Different footing underfoot
- Less cover from sun and cold
Still, it’s a smart move. The plateau views are part reward, part training: you’re learning how the air feels when you can’t hide from the elements. Expect a big sense of contrast—forest behind you, high plains ahead.
Day 3: Shira plateau exploration and the option to visit the Shira cone
Day 3 turns into a more “choose-your-path” exploration day on the Shira plateau. You trek east toward Kibo’s glaciated peak and have the option to visit the ancient collapsed Shira cone, described as the oldest of Kilimanjaro’s three volcanoes.
You’ll spend around 5–7 hours trekking on this day. The altitude listed reaches 13,800 ft / 4,206 m (about 14 km / 8.7 miles). You end at Moir Camp, in a huge gorge at the end of a dormant lava flow.
This is where the Lemosho route earns its keep. Instead of only “moving upward,” you’re getting time at altitude to let your body settle. You’re also building understanding of what’s coming—glaciated views, cold air changes, and the feeling that the mountain is bigger than the trail.
A practical note: days like this can be mentally tiring even if your legs feel okay. There’s a difference between “resting” and “not thinking about climbing.” Use breaks to sip water, eat small snacks, and keep warm.
Day 4 acclimatization to Lava Tower and the road toward Barranco
Day 4 is an acclimatization day that still feels like real hiking. You take a trek toward Lava Tower at about 15,000 ft / 4,500 m, shortly after which you reach a second junction that brings you up toward the Arrow Glacier area.
The day is set for about 4–6 hours, with an altitude around 13,000 ft / 3,962 m. After resting near the tower, you descend through Senecio forest and eventually finish at Barranco Camp (with waterfall scenery before camp).
Why I think this day is valuable: it’s altitude training with a payoff. You’re not “just going higher.” You’re going high enough to challenge acclimatization and then coming down toward a camp you can handle.
Barranco Camp sits in the shadow of the massive Barranco wall, and the breeze can carry clouds from the Barranco Valley. That can mean dramatic weather swings—warm at one moment, cold and damp the next. Pack layers and treat “weather change” like a normal part of the schedule.
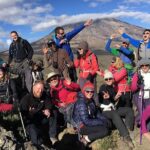
Day 5 conquering Barranco Valley and stepping into the arctic zone
On Day 5, you take on the classic Barranco transition. The itinerary has you conquering the Barranco Valley, then going up the Barranco wall. After that, you head along the South Circuit path through Karanga Valley and camp at Karanga Camp.
This day is about 4–5 hours and listed around 13,100 ft / 3,992 m (around 3.2 km / 2.2 miles—so it’s shorter, but not necessarily easier). The key idea is that the terrain becomes more demanding as you head toward colder zones.
Then comes the note that matters: you’re moving into the “arctic zone of Kili.” That phrase isn’t there for drama—it’s a heads-up that the temperatures can drop sharply, even when you’re moving. Cold affects energy use. It can also affect how well you sleep. If you get cold easily, this is the day to manage that early, not after you’re already shivering.
Day 6 to Kosovo Camp: slow pace, exposed ridge, summit prep
Day 6 is the bridge between “walking days” and summit logistics. The trek is described as a slow pace to Kosovo Camp (about 16,000 ft / 4,876 m), with roughly 5–6 hours total hiking time listed.
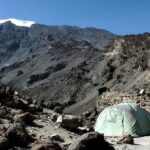
You pass Barafu Camp and get excellent views of Kibo and Mawenzi peaks. Kosovo Camp is positioned on an exposed ridge, so the day has an important practical message: you need to be comfortable with terrain before dark.
This is also the day for preparation. The itinerary notes acclimatization, rest, relaxation, and making necessary summit-day preparations. In plain terms, this is where you should double-check:
- That you’re set for cold night air
- That your summit-day layers are ready
- That your gear is organized for quick access
A slow day doesn’t mean a free day. You’re still working at altitude. Keep your effort smooth, eat when you can, and sleep as best you can.
Day 7 midnight summit to Stella Point and Uhuru Peak
This is the day that defines Kilimanjaro: midnight start, steep climbing, and a sunrise summit experience. The itinerary describes Day 7 as one of the steepest sections on the non-technical paths.
You’ll hike about 6–7 hours to Stella Point for sunrise. It’s listed at around 19,340 ft / 5,895 m, with about 13 miles / 21 km total (noting roughly 5 km ascent and 12 km descent). The route goes between the Rebmann and Ratzel glaciers and then heads northwesterly, ascending heavy scree toward Stella Point on the crater rim.
Here’s what to expect in real human terms:
- Scree is slow. It drains focus and takes constant balance.
- Cold plus altitude can make you feel slower than you are.
- Mentally, it’s the toughest portion—everything is about pacing and staying calm.
From Stella Point, the summit view is near. The itinerary notes that Uhuru Peak is about 1 hour away. After reaching the top, you descend down to Mweka Camp for dinner and celebration.
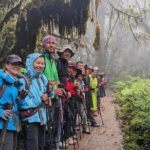
If you’re wondering how this works in group life: the reviews emphasize guides who keep people safe and moving—people mention being pushed to the summit by experienced leaders and hearing motivating songs. That kind of steady encouragement matters on a night where your body is negotiating every step.
Day 8: Mweka Gate walk-out and the shower payoff
Day 8 starts with a walk to Mweka gate for the end of the trekking portion, then a vehicle transfer back to your hotel. The itinerary lists the final hike as about 3–4 hours, around 5,400 ft / 1,645 m, with roughly 10.3 km / 6.4 miles.
This day is mostly emotional closure: less strain, more reflection. Your body is tired, but you’re in the final stretch of the whole altitude arc. When the Climb Kili vehicle arrives, you get that welcomed transfer moment—and a shower at your hotel is part of the payoff.
Practical tip for Day 8: keep your energy up with proper eating and hydration. You’ll feel “done,” but your system still needs fuel and water to recover.
Guides, safety, and why the team vibe shows up
This trip’s reputation is strongly tied to the people running it. Names that show up in the experience stories include Gasto (and teams that also included Joe and Jeff). People also mention Rosemary handling administrative work, which can reduce stress before you ever start walking.
From what you can infer from those patterns, this company runs a tight operation:
- Guides focus on safety and keeping the pace manageable
- They motivate without losing control
- They’re organized about logistics so you don’t waste energy on confusion
There’s also a clear theme about the emotional side of the climb. Some of the strongest praise is about guides being positive, professional, and attentive—plus the specific mention of motivating songs. That might sound like “extra,” but on Kilimanjaro it can help you keep a steady rhythm when your brain wants to quit.
Camp comforts and meal planning: the included value that matters
A lot of treks advertise “meals included,” but Kilimanjaro is about how meals support performance. Here, meals are included while on the mountain, and the trip includes:
- All meals on the mountain
- Large portions of fresh, healthy nutritious food
- Quality mess tents with table and chairs
You also get quality, waterproof, four-season private mountain sleeping tents. That’s not a luxury detail. When you’re high and cold, sleeping setup affects recovery. Better shelter helps you sleep, which affects the next day’s energy and your readiness for summit night.
One more value piece: the package includes all park fees and rescue fees. Those costs add up on Kilimanjaro, and knowing they’re covered lowers decision stress.
What’s not included is also important: tips and person gear for climbing (personal gear). If you show up without the right clothing and cold-weather layers, you’ll feel that pain more than you would on a typical hike.
Price and logistics: what $2,480 buys you
At $2,480 per person for an 8-day private trek, this isn’t a budget deal. But you are paying for the parts that reduce risk and friction:
- Professional, experienced mountain guides
- Private camping with waterproof four-season tents
- Food support every day on the mountain
- Park and rescue fees
- Airport transfers
You’re also buying a structured day-by-day climb that repeatedly uses acclimatization and camp transitions. That’s not just “nice planning”—it’s the difference between feeling like you can keep going versus feeling like you’re always behind.
Could the price be lower? Sure. But if your goal is to maximize safety and minimize chaos, those included elements often justify the cost. For me, the best value angle here is what it removes: surprise fees, unclear admin, and the feeling that you need to manage too much alone.
Who this trek suits—and who should pause
This trek is described as suitable for both beginner and advanced climbers. The key is that “beginner-friendly” on Kilimanjaro usually means you’re capable of consistent hiking, patience, and following guide instructions—especially on the higher days.
You’ll do best if you have moderate physical fitness and you’re willing to follow a slow pace. The itinerary itself repeatedly reinforces slow and steady, especially on Day 6 and summit night.
Who might rethink it:
- If you can’t handle cold nights and windy ridges
- If you’re not comfortable with steep walking on heavy scree
- If you don’t have (or can’t get) proper personal climbing gear
And a quiet but real consideration: summit day is long and mentally hard. Even with a strong guide team, it’s still a demanding night climb.
Should you book this 8-Day Private Lemosho trek?
Yes, if your priority is a route that gives your body time to adapt, plus a guide team that stays on top of safety and motivation. The combination of Lemosho pacing, private trekking setup, and included mountain logistics (tents, meals, mess setup, park and rescue fees) is the “why” behind the high recommendation rate.
I’d pass only if you’re likely to struggle with cold exposure, steep terrain, or you’re missing key personal climbing gear. In that case, you’d be better off fixing preparation first or choosing a different style of mountain challenge.
FAQ
FAQ
What time does the trek start?
The start time is listed as 7:30 am.
How long is the trek?
It’s an 8-day trek (approximately 8 days).
How much does it cost?
The price is $2,480.00 per person.
Is this a private tour?
Yes. It’s described as a private tour/activity, so only your group participates.
What’s included in the price?
Included items are mountain sleeping tents, professional guides, all park fees and rescue fees, all meals while on the mountain, mess tents with table and chairs, and airport transfers.
What isn’t included?
Not included are tips, the Tanzania visa, and personal gear for climbing.