REVIEW · ARUSHA
7 Days Kilimanjaro Trekking Machame Route with Professional Guide
Book on Viator →Operated by Africa Joy Tours - Day Tours / Mult Day Tours · Bookable on Viator
Kilimanjaro feels close on the Machame route. This 7-day trek (known as the Whiskey route) strings together rainforest climbing, Shira Plateau views, the Southern Icefields area, and a sunrise summit attempt with a real plan for acclimatization. What I like most is the pacing support from a professional team, and the way the itinerary builds altitude time without turning every day into a suffer-fest.
You’ll also get a structured start in Arusha: airport pickup, a pre-climb briefing and equipment check, and confirmation of your medical coverage. Then you’re on the trail with camps that feel part of a system—Machame Camp, Shira Hut area, Barranco Camp, Karanga Camp, Barafu Hut, and finally Millennium Camp after the summit push.
One consideration: summit night is long and early. You start the final climb about 1 a.m., and Day 7 can mean 11–15 hours of walking depending on how you feel—so your comfort with steep, slow uphill matters.
In This Review
- Key things that make this Machame trek worth your attention
- Why Machame works (and why “7 days on the mountain” matters)
- Arusha warm-up: lodge nights, briefing, and getting ready right
- Day 2: Machame Gate to Machame Camp (rainforest climbing)
- Day 3: Shira Plateau approach and big Mt. Meru views
- Day 4: Lava Tower lunch and Barranco Camp with cliff shelter
- Day 5: Barranco Wall to Karanga Camp and Southern Icefields nearby
- Day 6: Barafu Hut, a short acclimatization hike, then real rest
- Day 7: 1 a.m. start to Stella Point sunrise, then optional Uhuru Peak
- Day 8: Mweka Gate descent through tropical forest and farms
- Day 9: Say goodbye, then head to JRO (or add a short safari)
- Price and value: what you’re really paying for at $2,400
- The guide team: what support actually looks like on Kilimanjaro
- Who should book this Machame trek
- Quick things to think about before you go
- Should you book it?
- FAQ
- Where does the trek start on this Machame route?
- How many days are spent on the mountain?
- What is the total trip duration?
- When is the pre-climb briefing and equipment check?
- What time does the summit attempt start?
- What camps are included during the trek?
- Is oxygen and first aid included?
- Are meals included in the price?
- What transportation is included in Arusha?
- What is not included?
Key things that make this Machame trek worth your attention
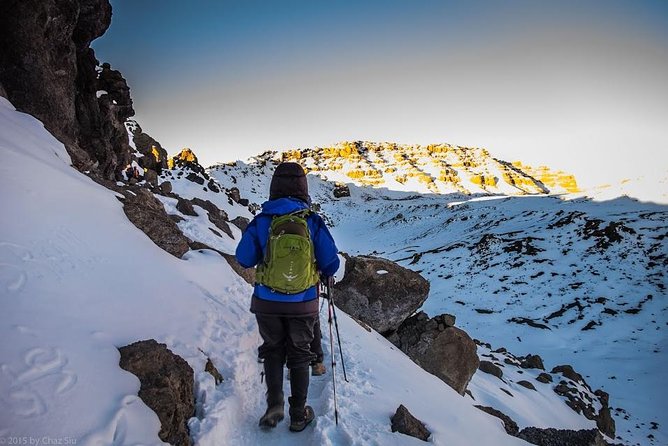
- Whiskey-style Machame routing: rainforest to Shira, then across the mountain toward the Southern Icefields approach
- Built-in acclimatization logic: extra time on the mountain helps reduce the pressure of trying to “rush altitude”
- Stella Point sunrise plan: climb to 18,800 ft at sunrise, then optional crater rim time to Uhuru Peak
- Safety basics included: oxygen, rescue fees, first aid, and a professional guide team
- Full-circle logistics: airport transfers, Arusha lodge start/end, and trekking days with meals, tents, and gear handled
- Guides who match your effort: strong emphasis on pace adjustment—this is often what makes the difference at altitude
Why Machame works (and why “7 days on the mountain” matters)
The Machame route is popular for a reason: it doesn’t just jump upward. You start at Machame Gate in the southern base and climb through lush rainforest, then gradually step into higher ecological zones—moorland with giant heather, rocky ridges, scree slopes, and the lunar-feeling crater rim area. The trail keeps changing, and that matters because your body also has to change with it.
This specific “7 Days” plan is designed to give you more time at altitude than a faster schedule. That’s not a small detail. When you climb Kilimanjaro, you’re not racing stairs—you’re managing how your body responds to thin air. The itinerary’s extra acclimatization day is there to make each following day feel harder in a more “workable” way, not harder in a panic way.
Then there’s the payoff. You’re not only chasing a top line on a map. You move through Barranco’s steep iconic wall, pass the approach areas with Southern Icefields views, and set up your summit night around sunrise at Stella Point. If you want a trek that feels like a full mountain experience—not a quick dash—Machame is built for you.
You can also read our reviews of more tours and experiences in Arusha.
Arusha warm-up: lodge nights, briefing, and getting ready right
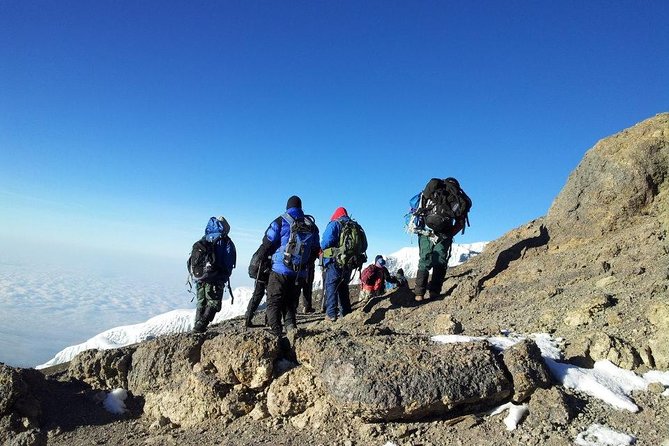
Day 1 is about reducing unknowns. You arrive at Kilimanjaro International Airport (JRO), then you’re picked up for a private transfer to Arusha Safari Lodge. In the evening, you gather for a pre-climb briefing and an equipment check.
This part is quietly important: you’ll confirm you have the appropriate mandatory medical coverage and travel insurance before you go higher. That’s the kind of admin step that can save you stress later, especially when you’re dealing with high-altitude risks.
You’ll also have dinner served at 6:30 pm, then overnight at the lodge. If you arrive early, you’ll have some breathing room in Arusha before the climb starts. You don’t want to spend Day 1 scrambling for gear or figuring out how the team runs the trek.
Day 2: Machame Gate to Machame Camp (rainforest climbing)
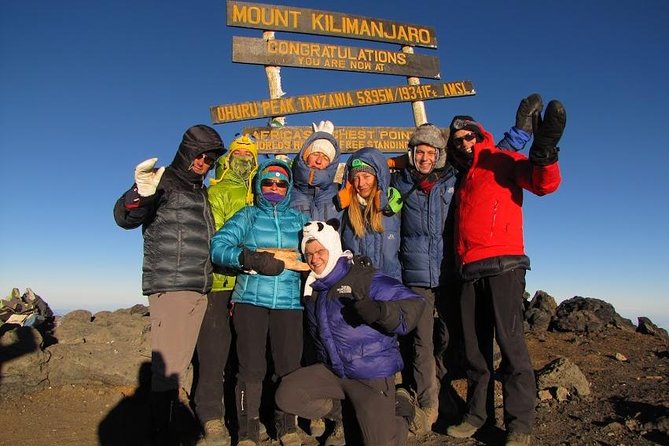
After registration at Machame National Park gate, the trek begins through lush forest. The first day is your “get your legs moving” phase—about 5–6 hours of walking. You’ll also have a picnic lunch along the way.
You reach Machame Camp at around 9,800 ft. This is a smart first step: it’s not trivial, but it’s not the kind of altitude shock that leaves you totally spent before the climb truly starts. In the rainforest, conditions can be damp and slippery, so trekking poles and careful footwork help a lot. The forest also tends to make the climb feel less exposed while you’re still finding your pace.
What I love about Day 2 here is that the schedule feels human. You’re not just trying to “make meters.” You’re learning how your body works at your starting altitude.
Day 3: Shira Plateau approach and big Mt. Meru views
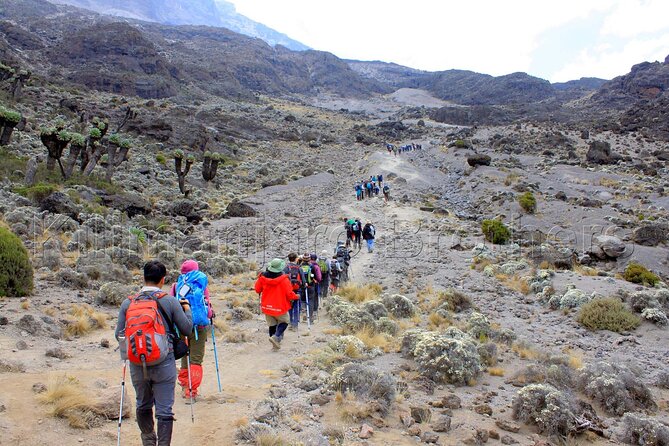
Day 3 steps you out of the forest and into moorland with giant heather. You get steady climbing, rocky hills, and wider views toward the Shira Plateau, around 11,000 ft.
By late in the day, you camp near Shira Hut at about 12,600 ft. The walk is roughly 4–5 hours, and the visual payoff is real: Mt. Meru can appear among the clouds from camp. That kind of view is the Kilimanjaro reward for keeping your effort steady instead of charging.
The tradeoff is weather sensitivity. At these altitudes and open ridgelines, cloud cover can roll in. If you want those clear views, you’ll appreciate a guide who watches the sky and keeps the pace consistent so you’re not arriving cooked or frustrated.
Day 4: Lava Tower lunch and Barranco Camp with cliff shelter
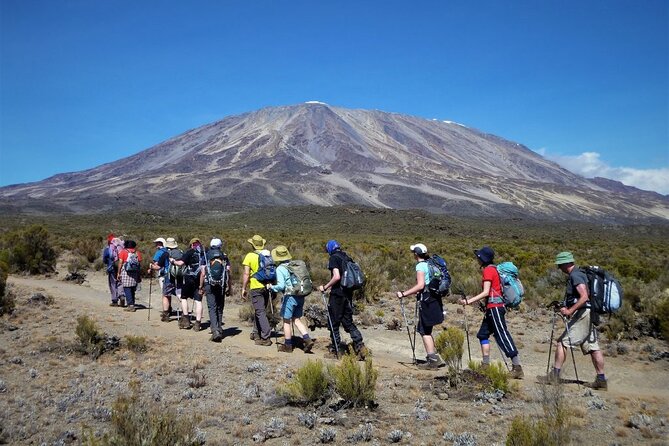
Day 4 starts with sustained ascent and panoramic views. You’ll have lunch near Lava Tower at around 14,900 ft. After that, the trail descends toward the Barranco Valley bottom at about 12,800 ft, where you camp at Barranco Camp.
This day is longer—about 7–9 hours of walking—so treat it like a whole-day hike, not a “half day.” The descent into Barranco can feel tough on your knees, but it also gets you into a camp that feels dramatic: towering cliffs around Barranco Camp and wide views down toward the plains below.
This is one of the trek days where a good guide matters. Your pace needs to stay controlled during the descent so you don’t burn out early, especially because Day 5 includes a steep climb.
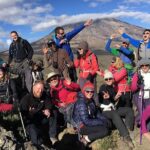
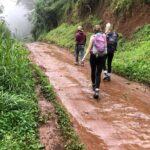
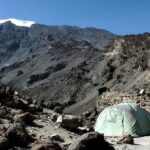
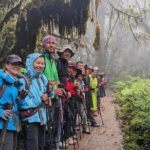
Day 5: Barranco Wall to Karanga Camp and Southern Icefields nearby
Today you tackle the famous Barranco Wall—a steep climb that sounds scary in theory, but usually works out best with patience and steady steps. After you top it, the trail turns into undulating walking along the south-eastern flank of Kibo, with superb vistas toward the Southern Icefields.
You move onto scree with pockets of vegetation in sheltered spots, which makes the terrain feel less uniform than you might expect. You camp at Karanga Camp around 13,100 ft, and it’s noted as the last water point on the approach to the summit—so this is one more reason you’ll benefit from a guide who runs the day calmly and efficiently.
Walking time is roughly 5–7 hours. If you’re feeling strong, it’s still a “don’t get cocky” day, because the coming schedule asks for endurance, not just bravery.
Day 6: Barafu Hut, a short acclimatization hike, then real rest
By Day 6, the trail follows compacted scree with wide views as you gain altitude relentlessly toward Barafu Hut at around 14,800 ft for lunch. You’ll then do a short acclimatization hike to a plateau around 15,700 ft.
After that, the plan shifts to recovery. The rest of the day is meant for preparing for the early morning summit push. This is where the itinerary’s structure shows its value. You don’t just “arrive near the summit and hope for the best.” You climb a bit, acclimatize briefly, and then you rest so you can move at night.
Walking time is about 3–5 hours. It can feel deceptively easy compared to other days, but don’t let your brain fool you. Your summit night depends on how well you sleep, hydrate, and conserve energy today.
Day 7: 1 a.m. start to Stella Point sunrise, then optional Uhuru Peak
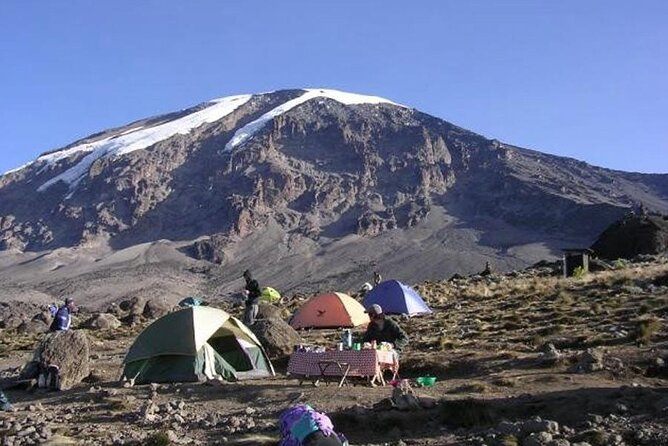
This is the day that makes or breaks the experience. You start the ascent by torchlight about 1 a.m. so you’ll reach the crater rim around sunrise. The climb is steep over loose volcanic scree, and there are zig-zags—graded enough to keep you moving, but still slow and demanding.
You aim for Stella Point at 18,800 ft. It takes about 5–6 hours for many people, and the plan includes a short rest to enjoy the sunrise. Mawenzi’s presence at sunrise is one of those moments you’ll remember long after the aches fade.
Then you have an option: if you feel strong, you can make the two-hour round trip along the crater rim to Uhuru Peak at 19,345 ft. The route passes close to glaciers and ice cliffs that still occupy much of the summit area. Even if you don’t go all the way to Uhuru, reaching Stella Point is still a serious summit milestone.
Afterwards, the descent back to Barafu can feel surprisingly fast, followed by refreshments. Then you continue descending to Millennium Camp at around 12,500 ft. Total walking time for Day 7 is listed as 11–15 hours.
This is the moment where guide judgment matters. You want someone watching your breathing, your energy, and your mental clarity—not just someone following a stopwatch. One of the best things this trip seems to deliver is exactly that kind of human pace management, highlighted in real-world guide support where the team adjusts effort based on how you’re actually doing.
Day 8: Mweka Gate descent through tropical forest and farms
Day 8 is a relief day in the best possible way: you’re descending. The trail takes you through tropical forest with birdsong and lush undergrowth, and there’s stated botanical interest. Your route winds down to Mweka village via the Kilimanjaro National Park gate at Mweka (about 5,400 ft), then continues through coffee and banana farms.
Finally, you transfer back to Arusha and your lodge. The walking time is about 4–6 hours, so it’s usually easier on the body than the ascent days. You’ll have dinner and overnight at Arusha Safari Lodge again.
This is also where you feel the full arc of the trip. You started under thick forest canopy, and you end in a working landscape with farms and a calmer rhythm. If you’re the type who likes closure, this day delivers it.
Day 9: Say goodbye, then head to JRO (or add a short safari)
On your final day, you bid farewell to your guide team, then you get a private departure transfer from Arusha to Kilimanjaro International Airport (JRO). If you want extra time, there’s an option to discuss adding a short safari or other add-on activity.
This last transfer matters more than it sounds. You’ll want your gear packed, your flight time protected, and your body already on “post-trek mode.” A private transfer keeps the day from turning into a guessing game.
Price and value: what you’re really paying for at $2,400
At $2,400 per person, you’re not just paying for walk days. You’re paying for the full machine that makes the trek safer and smoother: all fees and taxes, private transportation, all transfers, all accommodation, a professional guide, rescue fees, oxygen, first aid, tents, and the listed meal plan (breakfast, lunch, and dinner counts across the days).
You’re also getting “all gears” included. The exact list isn’t detailed here, so you should confirm what’s covered versus what you must bring. Still, the overall intent is clear: you’re less likely to arrive without critical items or scramble to rent gear last minute.
One thing not included: tips. That’s normal in this kind of trek, but it’s worth budgeting so it doesn’t catch you off guard at the end.
What makes this price feel more defensible is that it’s private. The tour is described as private, meaning it’s not an open-join crowd situation. If you want a more controlled experience—same group, same guide attention—this structure tends to fit better.
The guide team: what support actually looks like on Kilimanjaro
The biggest Kilimanjaro factor isn’t gear. It’s how you’re managed when your body starts arguing with you.
This trek leans into that. You’ll be led by a professional guide, with rescue and first-aid support in place. Oxygen is also included, which is an important reassurance if you run into breathing issues at higher camps or on summit night.
Real-world guide names associated with past trips include Frankie and Nestor, and also Bryson, Emmanuel, Augustine, and Clinton—and the consistent message across them is support that’s practical, organized, and responsive. One review-style theme that matters to you: guides sensing how someone is feeling and adjusting pace accordingly. That’s the difference between a steady summit attempt and a scramble that burns you out early.
You’ll also be part of a larger support crew. Past experiences described support from guides and porters who handle tents and carrying personal stuff, along with good and healthy food. That’s not just comfort—it’s how you preserve energy for climbing.
Who should book this Machame trek
This is a good fit if:
- You have at least moderate physical fitness and you’re okay with long walking days.
- You want a planned acclimatization rhythm rather than a compressed schedule.
- You value a guide team that focuses on safety and pacing, not only pushing forward.
It can also work for people who aren’t “hardened hikers.” Past group ages included late teens through seniors, and inexperienced hikers still had a positive outcome—especially when the team kept the effort realistic.
Quick things to think about before you go
- Summit day is serious. Even if you’re prepared, the time on the mountain (and the early torchlight start) is the hardest part.
- Weather matters. The experience is noted as requiring good weather, and it may be rescheduled or refunded if canceled due to poor weather.
- Budget for tips. Tips aren’t included, so plan for that.
- Check your coverage before you climb. Day 1 includes confirming mandatory medical coverage and travel insurance.
Should you book it?
If you want the classic Kilimanjaro feel—rainforest beginnings, high plateau views, Barranco drama, Southern Icefields scenery, and a sunrise summit plan—this Machame route is a strong choice. The value is in the structure: acclimatization time, long-range safety planning (oxygen, rescue, first aid), and logistics that take stress off your shoulders.
Book it if you’re ready for a demanding Day 7 and you trust a guide who’ll manage your pace. Skip it if you’re hoping for a light hike or if you’re likely to panic when the summit night starts at about 1 a.m. and the hours stretch long.
FAQ
Where does the trek start on this Machame route?
The trekking starts at Machame Gate, and you register at the Machame National Park gate before beginning the forest walk.
How many days are spent on the mountain?
The itinerary is designed with 7 days of trekking on Mount Kilimanjaro, even though the full tour duration is about 9 days.
What is the total trip duration?
The tour duration is listed as 9 days (approx.), with travel and lodge time in Arusha included.
When is the pre-climb briefing and equipment check?
There is a pre-climb meeting around 4:30 pm on Day 1, along with an equipment check.
What time does the summit attempt start?
On summit night (Day 7), the ascent starts by torchlight about 1 a.m.
What camps are included during the trek?
The trek includes camps at Machame Camp, Shira Hut area, Barranco Camp, Karanga Camp, Barafu Hut area, and Millennium Camp after the summit.
Is oxygen and first aid included?
Yes. Oxygen and first aid are included, along with rescue fees.
Are meals included in the price?
Yes. Breakfast is included for 9 days, lunch for 8 days, and dinner for 8 days.
What transportation is included in Arusha?
Private transportation and transfers are included, including airport pickup from JRO to Arusha and a private departure transfer back to JRO.
What is not included?
Tips are not included.