REVIEW · LOMBOK
Mount Rinjani Trekking: 2D/1N Hike To Summit 3726m Full View
Book on GetYourGuide →Operated by Din Trekking Rinjani} · Bookable on GetYourGuide
Mount Rinjani is all about altitude and atmosphere. This 2-day hike to the 3,726m summit feels like a full nature reset: tropical forest climbs by day, then crater-rim camping before a cold, headlamp sunrise push.
I especially like the human touch built into the experience. You get an English-speaking guide plus professional porters who handle cooking gear and camp setup, and the food coverage is strong (including tea/coffee and fruit like pineapple and banana). The biggest drawback is that cold summit conditions are real, and some sleeping bags can run old or not warm enough, so you’ll want to pack smart.
In This Review
- Key highlights you’ll actually care about
- Why this 2-day, 1-night Rinjani plan feels like real hiking
- From Sembalun Village to Pemantauan: your climb begins in the foothills
- Tengengean to Pada Balong: where the trek gives you time to reset
- Reaching Sembalun Crater Rim (2,639m): camp time with real altitude air
- The night at the rim: stargazing potential, plus comfort realities
- Summit morning to 3,726m: headlamps, patience, and sunrise timing
- Coming down: hot breakfast, then rainforest lunch on the way back
- The guide and porter setup: why it changes the whole experience
- Price and value: what $190 covers (and what you still need to budget)
- What to pack for Rinjani: cold summit gear beats guesswork
- Weather, closure notes, and altitude limits you can’t ignore
- Should you book this Mount Rinjani 2D/1N summit trek?
- FAQ
- How long is the Mount Rinjani 2-day summit hike?
- What summit elevation does this hike aim for?
- Is an English-speaking guide included?
- What’s included for meals and water?
- What camp and sleeping items are provided?
- Do I need to pay the national park entry fee?
- What should I bring since some essentials aren’t included?
Key highlights you’ll actually care about

- Crater rim camping at 2,639m with a stargazing setup that beats any “viewpoint photos”
- Early summit start so you can catch sunrise from 3,726m
- Dense forest walking on Lombok, with breaks built in for lunch and recovery
- Meal and water support: 3 liters mineral water per person per day plus 3 meals a day
- English guidance and porter help that keeps you focused on the hike, not logistics
- National Park entry included (250,000 IDR per day), so you’re not hunting tickets mid-trip
Why this 2-day, 1-night Rinjani plan feels like real hiking

A day hike can be pretty. A summit trek is different. On this route, you climb from Sembalun into the volcano’s higher zones, camp near the crater rim, then make the summit push before sunrise. That pacing matters because you’re not trying to do everything in a single marathon day.
The second reason I’d pick this format: you spend time at altitude in both “moods” of Rinjani. Daytime is for forest and gradual climbing. Night is for the crater rim—cool air, clearer views, and that quiet feeling when the jungle fades and the mountain takes over.
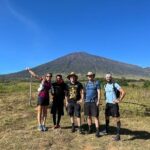
One more practical point: this is built around a small-group style of guiding. You might end up with a small team (one group was just four people), which usually means less waiting around and more attention from the guide.
You can also read our reviews of more tours and experiences in Lombok.
From Sembalun Village to Pemantauan: your climb begins in the foothills
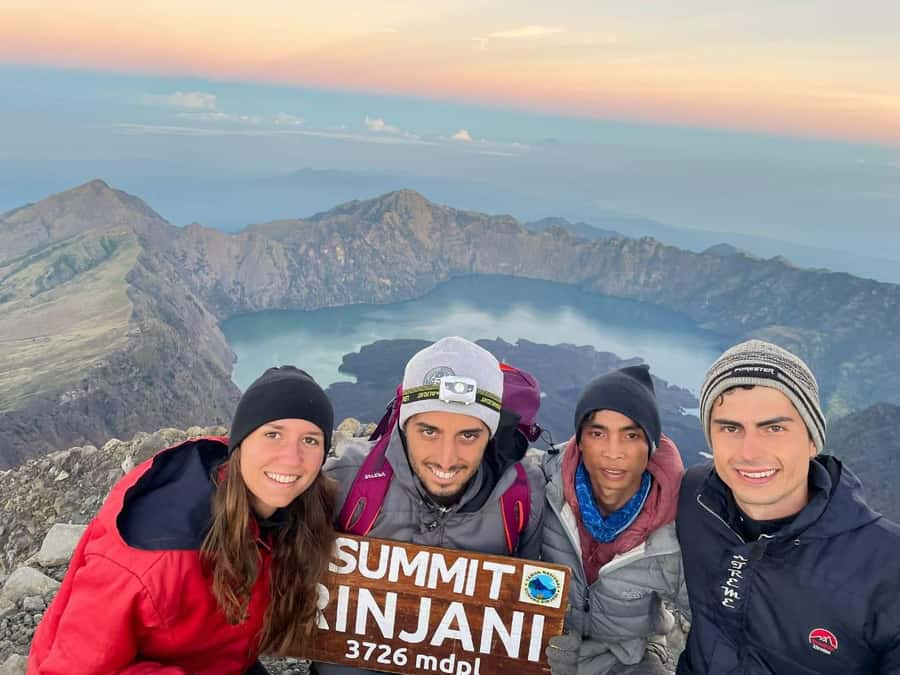
Your day starts with an early pickup from Lombok accommodation, then a transfer to Sembalun. You’ll register at the Rinjani Information Center, which is a small step that helps you start on the right side of the rules.
Then the hike proper kicks in through the foothills zone. First stop is Pemantauan at about 1,300 meters, where you rest and settle into your pace. This is where good day-hike habits matter: start slower than you think you need, keep steady breathing, and don’t burn your legs before the real altitude work begins.
If you’re the type who likes clear “checkpoints,” you’ll appreciate that this trek doesn’t just throw you uphill immediately. It breaks the climb into levels: Pemantauan (1,300m), then up toward Tengengean (around 1,500m).
Tengengean to Pada Balong: where the trek gives you time to reset

After Tengengean, you’ll keep moving upward and into the thicker forest feel. At around 1,500 meters, you’re still hiking, but the air tends to shift—usually cooler and less humid than lower elevations.
At Pada Balong, you get a longer lunch break (about 2 hours). This isn’t just for food. It’s your chance to regroup, drink water, and let your body catch up. If you’ve ever felt shaky late in a trek, you know how much a real reset helps.
This is also one of the smarter moments for your gear routine. Check your layers, keep your headlamp accessible for later (even if you don’t need it yet), and make sure your “small backpack/daypack” setup isn’t too bulky. A daypack is mentioned as possible to rent, which hints that many people travel light on day one.
Reaching Sembalun Crater Rim (2,639m): camp time with real altitude air
By the time you reach the Sembalun Crater Rim at roughly 2,639 meters, you’re officially in the zone where the mountain starts making its point. The crater rim area is where you’ll set up camp for the night.
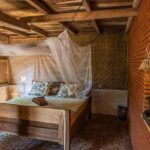
What’s nice here is that camp life is handled for you. Porters carry the cooking utensils and camping equipment, and you’ll have a tent plus sleeping bag and mat. There’s also a toilet tent and toilet paper, so you’re not dealing with “make it work” improvisation after a long climbing day.
Now for the part that surprises people: it can get cold quickly at rim level. One tip straight from experience: plan for cold summit conditions and don’t assume your warm clothes will be optional. Also, bring a headlamp or long-life flashlight for dark walking. Even if your guide has a plan, you’ll feel more confident moving around camp at night.
The night at the rim: stargazing potential, plus comfort realities

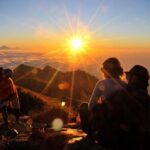
Sleeping at a crater rim is the payoff for most people. You’re higher than the forest floor, so the sky tends to feel more open and dramatic. With a trek like this, that night isn’t “bonus entertainment.” It’s part of the challenge, and it’s part of the reward.
Here’s the balanced truth: comfort varies. One traveler noted a sleeping bag that was older and not warm enough. That doesn’t mean you’ll have the same issue, but it does mean you should treat warm layers as non-negotiable.
If you want the simplest rule: dress in layers you can add or remove fast. Bring a thick coat or jacket (recommended), and pack warm clothes you’ll actually use. You don’t need to carry everything—just be ready for cold air and early wake-ups.
Also, a small heads-up: hot springs can be unreliable depending on timing and weather. If rain season is near or rain hits, hot springs may be basically not there. So don’t count on a soak to fix discomfort. Plan on warmth through clothing and recovery.

Summit morning to 3,726m: headlamps, patience, and sunrise timing

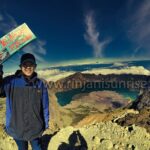
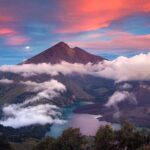
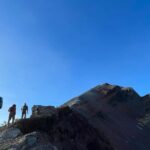
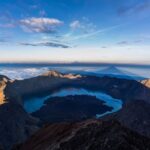
This is the “full view” moment the trek promises. You’ll start the summit ascent either before sunrise or at the crater rim, depending on how you time it—but the key summit approach is early enough to reach the highest point on Lombok at 3,726 meters in time for sunrise.
You’ll want a headlamp or long flashlight here. One traveler specifically recommended taking a front torch because the dark-to-dawn shift can be tricky on uneven ground. Even if the path is marked, your hands and steps work better when you can see where you’re placing them.
Pace matters more than power. Summit climbs reward steady effort: small, consistent steps and controlled breathing. If you push too fast, you’ll feel it when the air gets thinner and colder.
And yes—this is where the guide and porter team becomes more than “nice extras.” The guide’s job isn’t just route navigation. It’s keeping you safe, helping with timing, and making sure you’re not exhausted before the critical sunrise window.
Coming down: hot breakfast, then rainforest lunch on the way back

After the summit, the mission becomes controlled descent. You’ll trek back toward the crater rim and aim to return in time for a hot breakfast. That warm meal is a morale booster, and it helps your body transition from the cold, high effort of the summit.
Then you continue down to Sembalun village. Along the way, you’ll stop for lunch in a pristine rainforest area. Even if you’re tired, this part is valuable because it’s your final “reset” stretch—less about altitude and more about easing your legs while you refuel.
When you finish at Sembalun, you’ll transfer back to your accommodation area on arrival—specifically listed as Banksal, Senggigi, or Mataram. Pickup is included from your Lombok lodging for the trek start, so the handoff is built in rather than something you figure out at the last minute.
The guide and porter setup: why it changes the whole experience
For a summit hike, guidance quality is everything. This trek includes an experienced English-speaking guide plus professional porters who handle camp and cooking. That means you’re not wrestling with heavy gear while trying to manage your breathing at altitude.
The food support is also part of why this feels well-run. You’ll get 3 meals a day, with tea and coffee included. One traveler highlighted that porters made great food and provided lots of snacks, and that the team felt attentive and made them feel safe throughout.
Even if you’re an independent hiker, you’ll likely appreciate the “systems.” Having drinking water and camp setup managed is a big deal when your energy is already going to the climb.
Price and value: what $190 covers (and what you still need to budget)
At $190 per person for a 2-day summit trek, the value isn’t just the view. It’s the package of work that gets done behind the scenes.
Included items you’re paying for directly:
- English-speaking hiking guide and professional porters
- Camping support: tents, sleeping bags, sleeping mats, toilet tent, and toilet paper
- 3 meals a day plus tea and coffee
- Water: 3 liters of mineral water per day per person
- Fruits like pineapple and banana, plus snacks (mentioned as provided)
- Rinjani National Park entry (250,000 IDR per day)
- Trekking insurance
- Transportation after the trek to Banksal/Senggigi/Mataram, and pickup from Lombok accommodations
- Even storage: backpack storage in the office
Not included (and this is where costs can creep up if you’re unprepared):
- Trekking shoes and trekking poles (you might rent smaller items, but they’re not included)
- Headgear, jacket, and warm clothes
- Extra tips for guide/porter
My take: this pricing makes sense if you don’t already have the right gear and you value having the hard parts handled—guiding, camp logistics, and enough food and water to keep you steady. If you already own everything and you’re fully self-supported, a DIY or cheaper option might be tempting. But a summit climb is where “less stress” becomes worth money fast.
What to pack for Rinjani: cold summit gear beats guesswork
The trek recommends:
- Trekking shoes
- A thick coat or jacket
- Short pants for the natural sauna (yes, that’s how the recommendation is worded)
- Small towels
- A headlamp / long-life flashlight
- Personal medicine
- A digital camera and handy cam (if you’re into filming)
And from real-world experience advice, I’d add:
- Bring extra warmth even if you think you’ll be fine in the daytime. The summit and early morning hours can feel brutal.
- If you’re counting on the sleeping bag to be enough, keep an extra layer ready as backup.
- Don’t wait until you’re already on the mountain to decide you want better shoes. Bad footwear turns a sunrise climb into a foot problem.
Also note: a “small backpack/daypack” is possible to rent, so you don’t need to bring a giant travel pack for the entire trek. Still, keep valuables minimal and protect your phone/camera from dust and cold air.
Weather, closure notes, and altitude limits you can’t ignore
The mountain has real rules. The information provided notes that trails were officially closed due to predicted extreme weather until the end of March 2018. That’s historical, not a guarantee of today’s conditions—so you should always check whether the route is operating before you go.
Fitness is another must. You need a good level of fitness and the ability to walk long distances. People suffering from mountain sickness or with a height phobia are not allowed to join. Minimum age is 10 years old.
So if you’re on the fence: be honest with yourself. A summit trek isn’t a “try it anyway” outing. It’s a disciplined hike at altitude.
Should you book this Mount Rinjani 2D/1N summit trek?
Book it if you want a structured 2-day summit hike with strong support: English guidance, porter-managed camp, enough meals and water, and a realistic plan for sunrise from 3,726m. I’d also recommend it if you don’t want to spend your trip time on logistics like park tickets, camp setup, or carrying cooking gear.
Skip (or choose a different approach) if you hate cold conditions or you’re unsure you can handle altitude demands. Also, if you’re sensitive about sleeping comfort, plan to add warm layers and treat the sleeping bag as helpful rather than guaranteed.
FAQ
How long is the Mount Rinjani 2-day summit hike?
It’s a 2-day trek.
What summit elevation does this hike aim for?
The summit is 3,726 meters.
Is an English-speaking guide included?
Yes. The tour includes a live English tour guide and professional porters.
What’s included for meals and water?
You get 3 meals a day plus tea and coffee, and 3 liters of mineral water per person per day.
What camp and sleeping items are provided?
Included are a tent, sleeping bag, and sleeping mat, plus a toilet tent and toilet paper.
Do I need to pay the national park entry fee?
The Rinjani National Park entry ticket (250,000 IDR per day) is included.
What should I bring since some essentials aren’t included?
You’re recommended to bring trekking shoes, a thick coat or jacket, headgear/headlamp, warm clothes, small towels, personal medicine, and a camera if you want photos.