REVIEW · LOMBOK
Rinjani trekking 2D 1N RIM
Book on Viator →Operated by Green Rinjani Trekking · Bookable on Viator
Rinjani crater rim days get your attention fast. This private 2D/1N hike from Senaru to the rim and back mixes rainforest hiking with an overnight camp by crater scenery that feels bigger than the paperwork. I like the included guide, porters, and camping gear, so you’re not stuck juggling rentals and extra costs in the field. The main drawback is simple: the route is stony and can be steep, and you still need your own essentials like trekking shoes and a headlamp.
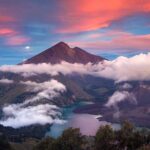
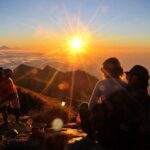
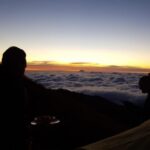
You’ll hike through changing terrain and at least two altitude steps, from Senaru-area paths up into higher camps, with monkeys, humidity, and long photo stops built into the rhythm. From the rim, the views are the point: sunset out to the three Gilis and Bali’s Mt. Agung, then sunrise with the dramatic Lake Segara Anak area and the smoke from activity nearby. Nights are cold enough to make stars feel close.
If you’re in for a serious hike but not trying to do summit-style suffering, this is a smart fit. You’ll want moderate fitness and a willingness to move steadily from one checkpoint to the next, especially on Day 1.
In This Review
- Key things that make this trek worth your money
- A 2-day Senaru-to-Rinjani Rim Plan That Feels Structured (Not Chaotic)
- Private tour setup: what you get, and what you still have to bring
- Day 1: From Senaru’s coffee trees into rainforest humidity and up to Pos 2 and Pos 3
- The climb out to the crater rim: savanna views, steep stone, and the Cemara Lima pause
- Night camp by the crater rim: meals, timing, and staying comfortable
- Day 2: Sunrise breakfast and a long, satisfying descent to Senaru
- Views you’ll remember: Gilis, Agung, and Lake Segara Anak
- Price and value: where the $205 feels fair
- Guide and porter team: why support makes the difference
- Packing list that prevents the misery on Rinjani
- Should you book this Rinjani 2D/1N trek to the crater rim?
- FAQ
- What time does the trek start?
- Is this a private tour?
- What trekking equipment is included?
- Do I need to bring a headlamp and trekking shoes?
- Are meals and drinks included?
- How much does an extra porter cost for luggage?
- Can I cancel for a full refund?
Key things that make this trek worth your money
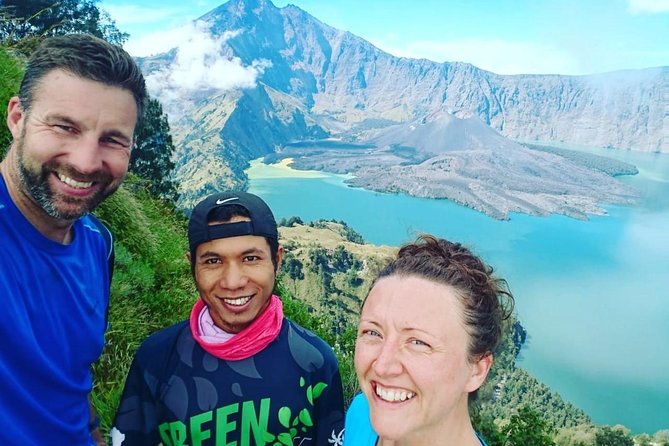
- Private pacing with guide and porters: your group sets the tempo, not a cram-it-all schedule
- Camping setup is included: tent, sleeping bag, sleeping mat, and even camp chairs/table
- Real food stops at checkpoints: soft drinks and fruit at Pos 2, plus a cooked lunch at Pos 3
- Crater rim timing is built in: sunset and sunrise views are part of the overnight plan
- Monkeys are part of the day: keep small items in your control during breaks
A 2-day Senaru-to-Rinjani Rim Plan That Feels Structured (Not Chaotic)
This trek is a tight, two-day mission: hike from Senaru up to Mt. Rinjani’s crater rim, camp nearby, watch the sky show, then hike down. It’s not a casual stroll. You’ll be walking from the cool morning start through humid forest stretches, then up again into higher, more exposed ground.
One thing I like about this format is how it balances effort and recovery. The day is broken into named positions with breaks where you can eat, drink, and reset your body. Pos 2 and Pos 3 aren’t just dots on a map. They’re where you get food support and where the pace becomes more realistic.
Also, it’s a private tour, so it’s easier to match your hiking style. If your group likes steady walking and fewer stops, you can usually keep the rhythm. If you need more time at viewpoints or in humid jungle, a private setup helps. That matters because Day 1 is the tougher climb.
Finally, this runs with a mobile ticket approach and a real on-the-ground team. You’re registering at the Rinjani Trekking Centre at Pos 1, then you’re on the trail with a guide and porters who handle camping logistics and cooking. Less stress for you. Fewer last-minute decisions.
You can also read our reviews of more tours and experiences in Lombok.
Private tour setup: what you get, and what you still have to bring
This package comes with a full crew: a local guide and porters, plus transfers. You also get food and drink through the trek—breakfast, lunch, dinner, snacks, bottled water, and coffee/tea. Alcoholic beverages are included too, which is a nice detail for an evening meal after a long day (just keep your hydration game on point).
The camping side is practical. Equipment included includes your tent, sleeping bag, camping pillow, camping chair and table, toilet tent, and sleeping mat. That’s a big deal. Many volcano treks quietly make you rent or buy half the gear separately. Here, the package shoulders most of the heavy logistics.
What you still need to pack yourself is where the trek can get uncomfortable fast. The basics that matter most:
- Headlamp/torch (recommended and not included)
- Trek shoes (not included)
- Long pants/trousers (not included)
- A small day pack for the things you’ll carry during breaks
If you’re tempted to pack light and skip footwear, the trail can punish you. Expect stony footing and steep sections, especially on the push toward the rim.
There’s also an option to hire an extra porter for your own luggage for an additional $22 per day. If your group is traveling with more than a small day pack, that might be worth it for comfort. If you travel minimalist, you can likely stay within the core plan.
Day 1: From Senaru’s coffee trees into rainforest humidity and up to Pos 2 and Pos 3
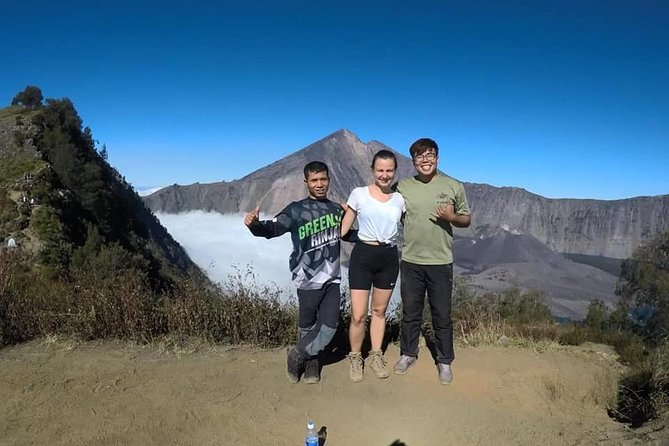
Day 1 starts early—meet around 7:00am, with the trek beginning in the 7:30–8:00am window. You’ll register at Pos 1 in Senaru village. Then the walking starts in the cool morning with open views and plant life tied to local agriculture—coffee trees and bamboo show up early, before the route funnels you toward the rainforest.
The first stretch is a good warmup because the trail is not just uphill. You’ll get a mix of sunlight and shade, plus that shift from open village-edge views into the deeper humid jungle. Once you reach the rainforest gate area, there’s a short break (about 15 minutes), then you keep moving under canopy cover. That shade can feel like relief on a hot day.
Keep an eye out for monkeys. You may hear and spot black/brown monkeys along the forest sections. On Pos 2 and Pos 3, monkeys get more of a role—so plan for them like you plan for weather.
Pos 2: Montong Satas (around 1,500m)
After roughly three hours, you reach Pos 2. This is a real energy reset point. You’ll do a break with soft drinks, crackers, and fresh fruit like banana and pineapple. It’s also where you can lay down briefly if you need a mental break before the next push.
Pos 3: Mondokan Lokak (around 2,000m)
From Pos 2 it takes about two hours to reach Pos 3. Along the way, you might see local strawberry plants during the June–August season. At Pos 3, the guide and porters prepare lunch—fresh fruit and biscuits as snacks, plus proper cooking for the meal.
One caution: Pos 3 and nearby areas can have brown monkeys. They sometimes go for small backpacks. Keep your bag zipped and close, especially during stops. Don’t set it down and wander off for one second. They move fast.
The climb out to the crater rim: savanna views, steep stone, and the Cemara Lima pause
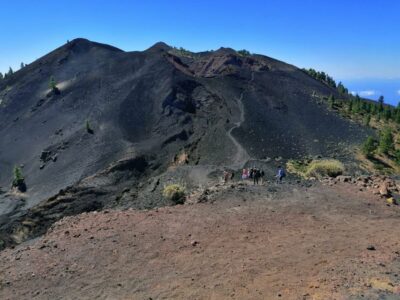
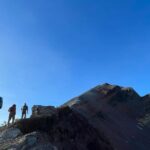
After Pos 3, you keep climbing toward the crater rim at 2,641m. The route shifts again. You leave the tropical rainforest and walk into savanna-like hills with more open views. That shift is where the trail can feel steeper and more exposed, because you’re no longer sheltered by dense canopy.
This is also where you should expect more stony footing. The plan includes breaks, though:
- After about 25 minutes out of the Pos 3 area, you keep going through a steep segment
- You’ll take a pause called Cemara Lima, where the views open up back toward Senaru—there’s a wide chance to catch your breath and take photos
Then you reach the rim area at Pelawangan 1 Senaru Crater Rim after about an hour more. This is also where you settle into camp and overnight.
Sunset is part of the schedule here, and the package leans into it. You’re set up to watch:
- the three Gilis
- Bali’s Mt. Agung
- the Lake Segara Anak crater area
- the smoke effects from nearby volcanic activity in the valley area described in the plan
It’s not just pretty. It’s motivation. Day 1 can feel like work, and then the rim turns it into a story you’ll remember.
As for sleep: bring the mindset that you’re sleeping in altitude outdoors. The plan even calls out best sleep under the stars. That’s a polite way of saying nights can be cold and the sky does most of the lighting.
Night camp by the crater rim: meals, timing, and staying comfortable
Overnight is the core difference between doing a day hike and doing the full 2D/1N. You get time. You get light changes. You get to watch the crater settle into a calmer mood after sunset.
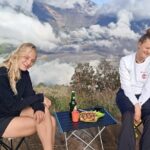
You’ll have your camp set up for you—tent, sleeping bag, and sleeping mat—so your job is basically to manage warmth and keep your small items organized. Dinner is included, along with snacks during the day and plenty of water.
Alcohol is included in the package too. I’d treat that as a bonus, not a requirement. If you choose to have some, keep it light and don’t use it as a substitute for hydration. A dry air + cold air combo can make you feel rough even if the weather looks clear.
Also, bring a headlamp/torch. Even with a group and camp setup, night movement is easiest with proper light, especially around the toilet tent area and if you want to grab photos.
Then there’s sunrise. Day 2 starts with breakfast and early viewing, plus picture time by the lake area. You’re positioned to catch the morning look at Lake Segara Anak and the smoke effects mentioned in the plan, plus broader crater views. If you’re the type who wakes up for a view, this is your moment.
Day 2: Sunrise breakfast and a long, satisfying descent to Senaru
Day 2 is the quieter part in a physical sense, but it still takes time. After breakfast and enjoying the sunrise, you’ll spend time taking pictures with the lake scenery before you start the descent.
The downhike is about 5–6 hours. You’ll be moving from the rim area back to Senaru village, which sits much lower (around 601m). That means lots of downhill walking. It can feel easier than the climb, but it can be hard on knees if you go too fast.
Your arrival back at the Senaru Rinjani Trekking Centre is planned around 12:30pm to 1:00pm. After that, a private car transfers you to your next destination. That last step is underrated. It turns the trek from a tough day into a finished trip instead of an extra hassle.
If you’re connecting onward—hotel check-in, another island plan, or just dinner with local food—this timing gives you a reasonable cushion.
Views you’ll remember: Gilis, Agung, and Lake Segara Anak
The crater rim views are the reason people sign up for Rinjani. This trek is designed around those view moments.
From the rim, you’re set up for sunset over:
- the three Gilis
- Bali’s Mt. Agung
Then sunrise brings the crater story into focus, with time beside Lake Segara Anak. The plan specifically mentions smoke effects from nearby volcanic areas and the valley features around Mt. Sanggka Reyang, plus reference to the crater activity and Rinjani’s peak height (3,726m).
Here’s the practical takeaway for you: clouds and haze can happen. But because the trek includes both evening and morning, you have two chances at good light. That’s better than doing one view window only.
Price and value: where the $205 feels fair
At $205, the headline question is: do you get enough to justify the cost?
You’re paying for a private guide team, porters, camp gear, transfers, and a full food plan (breakfast, lunch, dinner, snacks, coffee/tea, bottled water, plus alcohol beverages). You also aren’t responsible for setting up a tent or carrying bulky items.
So what does that mean for value? It means you’re buying:
- convenience (camp logistics handled)
- safety and pacing support (guide/porters)
- a full experience (night camping + sunset/sunrise timing)
Your personal spending will mostly be for the items the package doesn’t include: headlamp/torch, trekking shoes, long pants, and trekking jacket if you want extra wind protection. Tips for guide and porter are also not included.
If you compare the cost of hiring only a guide while still needing camping gear and food, the package format makes sense. This is the kind of trek where splitting costs can quietly get expensive. Here, it’s bundled.
Guide and porter team: why support makes the difference
The best part of the experience isn’t just the scenery. It’s how the team manages your pace and the practical problems that show up on volcano trails.
In the guides you’ll see mentioned for this trek—Dana, Adi, Yun, Sri, and Ubang—the common theme is support. The guide role isn’t just navigation. It’s pacing, encouragement, and keeping the group safe when the trail turns steep or the air feels thick.
Porters are the other half of the comfort. They carry gear, help set up camp, and support meal prep at checkpoint points like Pos 2 and Pos 3. That lets you carry a smaller day pack and focus on walking.
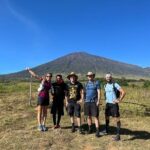
If you’re traveling with friends or family, the private format plus supportive guiding means fewer arguments about pace. You can stop when you need a breather. You can move forward without feeling rushed.
One more human detail: a few recent experiences highlight smooth communication and airport pickup support, with meals offered even when arrival times are late. That kind of organization matters when you’re trying to get to a hike-ready headspace.
Packing list that prevents the misery on Rinjani
You’ll do better if you pack like the trail is both stony and variable in temperature. Here’s what the provided info points to as useful.
Must-haves (because they’re not included)
- headlamp or hand torch
- trekking shoes (a real tread matters)
- long trekking pants/trousers
Strongly recommended for comfort
- sunblock/sunscreen, hat/cap, sunglasses
- insect repellent
- windproof jacket (altitude air can bite)
- spray for muscle balm
- trekking poles (optional)
- small towel and toiletries
For walking efficiency
- a day pack that fits the small-bag reality of monkey-heavy stops
- layered clothes (shorts are fine if you layer; long pants help on rougher trail segments)
If you’re considering mosquito protection, plan for insect repellent. Jungle sections are humid and insects tend to be part of the package.
Should you book this Rinjani 2D/1N trek to the crater rim?
Book it if you want a classic Lombok volcano experience with a clear plan and real support. You’ll like it if you’re comfortable with a challenging Day 1 and you want the payoff of sunset and sunrise from the rim, not just one view window.
Skip or reconsider if:
- you hate steep, stony trails
- you don’t want to manage your own essentials like shoes and headlamp
- your group isn’t ready for moderate fitness demands
One smart decision rule: if you can bring good footwear and keep your day pack controlled around monkeys, you’re set up for success. The rest—camp gear, food, guide, porters, and transfers—is built into the package, which makes your trip feel less like logistics and more like walking toward a big payoff.
FAQ
What time does the trek start?
Start time is listed as 7:00am, with the hike beginning in the 7:30–8:00am window and registration at the Rinjani Trekking Centre at Pos 1 in Senaru village.
Is this a private tour?
Yes. It’s a private tour/activity, meaning only your group participates.
What trekking equipment is included?
The package includes overnight camping equipment such as a tent, sleeping bag, sleeping mat, camping pillow, camping chair and table, and a toilet tent.
Do I need to bring a headlamp and trekking shoes?
Yes. A headlamp/hand torch and trekking shoes are not included in the package, and the trek includes steep and stony sections.
Are meals and drinks included?
Yes. Food and drink are included, including breakfast, lunch, dinner, snacks, bottled water, coffee and/or tea. Alcoholic beverages are also included.
How much does an extra porter cost for luggage?
Extra porter for own luggage is listed as $22 per day.
Can I cancel for a full refund?
Free cancellation is available. You must cancel at least 24 hours in advance of the experience’s start time for a full refund. If you cancel less than 24 hours before, the amount paid is not refunded.