REVIEW · TETEBATU
Mt Rinjani Trekking 4 Days and 3 Nights
Book on Viator →Operated by HaLoMi Trekker · Bookable on Viator
Rinjani is not a casual hike. This 4-day Mount Rinjani trek in Lombok balances hard walking with standout nights at the Sembalun and Senaru crater rims, plus a summit day that’s all about payoff views. I especially like the camping-on-the-rim setup (you feel closer to the volcano at night) and the fact that local guides and porters handle the heavy lifting so you can focus on pacing. The main drawback to plan for is the early start and tough altitude day—if you hate long, steep climbs, this will test you.
You’ll also get a smart first-day warmup with Sendang Gile and Tiu Kelep waterfalls, but timing matters: those stops only work if you arrive at least 2 hours before sunset. Expect a real team experience, and you might even get a guide known for keeping things organized and safe—names that show up include Dani, Hadie, Mul, Edy, and Irsyad.
In This Review
- Key things to know before you go
- Mount Rinjani 4D/3N: What you’re really signing up for
- The 5:00 am start: why your day feels long (and why that’s good)
- Day 1: Sendang Gile and Tiu Kelep, then Sembalun Crater Rim camping
- Day 2: Starting the trek from the rim (and letting porters do their job)
- Day 3: Summit push, then Segara Anak Lake and hot springs
- Day 4: Lake-side recovery, then Senaru Crater Rim views
- Day 5: Final crater rim time and finishing the trek
- What’s included (and the few things you must bring)
- Guides and porters: where the experience turns from hard to safely memorable
- Price and value: why $469 can make sense if you care about the full package
- Bonus boat transfer to Gili Island after the trek
- Should you book this Mt Rinjani 4 Days and 3 Nights trek?
- FAQ
- How long is the Mt Rinjani trek?
- Where do you camp during the trek?
- What time does the trek start?
- Are hotel pickup and drop-off included?
- What’s included for meals and water?
- What equipment is provided, and what should I pack?
- Is food available for vegetarians?
- Can I go straight to Gili Island after the trek?
Key things to know before you go
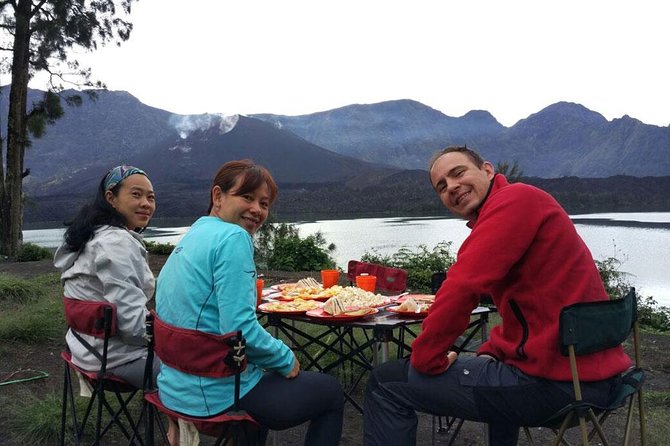
- Crater-rim camping at both Sembalun and Senaru: the views are the point, and you’re sleeping for them
- Summit day + Segara Anak on the same long push: you go up high, then drop to the lake area
- Hot springs time after the summit walk down: a chance to soak tired legs
- Waters and full-board meals included, with about 3 liters of water per day
- All camping gear included, but you still need to bring key trekking items like shoes and a headlamp
Mount Rinjani 4D/3N: What you’re really signing up for
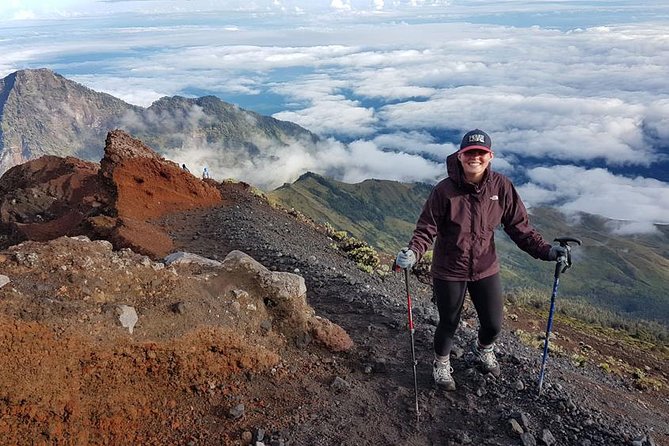
This trek is for people who want a volcano experience, not just a photo stop. Mount Rinjani is Indonesia’s second highest volcano, and the route is built around big altitude days, crater-rim camping, and time near Segara Anak Lake. If you like the idea of waking up above the clouds and ending the day with mountain camp views, you’ll fit right in.
The best part for me is the rhythm: you don’t just hike to one peak and leave. You camp at Sembalun Crater Rim, then later at the lake side area, and finish with another night at Senaru Crater Rim. That gives the trip a “slow enough to breathe” feeling between the tougher walking blocks—especially on the day with lake-side downtime.
The tradeoff is that Rinjani is physically serious. “Most travelers can participate,” but the summit push is described as a fight upward, and you’ll be walking a lot over steep, uneven ground. Go only if you’re ready to take your time and follow your guide’s pacing.
You can also read our reviews of more tours and experiences in Tetebatu.
The 5:00 am start: why your day feels long (and why that’s good)
You start at 5:00 am. On paper that sounds brutal. In practice, it helps you gain daylight for crater rim walking and makes timing around sunsets more realistic. Day 1 includes waterfalls, and those require a specific arrival window.
Here’s the practical bit: early starts also mean you should be prepared to move right away, not wait around for coffee and bag sorting. Keep your essentials easy to reach—water bottle, headlamp if you bring it, and any layers you’ll want for early cold. The trip includes plenty of meals and hot drinks, but mornings are about motion.
Day 1: Sendang Gile and Tiu Kelep, then Sembalun Crater Rim camping
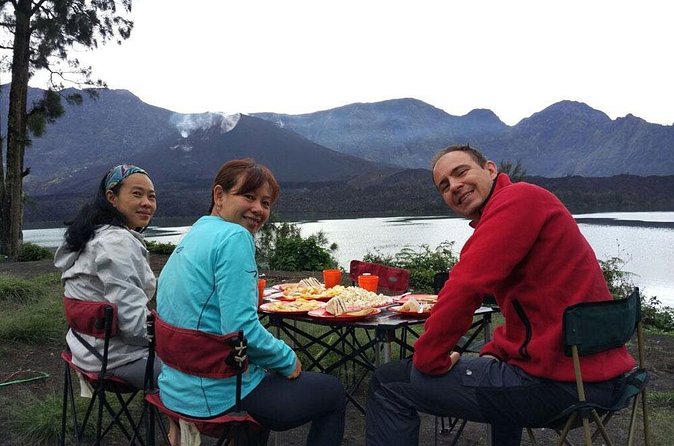
Day 1 is where you get the “this trip is worth it” feeling fast. You’ll visit Sendang Gile and Tiu Kelep Waterfall. There’s a clear constraint: you need to arrive no later than 2 hours before sunset to make this happen. That’s not just a logistics detail—it changes the whole vibe. You want enough daylight to enjoy the falls instead of doing a rushed, half-seen stop.
After the waterfalls, you shift into the crater rim camping phase at Sembalun Crater Rim. This is the kind of night that makes volcano trekking feel different from a typical day hike. You’re up high, the air can be cooler, and the crater rim viewpoint sets you up for the bigger climb ahead.
If you hate planning around sunset windows, this part can feel like pressure. But if you’re flexible and good at following a schedule, it’s a strong start.
Day 2: Starting the trek from the rim (and letting porters do their job)
Day 2 is essentially your “get moving” day. You begin trekking from the area, then settle in for the night at the Rinjani (Sembalun Crater Rim).
What matters here is how the team setup works. You have local guides and local porters in the mix. That means you’re not responsible for dragging all your camping gear uphill. In the feedback I saw patterns of guides keeping timing tight and porters moving luggage efficiently, so the hike stays about your legs and your breathing—not constant gear management.
You’ll still feel the effort on Day 2, even if it’s not the summit day. Think of it as the day your body starts learning the route: steady steps, careful footing, and the kind of endurance that makes the next morning possible.
Day 3: Summit push, then Segara Anak Lake and hot springs
Day 3 is the big one. It starts with the summit climb—your route is described as a fight upward, and you’ll be pushing through tougher terrain to reach the peak. The reward is obvious and immediate: summit time is short, but the altitude payoff is why people come to Rinjani at all.
After you walk down from the top, you head toward Segara Anak Lake and hot springs. The pacing here matters: you’re not just going downhill for fun. You’re shifting from high effort to high payoff—then adding a recovery moment with soaking options.
The tour plan explicitly gives you time to enjoy the lake area, including the chance to swim at the lake or soak in spring water. Even if you don’t do either, plan on spending real time in that zone because it’s a different “Rinjani feeling” than the summit. The air, the sound, and the crater-basin atmosphere are part of the story.
Then you spend the night at the lake side. A lake-side camp after a summit day can feel unreal: tiring legs, but a big sense of accomplishment.
Day 4: Lake-side recovery, then Senaru Crater Rim views
Day 4 starts with a more relaxed block at the lake side. That matters because it’s your recovery buffer before the final crater-rim stretch. You’re not meant to go full speed every day here. This day gives you time to breathe, regroup, and handle the small stuff—sore spots, hydration, and layering for changing temperatures.
After that downtime, you continue toward Senaru Crater rim, which is described as one of the best places to see Segara Anak Lake. This is where the view turns from “wow” into “how is this real?” You’re looking across the crater basin again from a different angle, and camping here sets up your final day’s perspective.
You sleep at Senaru Crater Rim, and that night is often where the trip feels most emotional. Not dramatic like a movie—more like quiet relief that you made it.
Day 5: Final crater rim time and finishing the trek
Day 5 keeps you at Senaru Crater Rim for the final stretch, then you finish the trek. This last day is often about timing your feet for the exit and making sure you soak in what you paid for—those crater rim views again before you head out.
If you’re the type who gets restless waiting for the next stop, plan to slow down here. The reason Rinjani treks feel special is that the final views hit after fatigue. You earned them.
What’s included (and the few things you must bring)
The package is very clear about what’s covered on the mountain and what isn’t. Included items focus on keeping you moving and comfortable on multi-day camping trekking.
What’s included:
- Local guide and local porters
- All necessary camping equipment
- Waters (about 3 liters a day)
- Full-board meals and drinks, including breakfast, lunch, and dinner over the trek days, plus snacks and coffee and/or tea
- Cooking gears
- Hotel pickup and drop-off
- Admission tickets included for the waterfall stop, while some mountain area admissions are listed as free
What you need to bring (not included):
- Head lamp/hand torch
- Small backpack/daily pack
- Trekking shoes
- Trekking jacket
- Long pants/trousers
- Tips for guide and porters are not included
A quick practical note: don’t assume you can improvise shoes. Rinjani walking means traction matters. Also pack a daily pack that can hold your layers and water without bouncing too much.
Guides and porters: where the experience turns from hard to safely memorable
The strongest recurring theme is how well guides look after safety and timing, especially on the summit day and during transitions between camps. In the feedback, you’ll see guides like Dani, Hadie, Mul, Edy, and Irsyad mentioned for taking care of pacing, making sure timing lines up, and keeping the vibe light when the walk gets tough.
Porter teams also show up as a major quality factor. Names like Aria, Adi, Sana, Ahmad, and Addi appear alongside praise for moving luggage fast and cooking meals well. That matters more than people think. When porters do their job cleanly, your hike feels like it belongs to you.
So when you’re choosing this trek, pay attention to that leadership component. You’re not just buying “a route.” You’re buying a guide who helps you handle altitude effort, slippery sections, and camp-to-camp timing.
Price and value: why $469 can make sense if you care about the full package
At $469 per person, you’re paying for a multi-day, team-led camping trek—not just a guide for a day. This package includes guides and porters, camping equipment, full-board meals and drinks, cooking gear, and about 3 liters of water per day. It also includes hotel pickup and drop-off.
What’s not included is also important: you still need to bring essential trekking items like shoes, a jacket, a headlamp, and a day pack. You’ll also cover tips if you want. Those add-ons are not huge compared to the overall trip cost, but they are the main “real-life” gaps.
The value equation improves if you’d otherwise have to book a guide, tents, meals, and transport separately. It gets worse if you’re already fully set up with gear, and you only want the peak with zero extras. This trek is best viewed as a full Rinjani experience: waterfall warmup, summit day, crater lake time, and two crater-rim camps.
Bonus boat transfer to Gili Island after the trek
One extra reason this itinerary works well is the free bonus boat transfer to Gili Island after the trek. That’s handy if you want to keep your holiday flowing: tough volcano days, then a more relaxed coast-and-beach chapter right after.
The key is mental pacing. Don’t plan a big party night immediately after. You’ll likely need hydration and recovery time, and Gili is where you should allow that to happen.
Should you book this Mt Rinjani 4 Days and 3 Nights trek?
Book it if:
- you want camping on the crater rims (not just a quick hike)
- you’re comfortable with an early 5:00 am start and a real summit day
- you like the idea of seeing Segara Anak Lake and having time near hot springs
- you want a guided, porter-supported experience with meals and water handled
Consider another plan if:
- you’re sensitive to steep, long days and altitude effort
- you don’t want to commit to bringing the missing essentials like trekking shoes, a jacket, long pants, and a headlamp
- you hate schedules tied to sunset timing (Day 1 waterfall stops have that constraint)
If you’re on the fence, think about what you want your final memories to look like. This trek aims squarely at crater-rim nights and a summit payoff, with the kind of crew support that helps you finish feeling proud rather than wrecked.
FAQ
How long is the Mt Rinjani trek?
It’s a 4-day trekking experience with 3 nights camping, with an overall trip time of about 5 days including the start and finish.
Where do you camp during the trek?
You camp at Sembalun Crater Rim, then at the lake side after the summit day, and finally at Senaru Crater Rim.
What time does the trek start?
The start time is 5:00 am.
Are hotel pickup and drop-off included?
Yes, hotel pickup and drop-off are included.
What’s included for meals and water?
Full-board meals and drinks are included, along with coffee and/or tea and snacks. Water is included at about 3 liters per day.
What equipment is provided, and what should I pack?
Camping equipment is included, but you need to bring a head lamp/hand torch, a small daily pack, trekking shoes, a trekking jacket, and long pants/trousers.
Is food available for vegetarians?
Yes, a vegetarian option is available if you advise at the time of booking.
Can I go straight to Gili Island after the trek?
Yes. There is a free bonus boat transfer to Gili Island after the trek.