REVIEW · PUERTO NATALES
Trekking Base Torres – Torres del Paine trek from Puerto Natales
Book on Viator →Operated by Howlanders · Bookable on Viator
That first view of the towers is the whole point. This out-and-back day hike from Puerto Natales delivers the famous peaks the park is named for, plus a long, well-supported walking day that’s perfect when you don’t have time for a multi-day trek.
I love how organized it feels from the start: you’re picked up early, outfitted with trekking poles, and guided from the park entrance right to the Base Torres viewpoint. I also like the pacing approach—guides help different fitness levels move together so you don’t end up split up or rushed past the best moments.
One thing to consider: this is a long, demanding hike with a steep moraine and a final push that can feel technical if conditions are harsh. If you’re expecting an easy nature walk, you’ll be disappointed.
In This Review
- Key things that make this trek click
- First light from Puerto Natales: why this pickup matters
- Shuttle ride + Porteria Amarga: stepping into the park properly
- Base Torres is a full-day push: what the hike really feels like
- Stop 1: Puerto Natales departure and the “prep” you shouldn’t skip
- Stop 2: Torres del Paine National Park entrance views
- Stop 3: Ascensio Valley, Lenga forest, and the climb to Base Torres
- Lunch and the lake beach moment: a smart recovery pause
- The descent back to Puerto Natales: keep your energy for the end
- Guides and group size: the underrated reason people rate this so high
- Gear and preparation: what to bring so you feel confident
- Price and value: is $99 a good deal?
- Should you book this Base Torres trek?
- FAQ
- What time does the tour start?
- How long is the trek day?
- Is the park entrance fee included?
- Is lunch included?
- What hiking equipment is included?
- Do I need a headlamp?
- Do I need gaiters?
- What fitness level is recommended?
- How big is the group?
- How difficult is the hike?
Key things that make this trek click
- Early 6:30 am start: you’ll beat the day’s crowds and light up the views when the sky cooperates
- Poles provided, crampons if needed: you don’t have to guess what you’ll require in Patagonia
- Guides keep the group together: smaller groups and guide-to-walker ratios help mixed abilities
- Porteria Amarga entry: you start the day inside Torres del Paine instead of doing a long transfer first
- Ascensio Valley + Lenga Forest: you get forest walking before the steep push to Base Torres
- Beach stop for cooling down: after lunch and photos, there’s a quiet moment by the lake
First light from Puerto Natales: why this pickup matters
Your day begins early, with pickup at your accommodation in the Puerto Natales area. Expect to be picked up between 6:30 and 7:00 am, depending on where you’re staying, and then you’ll head toward Torres del Paine with the rest of your group.
Early starts aren’t just for schedules here. In Patagonia, that extra morning time helps with two big things:
- You spend more of the hike under better conditions (especially wind and trail safety).
- You’re more likely to enjoy the viewpoints without fighting for time, space, or light.
Once you’re assembled, the guide hands out trekking poles and gives you the rundown for the Base Torres trek—what to watch for, how the day typically flows, and where you’ll be spending your energy.
You can also read our reviews of more tours and experiences in Puerto Natales.
Shuttle ride + Porteria Amarga: stepping into the park properly
After about a two-hour shuttle ride, you arrive at the park entrance through Porteria Amarga. This is a quality-of-experience detail that matters more than it sounds: you don’t just roll up and start walking with no context. From the moment you enter, the views start doing their job.
Porteria Amarga is also where the logistics click into place. You’ll have a clear “day plan” now: walk sections with breaks, lunch at the viewpoint area, then a descent and return by shuttle.
One important note for budgeting: park admission isn’t included. So plan for that extra cost on top of the tour price.
Base Torres is a full-day push: what the hike really feels like
This trek is often described as medium difficulty, but the day you’ll do includes long walking time, an out-and-back structure, and a few spots where you really have to commit your attention.
A useful way to think about it:
- It’s long (roughly a 20 km hike overall, around that ballpark depending on pace and conditions).
- It’s vertical enough (you start low near Puerto Natales and climb toward the viewpoints; the provided figures list about 870 m maximum elevation).
- It gets steeper in the key moments (especially the moraine approach and the last section toward the viewpoint).
You’ll also move over different terrain: forest paths, open valley stretches, and the rockier/steeper portions near the viewpoint. If you’re the type who only hikes on flat ground, this might feel like a surprise. If you’ve done decent day hikes before, it’ll feel demanding but fair.
Stop 1: Puerto Natales departure and the “prep” you shouldn’t skip
Even though you’re leaving from Puerto Natales, stop one is really about getting you set up for the hike. Before you ever see the towers up close, you’ll:
- get briefed,
- receive trekking poles,
- and confirm the gear expectations.
I’m glad trekking poles are included because it removes one guesswork item. Poles help your knees on the long descent, and in a steep Patagonia day, they can save your energy for when you need it most.
You still need to bring what the day demands:
- Mountain shoes with good soles
- food and drinks (you’re responsible for lunch)
- a headlamp and gaiters only in winter season (roughly June to September)
If you forget the winter essentials, you’ll feel it fast. If you’re hiking in shoulder seasons, it’s still smart to carry extra layers and a way to keep your feet dry and stable.
Stop 2: Torres del Paine National Park entrance views
Once you’re inside the park, you’ll be staring at big scenery almost immediately. That’s not a marketing line—it’s part of how the day stays enjoyable. The entrance area usually gives you a “now it’s real” moment, and it also sets expectations for the terrain ahead.
From here, the day becomes more about effort management. The guides will keep people moving, but the goal isn’t to blast uphill and hope you like it later. The better groups (and the happiest hikers) treat the first part of the walk as your warm-up for the steep segments later.
Stop 3: Ascensio Valley, Lenga forest, and the climb to Base Torres
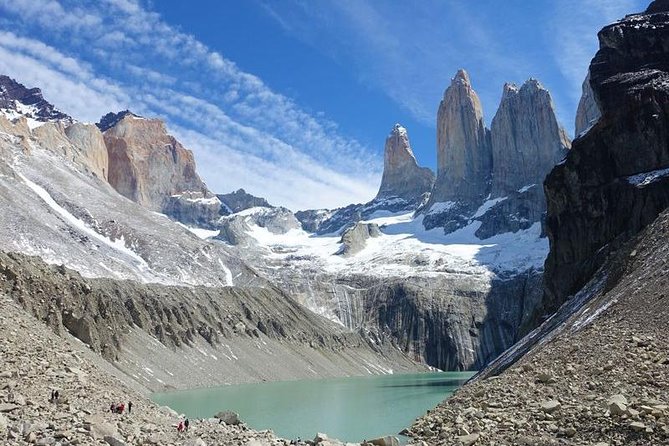
This is the heart of the experience.
Your walk to the Mirador Las Torres (Base Torres viewpoint) takes roughly four hours on the way up, and it’s staged to give you variety before the steep work begins. Here’s what you can expect:
- You cross the Ascensio Valley
- You walk through the Lenga Forest, which is a relief from open wind when conditions are tough
- You’ll see Almirante Nieto Hill from multiple perspectives as you work your way through the route
Then comes the part that turns “nice hike” into “okay, focus.” You’ll climb a glacier moraine—essentially a rocky path with a steep slope. This is where trekking poles earn their keep, and where proper footwear matters most.
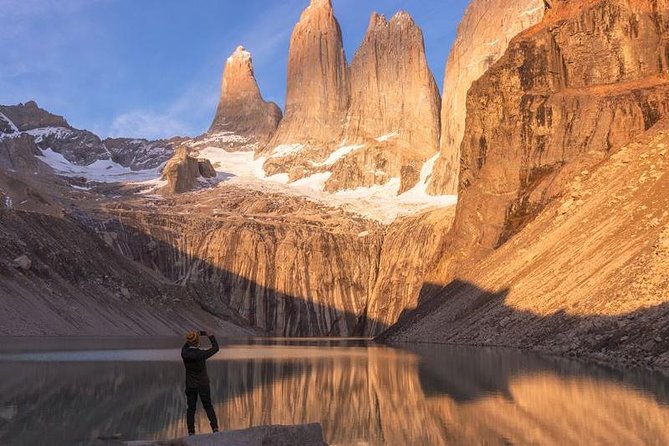
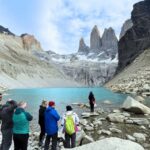
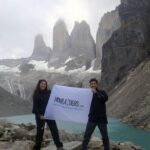
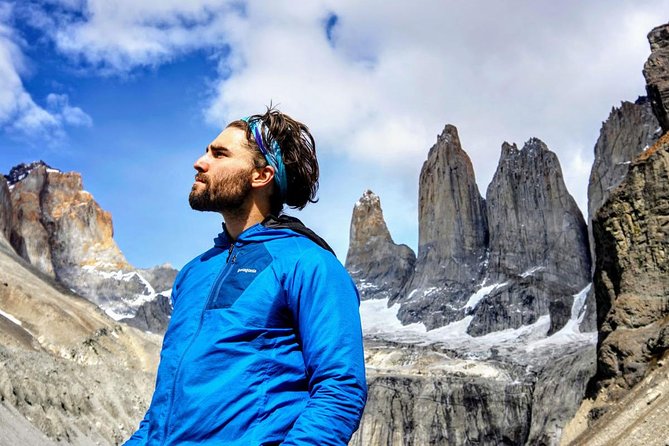
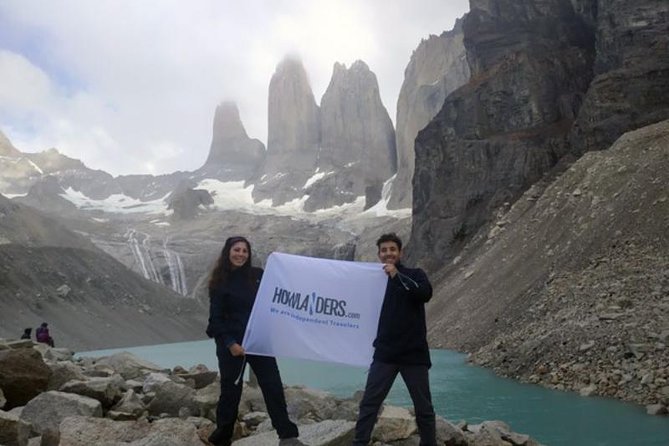
At the viewpoint, the payoff is the name of the park made real. The towers dominate the frame, and the atmosphere feels special even when the weather isn’t perfect.
A small practical tip: the viewpoint time is precious. If you’ve got a camera, plan your shots fast, then spend the rest of your time looking instead of moving.
Lunch and the lake beach moment: a smart recovery pause
After you reach Base Torres, you’ll eat lunch, take pictures, and then start your descent. There’s also a small extra stop that surprised me—in a good way.
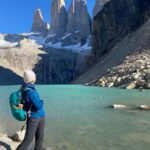
Your group will head down to a small beach formed by the lake, and you can actually touch the water. It’s a simple moment, but it’s a clean way to reset your body after the climb. Your legs will feel it; your brain will be grateful.
Not all hiking days include something like this, and it’s exactly the kind of “small but meaningful” stop that makes a hard trek feel complete instead of just exhausting.
The descent back to Puerto Natales: keep your energy for the end
The return portion is about three hours of descent, and then you’ll take the shuttle bus back to Puerto Natales. The bus typically arrives between 8:00 and 9:00 pm.
This timing matters if you’re planning dinner or future activities. By the time you’re back, you’re done with big decisions. So plan a low-key night.
Also, the descent is where poles help most. Your goal is steady steps, not speed. The guides will manage group flow so you don’t end up alone on a rocky section, and that’s a comfort when you’re tired.
Guides and group size: the underrated reason people rate this so high
The best part of this tour, based on what I’d emphasize to you, is the human side: guides manage pacing and safety for mixed fitness levels.
In winter, groups run smaller (with a guide for every 4 travelers). In summer, groups can be larger, up to around 21 people, with a guide-to-walker approach adjusted for different walking paces (described as about 1 guide for every 6 travelers). In general, the tour is capped at 15 travelers, which is a sweet spot for attention.
You’ll hear different guide names across different departures—people have highlighted guides like Pablo, Matías, Alex, Sebastian, Leo, Claudia, Ramiro, Daniel, and others. What keeps showing up in the good outcomes is pacing that feels fair: faster hikers aren’t destroyed, and slower hikers aren’t left behind.
That’s also why the tour works well if you’re fit but not trained for steep scrambles. One of the common compliments is how guides keep people moving safely, even when conditions shift (wind, rain, or snow can change plans fast in Patagonia). If weather turns serious, the priority becomes safety first, even if it means adjusting what you try to reach.
Gear and preparation: what to bring so you feel confident
This is one of those hikes where “I packed light” can turn into “why does my heel slip?” later.
At minimum, bring:
- Mountain shoes with good soles
- Food and drinks
- A headlamp and gaiters only during winter season (June–September roughly)
What’s handled for you:
- Trekking poles (Black Diamond or similar)
- First aid kit
- Crampons if necessary
If you’re deciding what footwear to wear, pick shoes that grip well on rocky, uneven ground. You don’t want to discover instability on the moraine climb.
Price and value: is $99 a good deal?
At $99 per person, this tour can be good value for the specific problem it solves: you want the famous Base Torres experience without building your own complicated day.
Here’s what you’re getting baked in:
- shuttle transport from Puerto Natales
- guide support with bilingual leadership (and an assistant guide)
- trekking poles
- first aid resources
- crampons if needed
What costs extra:
- the park entrance fee
- lunch (you’re responsible for food)
- winter-only gear like headlamp and gaiters
For me, the value comes from the fact you’re buying structure. On a long, steep day like this, guidance, pacing, and included walking gear often outweigh savings from DIY. You’re paying to reduce stress and raise safety.
That said, if you already have all gear, have strong navigation skills, and you’re hiking with a crew you trust, you might feel the tour cost less “necessary.” But for most visitors, the included poles and professional pacing make this a practical purchase.
Should you book this Base Torres trek?
Book it if:
- you want the iconic Torres del Paine towers in one big day
- you’re ready for a tough hike with real elevation and steep rocky sections
- you’d rather have a guide handle pacing and safety than wing it
- you prefer a small-group feel (attention matters on a long hike)
Skip or rethink if:
- you don’t handle steep, rocky climbs well
- you expect an easy walk with lots of leisurely stops
- you’re missing key winter gear in June–September
If you’re unsure, the best sign to go ahead is this: you’re physically capable of a full day outdoors and you can follow guidance on steep terrain. If that’s you, Base Torres is a standout day.
FAQ
What time does the tour start?
Pickup is scheduled so you’re generally heading out between 6:30 and 7:00 am, with the start time listed as 6:30 am.
How long is the trek day?
The total duration is approximately 10 to 12 hours.
Is the park entrance fee included?
No. Torres del Paine National Park admission is not included.
Is lunch included?
No. Lunch isn’t included, and you’ll need to plan your own food.
What hiking equipment is included?
You’ll be provided trekking poles (Black Diamond or similar). A first aid kit is included, and crampons are provided if necessary.
Do I need a headlamp?
You only need a headlamp in the winter season (roughly June to September).
Do I need gaiters?
Gaiters are mandatory only during the winter season (roughly June to September).
What fitness level is recommended?
Moderate physical fitness is required.
How big is the group?
The tour has a maximum of 15 travelers, with guide-to-traveler ratios that adjust between winter and summer seasons.
How difficult is the hike?
It’s described as medium difficulty, but it’s a long day with demanding sections, including a steep moraine climb on the way to the viewpoint.