REVIEW · MEXICO CITY
From Mexico City: 2-Day Pico de Orizaba Summit Trek
Book on GetYourGuide →Operated by Travesías México · Bookable on GetYourGuide
Pico de Orizaba turns a hike into real mountaineering. This 2-day summit trek pairs professional guides with high-altitude teamwork, starting with an easy-to-follow plan for getting ready for the glacier and ending with sunrise on Mexico’s biggest glacier. What I like most is the way the day-one acclimatization walk and hands-on crampon/ice-axe practice set you up to move safely and confidently. The biggest thing to watch is the altitude and physical demand: this is not a casual walk, and the tour specifically asks for an excellent fitness level and (ideally) prior mountaineering experience.
You also get the practical support side covered. The group stays small (up to 15), and the climbing gear plus safety equipment are included, which matters a lot when cold and nerves are both running the show. One possible drawback for some people is the simple reality of time at high elevation: you’ll need to follow the guide’s pace, focus on layers, and be prepared for a long, hard effort even with expert help.
In This Review
- Key things to know before you go
- Why Pico de Orizaba feels like a mountaineering trip
- Getting to Tlachichuca and arriving at the Piedra Grande hut
- Day 1: acclimatize smart and learn to move on ice
- Day 2: before dawn to glacier sunrise to the top
- Guides, safety gear, and why the small group matters
- Overnight setup at the Piedra Grande hut: simple, functional, worth it
- What to pack (and what matters most at altitude)
- How hard is this trek really?
- Price and value: is $599 a good deal?
- Who should book this summit trek (and who shouldn’t)
- Should you book? My honest call
- FAQ
- Where is the meeting point for the Pico de Orizaba trek?
- What languages are the guides?
- How big is the group?
- What is included in the price?
- What meals are provided?
- Do I need to bring my own crampons or ice axe?
- What should I bring for the cold and altitude?
- Is alcohol included?
- Is the trek refundable if plans change?
Key things to know before you go
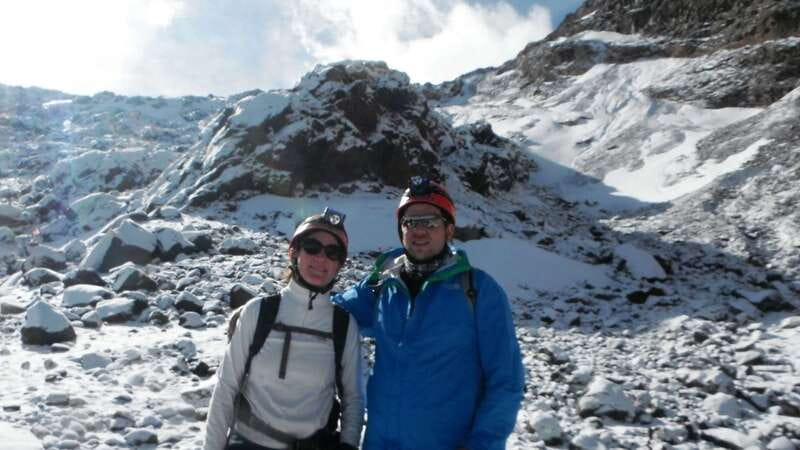
- Highest peak in Mexico (5,700m): You’re aiming for the top, not a viewpoint stop.
- Sunrise on the glacier: The timing is built around being in position before the light hits.
- Training built in: Day one includes crampon and ice-axe practice so you’re not guessing on summit morning.
- Small group scale: Limited to 15 people, which tends to make coaching and safety feel more personal.
- Gear and safety support included: Helmet, head lamp, crampons, ice axe, plus accident insurance.
- Hard physical requirement: Excellent fitness is expected, and some health conditions make this a no-go.
Why Pico de Orizaba feels like a mountaineering trip
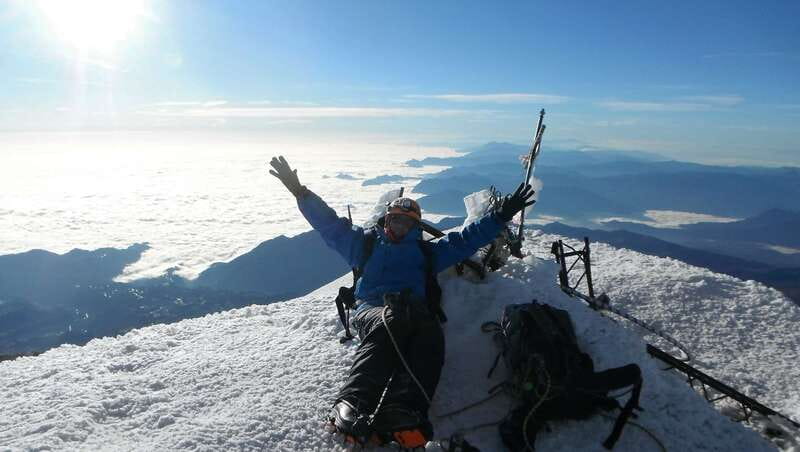
If you’re picturing a “tall hike,” Pico de Orizaba corrects that idea fast—in a good way. The whole experience is structured around glacier travel, which means your feet need to behave on snow and ice, not just on trails. Guides coach your movement, and you use crampons and an ice axe as part of the actual route, not as a last-minute add-on.
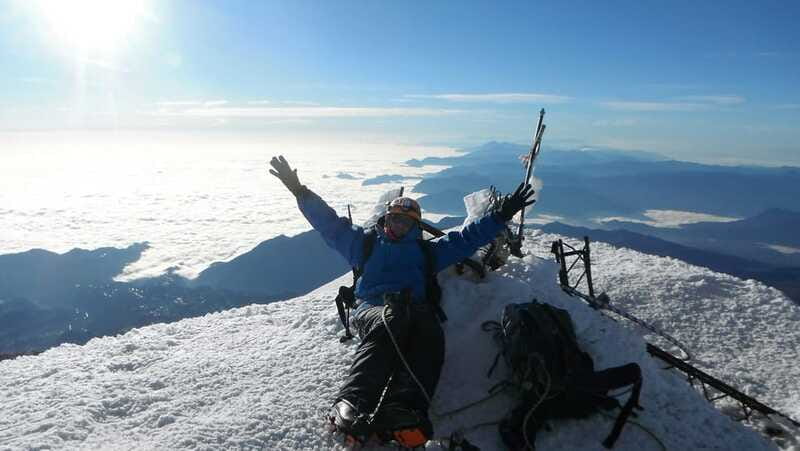
This climb also gives you two major rewards. First is the view payoff: you’re high enough to see wide valleys and cloud levels like you’re reading the map in 3D. Second is the sunrise moment, timed so you can watch the glacier catch the first light. If you like that mix of effort and payoff, this trek hits the sweet spot.
You can also read our reviews of more tours and experiences in Mexico City.
Getting to Tlachichuca and arriving at the Piedra Grande hut
Your tour starts in Mexico City and moves you out to the Puebla region, with transport that includes 4×4 access up the mountain route to the hut area. The first night accommodation is at the Piedra Grande mountain hut, which keeps the climb efficient. Instead of wasting the best weather hours on travel, you’re already staged near where the glacier and summit route make sense.
When you arrive, you don’t just drop bags and call it a day. You’ll do an acclimatization walk and practice using the tools that will keep you safe on summit morning: crampons and an ice axe. That matters because crampons aren’t just “gear.” They change how you step, how you stop, and how you manage balance on icy surfaces.
Dinner and sleep are part of the plan, too. You’ll return to the hut for your evening meal, then get a good night’s rest so you can start before dawn the next day. One review highlighted how comforting the simple hut setup was—especially the Mexican dinner prepared on a camping-style kitchen. That kind of real, practical food support can feel extra valuable when you’re running on cold-air altitude logic.
Day 1: acclimatize smart and learn to move on ice
Day one is about control. You want your body to start adjusting to the altitude, and you want your feet and hands to learn the basics before the real climb starts.
After pickup from Mexico City, the drive shifts the rhythm from city time to mountain time. Once you reach the hut area via 4×4, you’ll take an acclimatization walk. The goal isn’t speed. It’s getting used to breathing harder and walking in colder, thinner air. If you’re the type who wants to push early, this is where you resist that impulse. Your future summit self will thank you.
Next comes the hands-on practice. You’ll learn how to use crampons and your ice axe as you move. Even if you’ve never done it before, the structure helps because you’re learning before you’re tired and before the route becomes steep and exposed. In one experience, a climber who had never used crampons or an ice pick before felt the practice phase was managed in a way that made it doable—especially when the guide adjusted to their comfort level.
You’ll then return to the hut for dinner and prepare for the summit day. This is also when your packing habits matter: bring the layers you actually need, not the layers you hope you’ll need. Cold at elevation can turn your “I’ll be fine” plan into “I should have brought gloves.”
Day 2: before dawn to glacier sunrise to the top
Day two begins early—bright and early before dawn. That timing isn’t just for drama. It’s how you get positioned for the best light and the safest rhythm of climbing. By sunrise, you’re well placed to enjoy panoramic views of the valleys around Pico de Orizaba.
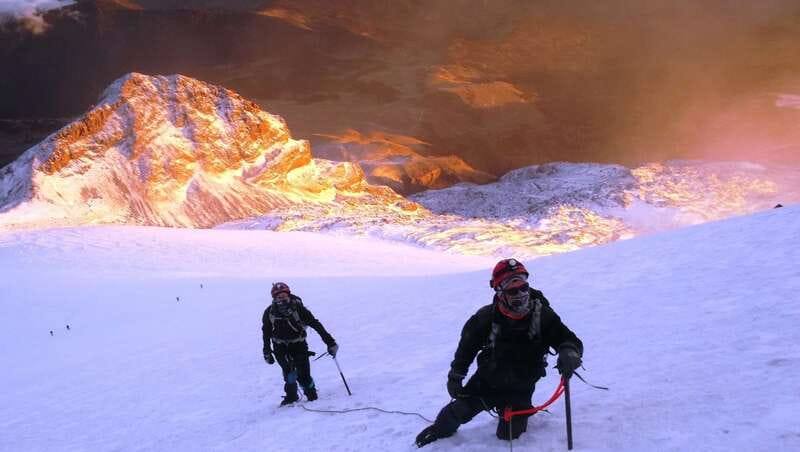
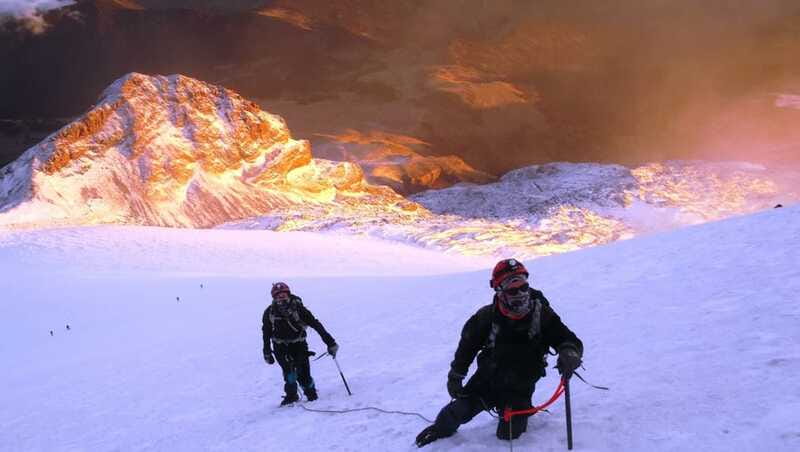
Then comes the moment people remember: the first rays of sun glinting off the glacier. The glacier is often described as the biggest in Mexico, and you see it as the real deal—something that shapes the route and the temperatures, not a postcard backdrop.
From there, you follow the glacier toward the summit at 5,700 meters, the highest peak in Mexico and the third-highest in North America. “Third-highest” is impressive on paper, but what it feels like is harder: you’re working while your body works too, with thinner air demanding steady effort. This is not a place for sprinting or showmanship.
When you reach the summit, you’ll have time to enjoy the views—then you descend back to the hut. Descending is still serious work, even if your brain wants to relax. The same tools that help you go up help you control your steps down.
Once you return to the hut area, transport back to Tlachichuca is waiting for you. You’ll eat a restorative meal and then continue back to Mexico City.
Guides, safety gear, and why the small group matters
The climb is only as good as the safety system behind it. This tour is run by qualified guides with accident insurance and a full set of included safety equipment: helmet, head lamp, crampons, and an ice axe. You’re not stuck trying to figure out gear logistics at the last minute, and that reduces stress when weather and altitude already add plenty on their own.
The small group size (limited to 15) also changes the feel. With fewer people, guides can pay closer attention to footwork, spacing, and pacing. Several reviews singled out guides for being patient, supportive, and very tuned to safety and comfort.
Names you may run into include Alan, Bernardino, and Carlos. One climber described Alan as super supportive and willing to match their pace, making them feel safe and at ease. Another review praised Bernardino’s explanations and the friendly welcome from the command center team. Carlos was noted for exceptional service and solid knowledge that shaped the whole experience from instruction to food.
Also pay attention to the tour’s “not for everyone” list. This isn’t just bureaucracy; it’s a realistic filter for safety on steep, icy terrain at altitude. It’s not suitable for pregnant women, people with haemophilia, people with heart problems, or people with back problems.
Overnight setup at the Piedra Grande hut: simple, functional, worth it
You sleep one night at the mountain hut in Piedra Grande. The hut experience is part of the bargain: you’re paying for access, instruction, and proximity to the glacier route. It’s not a resort. It’s a base that keeps you close to the climb so you can start early and not burn a day on long travel.
Your gear list includes a sleeping bag and a towel, so plan on that kind of practical overnight setup. You’ll also be encouraged to bring change of clothes, which is smart. Cold air soaks into everything, and warming up after the day’s effort is not just comfort—it helps you sleep.
One of the best pieces of “value” here isn’t just gear—it’s the rhythm. You’ll have lunch and dinner on day one, plus breakfast and lunch on day two. Food is timed so you’re fueled for early starts and colder conditions. Alcoholic drinks aren’t included, so if that’s part of your post-hike tradition, you’ll need to plan for it separately.
What to pack (and what matters most at altitude)
Your packing list is straightforward, but it’s worth treating it like an altitude climbing checklist, not a generic hike list:
- Layers: thermal clothing, warm clothing, hat, gloves
- Weather protection: rain gear (because cold + wet is a mood-killer)
- Eye and skin protection: sunscreen, sunglasses
- Footwear and carrying: hiking shoes, daypack
- Hygiene and comfort: toiletries, change of clothes
- Sleep and basics: sleeping bag, towel
Since head lamp and the climbing gear are included, you don’t have to rent or hunt for those at the last second. Still, bring a clean mindset. The best packers don’t pack “everything.” They pack warmth, dryness, and comfort that you can access fast.
A small tip: make sure your gloves and warm layer are easy to reach. On summit mornings, you don’t want to play luggage archaeology in sub-freezing air.
How hard is this trek really?
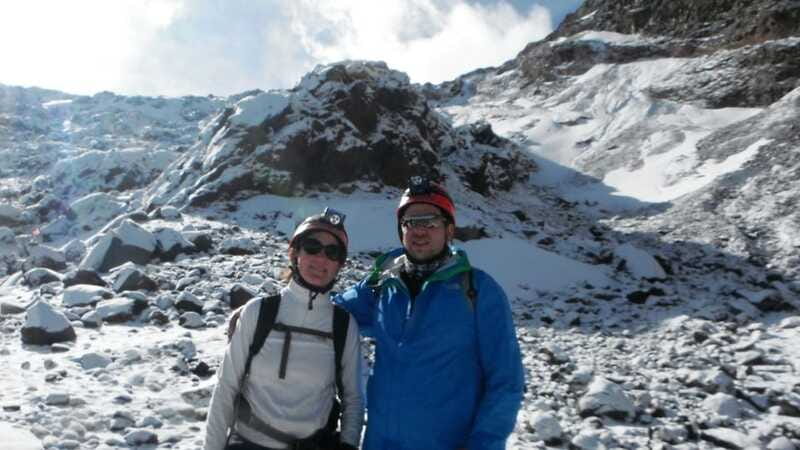
This is hard. The tour asks for excellent physical condition and recommends previous mountaineering experience. That’s because you’re dealing with glacier travel, not just steep hiking.
Still, difficulty doesn’t automatically mean you must be elite. One review described a climber who had never used crampons and an ice axe before, and said it wasn’t an issue thanks to the guide support and coaching. Another review also mentioned that the ascent time can vary: one climb took about 9 hours with a supportive guide, while larger groups can take up to around 15 hours due to the constant hard terrain.
So here’s the practical takeaway for you: train your body for long, hard effort, and if you’re new to ice gear, don’t improvise. This trek is built to teach you, but you need to show up ready to work.
Price and value: is $599 a good deal?
At $599 per person, this is not a budget day hike. You’re paying for a full system: qualified guides, accident insurance, included safety gear, entrance fees, transport, meals across both days, and one night accommodation at the hut—plus the instruction built into the route.
In plain terms, this price is for two things you can’t DIY safely at altitude: proper glacier tool training and the safety structure that goes with it. If you already have your gear and ice skills, a solo attempt might look cheaper on paper. But cold, thin air, and glacier travel punish mistakes quickly.
For me, the value question comes down to your goal. If you want a guided summit attempt with coaching and equipment ready to go, the price starts making sense. If you’re only looking for a light scenic walk and you want zero altitude stress, this one isn’t the fit.
Who should book this summit trek (and who shouldn’t)
This is a good match if you want a serious high-altitude experience and you’re willing to prepare physically. You’ll also love it if you enjoy learning gear skills rather than just being led along a path.
You should think twice or skip it if you fall into the tour’s not-suitable categories: pregnant women, people with haemophilia, people with heart problems, or people with back problems. These conditions need specialist medical guidance, and glacier environments add risk fast.
Should you book? My honest call
Book it if you check these boxes:
- You’re in excellent physical condition and ready for a hard effort.
- You’re excited to learn glacier movement with crampons and an ice axe.
- You want a small-group climb with serious safety gear and qualified guides.
- The idea of sunrise on Mexico’s biggest glacier is exactly your kind of motivation.
Skip it if:
- You’re expecting a casual trek or a relaxed pace.
- You don’t feel comfortable committing to acclimatization and careful tool practice.
- Any of the health conditions listed are relevant for you.
If you’re on the fence, treat it like a training goal. Day one gives you the instruction. Day two gives you the summit payoff.
FAQ
Where is the meeting point for the Pico de Orizaba trek?
Meet at the corner of Vicente Suarez and Michoacan at the benches in front of the market.
What languages are the guides?
The live tour guide offers English and Spanish.
How big is the group?
This is a small group limited to 15 participants.
What is included in the price?
Included are lunch and dinner on day one, breakfast and lunch on day two, accident insurance, qualified guides, transport, safety equipment, entrance fees, head lamp, helmet, crampons, ice axe, and one night accommodation.
What meals are provided?
You get lunch and dinner on the first day, then breakfast and lunch on the second day.
Do I need to bring my own crampons or ice axe?
No. Crampons and an ice axe are included, along with helmet and a head lamp.
What should I bring for the cold and altitude?
Bring a sleeping bag and towel, plus sunscreen, hiking shoes, sunglasses, thermal and warm clothing, hat, daypack, gloves, toiletries, change of clothes, and rain gear.
Is alcohol included?
No. Alcoholic drinks are not included.
Is the trek refundable if plans change?
Yes. You can cancel up to 24 hours in advance for a full refund.