REVIEW · KILIMANJARO
6 Days Machame Route Kilimanjaro Trekking
Book on Viator →Operated by Mafie Adventures · Bookable on Viator
Kilimanjaro doesn’t do subtle, and the Machame Route is one of the most engaging ways up. What I like most is the route’s mix of habitats and views, plus the way the team really runs the trek end-to-end, with coordinators like Erastus and guides such as Matthew, Joshua, Oliver, and Benjamin showing up in guest reports again and again. One thing to consider: the 6-day timing can feel tight if you hike slowly, since one review specifically recommended 7 days for slower walkers.
You also get a “real plan,” not just a generic hike. You’ll spend a lot of time off the beaten path through rain forest, moorland, semi-desert, and alpine desert, then do a midnight-to-dawn push for the summit, aiming for sunrise at Stella Point (weather permitting). The big drawback is the obvious one: summit day is the most mentally and physically challenging stretch, with heavy scree and an early start.
In This Review
- Key Highlights at a Glance
- Machame Route: Why This 6-Day Plan Works for So Many People
- Price and What’s Included: Does $1,930.42 Feel Worth It?
- Day 1: Moshi to Machame Camp via Rain Forest (Muddy Starts Included)
- Day 2: Shira Camp on Moorland Ridges and Rocky Transitions
- Day 3: Lava Tower (Shark’s Tooth), Arrow Glacier, and Barranco Hut
- Day 4: Barranco Wall to Barafu Hut (South Circuit Views)
- Day 5: Summit Night from Midnight to Stella Point Sunrise
- Day 6: The Descent to Mweka Gate and Summit Certificates
- Guides and Support: Why This Trek Gets Praised So Often
- What to Pack for This Route (Especially for Mud, Scree, and Cold)
- Who Should Book This 6-Day Machame Trek?
- Should You Book This Machame Route with Mafie Adventures?
- FAQ
- How long is the Machame Route trekking program?
- Where does the trek start and end?
- Are meals included?
- What is included in the price?
- What is not included?
- Are park admission tickets included?
- What kind of habitats and altitude range will I hike through?
- When does summit day start?
- Is pickup offered?
- Is the tour refundable if I cancel?
Key Highlights at a Glance
- A route choice backed by most climbers: Machame is commonly picked for views and variety.
- Habitat variety across 6 days: rain forest to arctic conditions near the summit.
- Acclimatization built into the profile: Shira/Lava Tower day and the Barranco/Hut sections matter.
- Sunrise at Stella Point: a classic, high-drama moment if weather cooperates.
- Team support that gets praised often: English-speaking guides and strong porter coordination show up repeatedly in reviews.
Machame Route: Why This 6-Day Plan Works for So Many People
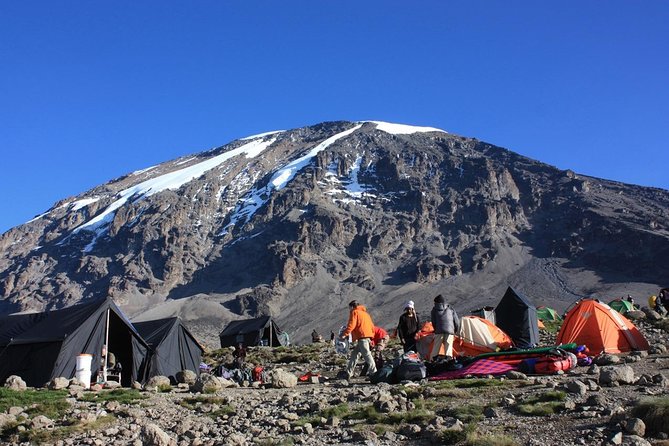
The Machame Route earns its popularity because it’s not just about reaching the top. You get a moving “story” of the mountain as you climb: damp forest, then cooler open ridges, then drier zones that start to look more like a high-altitude desert. It’s no surprise many seasoned climbers prefer it, and it’s also seen as a practical choice since it’s one of the cheaper options that still delivers a strong itinerary.
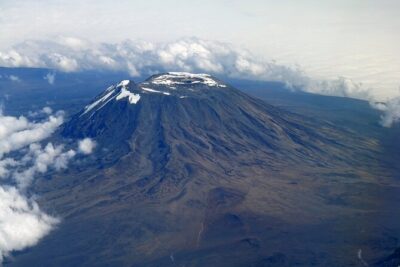
In plain terms, Machame is for people who want the experience to feel like more than a straight line upward. You’re walking through different environments and you’ll get changing summit angles too, including views of both Mawenzi and Kibo from higher camps. And if you’re hoping for a solid chance at the summit without going up forever, this 6-day structure is often the sweet spot.
Just keep one reality check in mind: higher altitude turns “normal hiking” into slow, careful hiking. If you move at a slower pace, you may find that 6 days can feel compressed, and one review suggested 7 days for slower hikers.
Price and What’s Included: Does $1,930.42 Feel Worth It?
At $1,930.42 per person, this trek is priced like a “fully supported” Kilimanjaro climb, not a barebones DIY plan. The big value items are the things that are hard to source and manage yourself: camping equipment (including a mess tent and mattresses), cooking equipment, meals (5 breakfasts, 5 lunches, 5 dinners), accommodation, porterage, rescue fees, taxes/VAT, and parking fees.
You’re also not left to figure out the logistics while you’re exhausted at altitude. The tour lists a professional driver/guide and pickup offered, plus a mobile ticket option. For many people, that means fewer surprises on the day you’re starting and fewer decisions mid-trek.
What’s not included is equally important for budgeting. You’ll still need climbing gear and a sleeping bag (both available for rent), plus you’ll cover personal items, travel insurance, and tips. International flights and accommodation before/after the trek are also on you. In other words, the price is a lot, but it’s paying for infrastructure plus real support.
Day 1: Moshi to Machame Camp via Rain Forest (Muddy Starts Included)
You’ll drive about 50 minutes from Moshi to the Kilimanjaro National Park gate. That short intro ride matters because it gets you moving toward the lower slopes and through the area around Machame village before the hiking begins.
Then you hit the rain forest. The trail climbs from roughly 5,400ft to 9,400ft over about 11 km, and it’s listed at 5–7 hours. Expect winding trails up a ridge, and yes: lower sections can be muddy and slippery. That’s where the practical stuff comes in. Gaiters and trekking poles are a smart call on day one, not a fancy accessory you wish you’d brought later.
A benefit of starting in forest is that you won’t feel like you’re instantly in the “extreme” zone. The early day is challenging enough to set your rhythm, but it’s not the arctic grind yet. You end at Machame Camp, where the mountain starts to feel real.
Day 2: Shira Camp on Moorland Ridges and Rocky Transitions
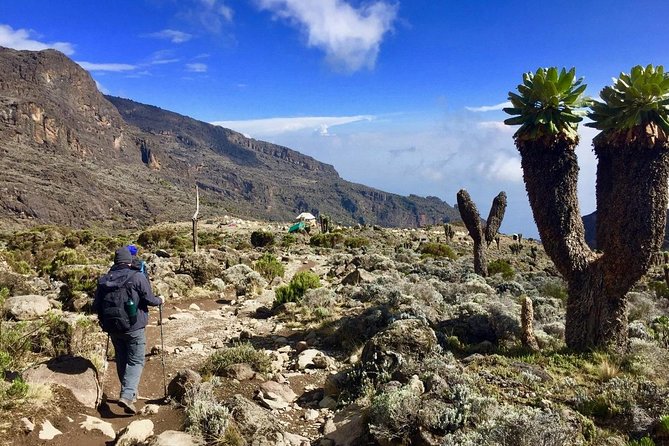
Day two moves you into a different kind of climbing: from 9,400ft to 12,500ft over about 5 km and roughly 4–6 hours. The habitat shifts to moorland, and the terrain becomes more exposed.
You leave the rain forest glades and climb on an ascending path, crossing a little valley and then walking along a steep rocky ridge covered with heather. The route then turns west into a river gorge. This is one of those days where your legs keep working but the “type” of work changes—you’re more on rock and open ground, so pacing and footing really matter.
You finish at Shira campsite and you’ll have rest, dinner, and overnight there. This day sets up your acclimatization for what comes next, so don’t treat it like a race. The mountain punishes early overconfidence.
Day 3: Lava Tower (Shark’s Tooth), Arrow Glacier, and Barranco Hut
This is the day where Machame starts to feel like a real expedition. You climb from about 12,500ft to 13,000ft (listed distance 10 km, 6–8 hours) through semi-desert conditions.
From the Shira Plateau, you continue east up a ridge. You pass a junction toward the peak of Kibo and then head southeast toward Lava Tower, nicknamed the Shark’s Tooth. That name isn’t just for fun—this section is visually striking and it signals you’re moving deeper into the higher, drier zones.
After Lava Tower, you reach another junction to go up to the Arrow Glacier at around 16,000ft, then you descend to Barranco Hut at 13,000ft. The day is described as especially important for acclimatization even though you end near the same elevation you started. That profile is useful: your body gets altitude stress, then you recover by coming back down slightly.
This is also one of your mental check-in points. The mountain is showing you what it will ask later, and you’ll be glad your team keeps you on pace rather than letting you burn out.
Day 4: Barranco Wall to Barafu Hut (South Circuit Views)
Day four rises to 13,000ft to 15,000ft over 9 km and about 8–10 hours in alpine desert. Expect long climbs and steep sections, especially as you pass the Barranco Wall.
You start by continuing from Barranco on a steep ridge. Then you head toward Karanga Valley campsite, and from there you connect with the Mweka Trail junction. The route then continues up to Barafu Hut, where you’ll camp and prepare for summit night.
This is where the South Circuit angle becomes part of the experience. You’ve completed the South Circuit section, and from Barafu Hut you get views of Mawenzi and Kibo from a position that’s often described as rewarding for the effort. It’s also a practical moment: you’re not just staring at a view—you’re getting yourself ready for the next day, when time is the biggest constraint.
The vibe here matters. If your pacing has been smart earlier, you’ll arrive steadier. If you’ve rushed, you might feel it now.
Day 5: Summit Night from Midnight to Stella Point Sunrise
This is the big one. You’ll start very early, between midnight and 2am, and push from roughly 15,300ft up to 19,345ft, then descend to about 10,000ft. The day is listed as 5 km ascent / 12 km descent, with 7–8 hours for ascent and 4–6 hours for descent.
You ascend between the Rebmann and Ratzel glaciers heading in a northwesterly direction. This section is described as the most mentally and physically challenging portion of the trek, largely because you’re climbing heavy scree toward the crater rim.
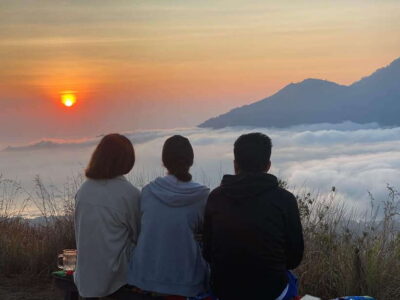
Your key early stop is Stella Point at about 18,600ft. Here you rest briefly and—weather permitting—you’re rewarded with one of the most intense sunrise moments you’ll ever see on a mountain. Then you continue on toward the summit before turning back down.
What I like about the way this trek is structured is that it gives you a concrete landmark to aim for—Stella Point—rather than making summit night feel like an endless foggy ordeal. Still, don’t underestimate it. If you’ve never done high-altitude night hiking, your body may feel awkward at first.
Then comes the descent: you’ll go down toward 10,000ft, which can be faster on paper than it feels in your knees.
Day 6: The Descent to Mweka Gate and Summit Certificates
Day six is a finish line, but it’s not a stroll. You descend from around 10,000ft to 5,400ft over about 10 km and roughly 3–4 hours, returning into rain forest habitat.
You’ll continue down to the Mweka Park Gate to receive your summit certificates. It’s a satisfying ritual moment after the hardest hours of your life. Lower down, the conditions can be wet and muddy, and the same advice from day one returns: gaiters and trekking poles help.
Clothing-wise, this day is more forgiving. Shorts and t-shirts will likely be plenty at lower elevations, but keep rain gear and warmer layers nearby in case the weather shifts.
Guides and Support: Why This Trek Gets Praised So Often
The reviews focus on one theme: the team. Guests repeatedly describe English-speaking guides who communicate clearly, plus porters who do an excellent job, along with food and facilities that stay up to standard.
I especially like the fact that the coordinators and guides show up by name in multiple accounts. Erastus is mentioned as coordinating everything perfectly, and lead guides like Matthew and Joshua are credited with helping people reach the summit. Other names come up too—Oliver and Benjamin get highlighted, with Benjamin described as very supportive and practical on summit help.
That kind of support matters on Kilimanjaro because your pace and comfort depend on constant small decisions: where you stop, how you manage effort, how you handle altitude stress, and whether you’re set up with the right rhythm. When communication is strong, you’re less likely to guess what’s happening and more likely to focus on moving.
Food gets mentioned as well. One review called out great food all the way, and another said facilities and food were all up to standard. On trek, meals aren’t a “nice extra.” They’re fuel for acclimatization and for summit night.
What to Pack for This Route (Especially for Mud, Scree, and Cold)
The itinerary hints at the weather reality even without fancy promises. You’ll move from rain forest to moorland, then to semi-desert and alpine desert, and summit night gets described as arctic conditions.
From the provided notes, here’s what stands out:
- Gaiters and trekking poles: useful for muddy, slippery sections at lower elevations.
- Rain gear: lower parts can be wet and muddy on the descent.
- Warmer clothing: keep it handy even if shorts and t-shirts work at lower elevations.
- Climbing gear + sleeping bag: listed as available for rent, so plan accordingly.
- Bath towels: not included, so either rent or bring your own.
One more practical angle: if you’re carrying your own items, the smoother your setup, the less you’ll fight your pack on steep sections. And if your legs tend to get sore easily, poles can save you a lot of complaining on the way down.
Who Should Book This 6-Day Machame Trek?
This tour is best for people who want a well-known Kilimanjaro route with habitat variety and classic summit-night structure. If you like having a clear itinerary and you prefer strong guidance and porter support, you’ll likely feel comfortable with the setup.
It’s also a good fit for people who can handle early wake-ups and long hiking days. Day five starts between midnight and 2am, and the ascent is described as extremely challenging. If you know you struggle at night hikes or with heavy scree, you’ll want to train and plan carefully.
Because it’s described as a private tour/activity where only your group participates, it can suit people who value a more personal pace. Just note one caution from reviews: if you hike slowly, you might want to consider a 7-day version rather than forcing your body into a tight 6-day schedule.
Should You Book This Machame Route with Mafie Adventures?
I’d consider booking if you want:
- a Machame Route itinerary with real environmental variety
- strong team support and English communication (names like Erastus, Matthew, Joshua, Oliver, and Benjamin appear in reviews)
- camping, meals, porters, and key fees handled for you
- a summit plan that aims for Stella Point sunrise (weather permitting)
I’d think twice if:
- you move slowly and worry a 6-day timetable might feel rushed
- you’re not ready for summit night being the hardest part of the trek
- you’re hoping to handle major gear and sleeping setup yourself (climbing gear and sleeping bag are available for rent, but they aren’t included)
If you train, bring the right basics (especially poles/gaiters and rain protection), and follow your guide’s pacing, this is the kind of Kilimanjaro experience that can feel both structured and unforgettable.
FAQ
How long is the Machame Route trekking program?
It’s listed as 6 days (approx.).
Where does the trek start and end?
The meeting point is Kilimanjaro International Airport, and the activity ends back at the meeting point.
Are meals included?
Yes. Breakfast is included 5 times, lunch is included 5 times, and dinner is included 5 times.
What is included in the price?
Included items cover camping equipment (mess tent, mattress, and cooking equipment), parking fees, rescue fees, all accommodation, all taxes/VAT, a professional driver/guide, porterage, and meals.
What is not included?
Not included: climbing gear (available for rent), sleeping bag (available for rent), bath towels, personal items (souvenirs, travel insurance, visa fees, etc.), international flights, accommodation before and after the tour, government imposed increases of taxes/fees, and tips.
Are park admission tickets included?
The itinerary notes admission ticket as free for each day.
What kind of habitats and altitude range will I hike through?
The route runs through rain forest, moorland, semi-desert, alpine desert, and arctic conditions, with listed elevations starting around 5,400ft and going up to about 19,345ft near the summit.
When does summit day start?
You start very early, between midnight and 2am, for the summit push.
Is pickup offered?
Yes, pickup is offered, and the meeting area is near public transportation.
Is the tour refundable if I cancel?
No. It’s non-refundable and cannot be changed for any reason.