REVIEW · YAMAGATA
Yamagata: Icefall Ice Monster Snow Trekking with Local Guide
Book on GetYourGuide →Operated by YAMAGATA EXPERIENCE · Bookable on GetYourGuide
Zao’s icefall walk feels like stepping into another world. I love how the route leads you into the white quiet of Senninzawa Ice Garden after you drop off the lift at Zao Liza World Ski Resort. I also like the fact that you’re not just sightseeing—you’re safely moving with light crampons, snowshoes, and poles on real winter terrain. One thing to consider: this is not a casual stroll. The tour is for people with winter trekking experience and it includes steep up-and-down sections.
In practice, the 5 hours feels full-on. You’ll hike downhill to the ice, eat lunch with hot water you prepare yourself, then come back up and switch footwear for the ride back down. A good chunk of the fun is physical: sliding a little on your butt on snowy slopes is basically built into the experience.
If you’re traveling with limited fitness, little cold-weather experience, or you’re not dressed for proper snow travel, the guide may refuse participation. You’ll get the best value when you show up ready to move for more than four hours.
In This Review
- Key points before you go
- Hyobaku icefall in Zao: the ice-monster feeling is real
- The 5-hour snow trekking route: downhill, ice garden, then a steep comeback
- Gear check: what’s provided (and what you still need)
- Lunch at the icefall: hot water, cold air, and serious views
- The return with snowshoes: from steep climb to fluffy new snow
- English-speaking local guide and a small group that actually helps
- Weather reality: conditions can be tough, and the guides plan for it
- Price and value: what $129 covers, and why it’s not just a guide fee
- Who this snow trek is perfect for (and who should skip)
- Packing list that keeps you comfortable on icy slopes
- Should you book the Hyobaku icefall snow trek?
Key points before you go
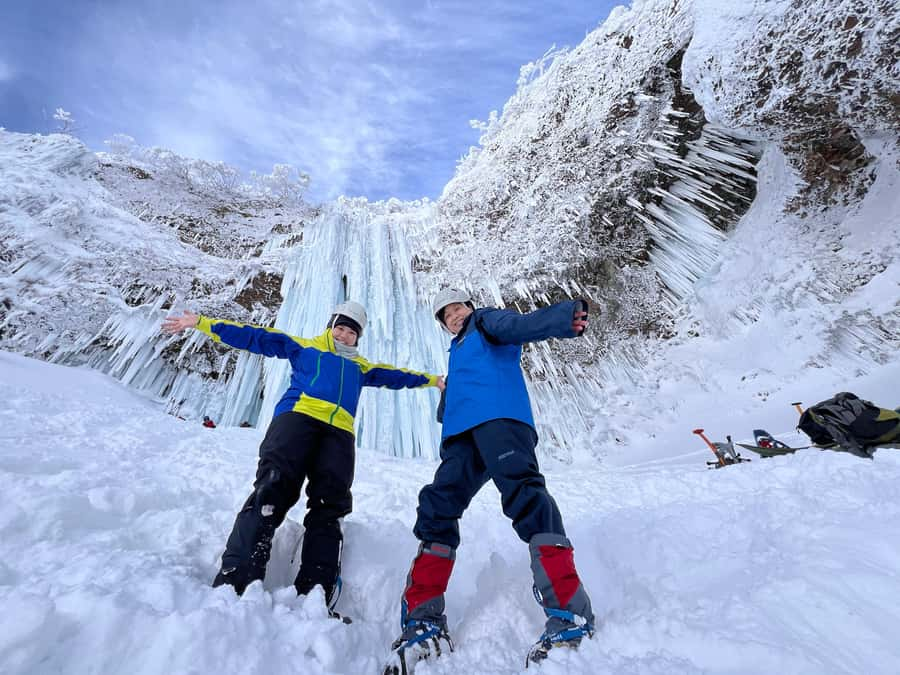
- Hyobaku (icefall): Frozen waterfall views with that eerie ice-monster vibe
- Small group size: Limited to 5 participants, so the guide can actually watch your footing
- Real traction gear: You’ll use light crampons, snowshoes, poles, and a helmet
- Lunch with hot water: You can warm up with instant noodles or whatever you bring
- Guide-run photos: The guide takes pictures and shares the data the same day
- Tent-type portable toilet: Useful in a place where you can’t just walk back to facilities
Hyobaku icefall in Zao: the ice-monster feeling is real
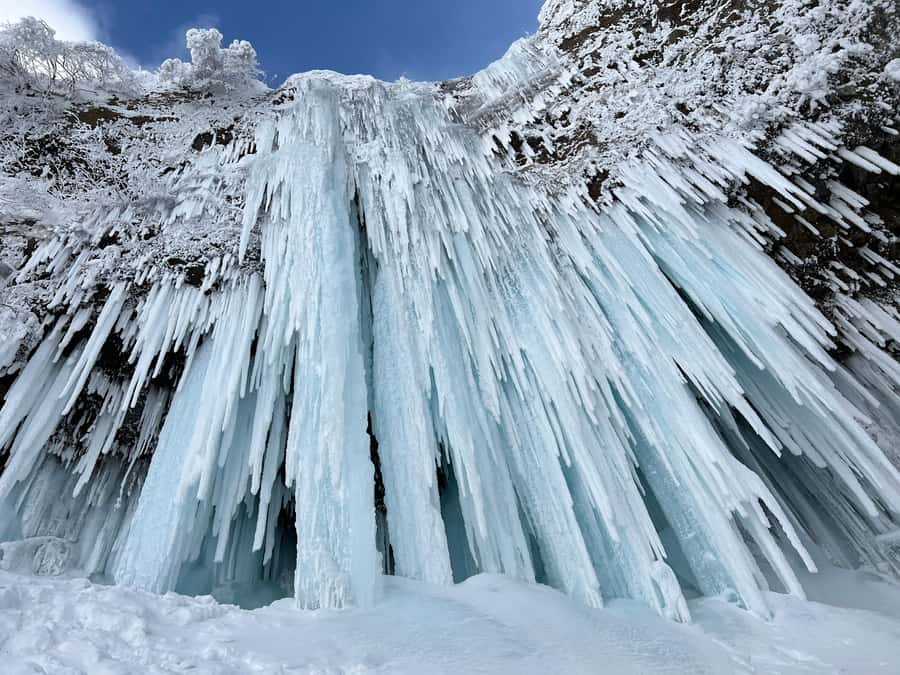
This snow trekking tour targets one of the most dramatic winter scenes in the Zao area: the icefall called Hyobaku. The idea is simple, but the effect is not. You start from the ski resort lift area, then move downhill until the terrain turns into a frozen waterfall zone that looks otherworldly under snow.
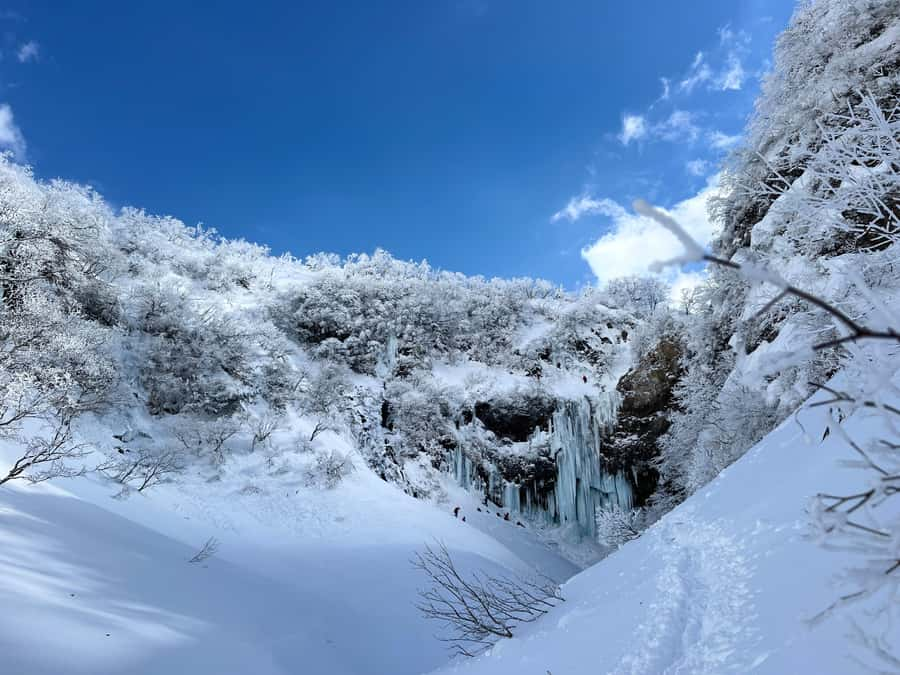
When you reach the area around Senninzawa Ice Garden, you’re not just seeing ice—you’re walking through it. The frost-covered waterfall and icy formations create that clean, bright “no one has walked here” feeling, the kind you only get when snow is thick and undisturbed.
That’s also why this tour is worth the effort. Instead of viewing ice from behind glass, you’re there on foot, in winter air, with the guide controlling the route and gear so you can focus on the views.
The 5-hour snow trekking route: downhill, ice garden, then a steep comeback
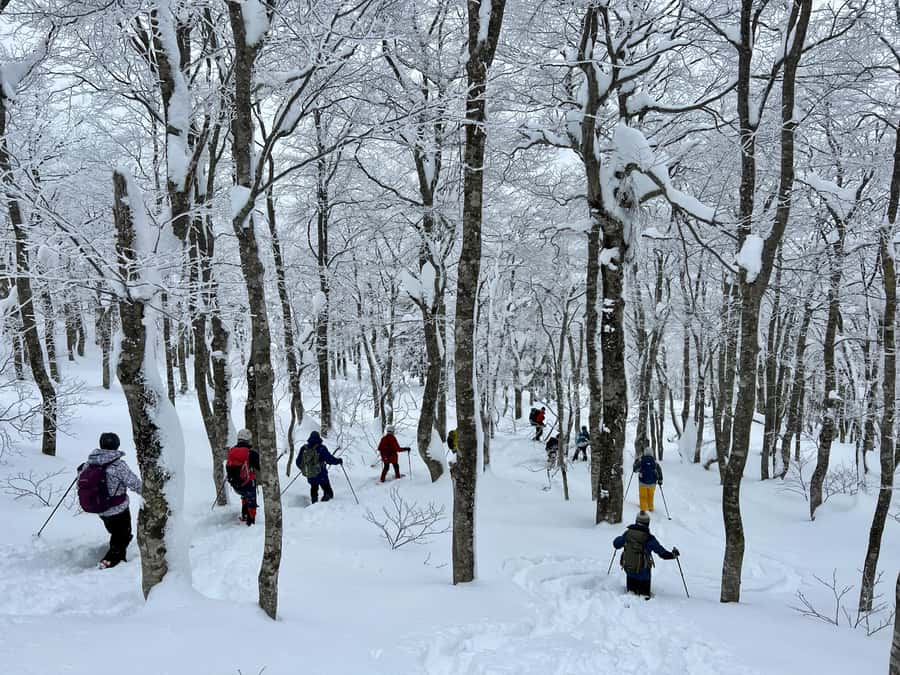
The timing is built around one main flow: get to the ice zone by moving downhill first, spend real time there, then return by climbing back up.
From the end of the lift at Zao Liza World Ski Resort, you’ll head downhill toward the frozen waterfall. This matters because it sets the pace and the mental shift. In the beginning, you’re adjusting to winter footing. Once you reach the ice trek section, everything becomes slower and more deliberate.
After you put on the light crampons, the walk to Senninzawa Ice Garden takes about an hour. Expect changes in slope and footing, and plan to keep your legs working. Even though the time sounds short on paper, you’re on snow traction gear and you’ll likely slow down when the ground gets uneven.
Then comes the best reward window: you arrive, slow down, and eat lunch while admiring the frost-covered waterfall. After lunch, the route flips. You climb back up a steep slope, then change into snowshoes for the return downhill section, including the option to walk down to the ski resort without taking the lift.
That final part is where the tour turns playful. The route can be steep, but with snowshoes and enough space, you’ll often find yourself moving faster than you expect—sometimes even doing a controlled butt-slide when the snow makes it tempting.
Gear check: what’s provided (and what you still need)
This tour takes the stress out of winter gear. You’ll be provided with essential equipment: snowshoes, poles, light crampons, a helmet, and a beacon. On top of that, there’s insurance included, plus the lift fee and tax are covered in the price.
What does that mean for you? It means you can travel lighter and spend your time on the actual experience instead of hunting for rental crampons in a new town. It also means the guide can match your gear to the conditions as you go, which is a big deal when the ice is slick and the snow is inconsistent.
You still need to bring your own winter basics. Plan on bringing sunglasses, a hat, gloves, snow clothing, warm shoes, and a daypack. If you have trekking gear, bring it. They’re also expecting you to carry a backpack, since the route includes time walking under your own power for more than four hours.
One small but smart tip: bring something to make lunch warmer. The tour provides hot water, so instant noodles are an easy win if you don’t want to eat cold food in blowing wind.
Lunch at the icefall: hot water, cold air, and serious views
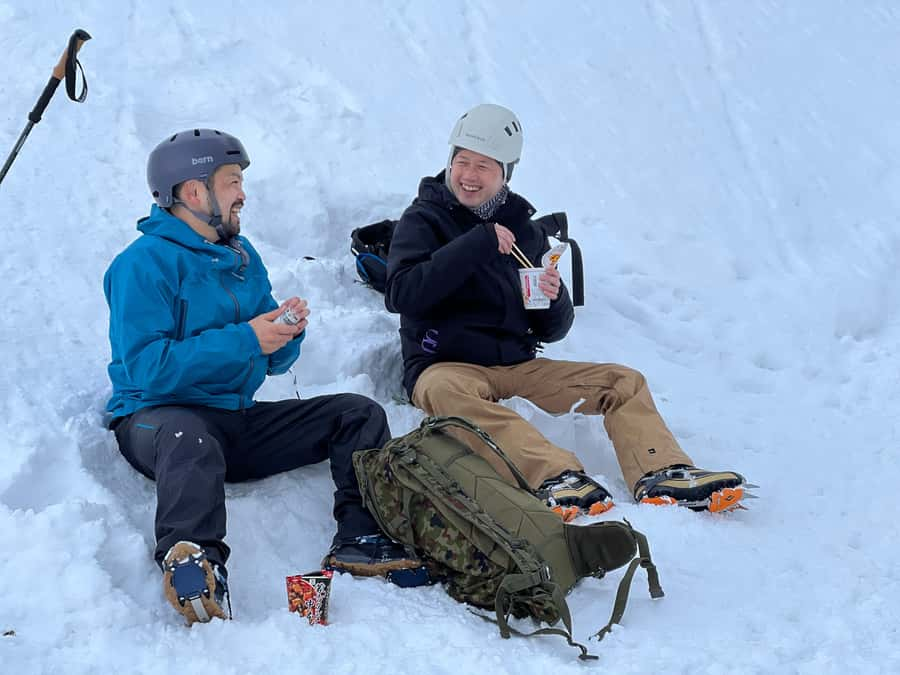
Lunch is served after you reach the ice area—timed so you get time to look before you warm up. The guide provides hot water, and you prepare your meal yourself. That’s practical and it keeps the lunch experience flexible based on what you bring.
You’ll likely be sitting or standing near the frozen waterfall while the winter air does its work. That’s why hot water matters. Even if your meal is simple, a warm cup can reset your body quickly when you’ve been moving through snow.
If you want a smoother lunch break, bring quick-to-make food (instant noodles are specifically a good fit) and a warm layer you can put on right away. The tour includes the hot water, but your comfort still depends on how you dress.
The return with snowshoes: from steep climb to fluffy new snow
Coming back is the part people underestimate. After lunch, you climb back up a steep slope. That climb is short compared to the full tour time, but it’s real, and it’s exactly where stamina and balance show up.
Then the tour shifts gear style. You change into snowshoes and walk on fluffy new snow. This is different from the crampon section. With snowshoes, you’re floating more, and the route feels less technical—but it can still be steep.
This is also where the fun reputation makes sense. When snow texture is right, you’ll have room to experiment with walking and sliding a bit. It’s not a theme park ride. You’ll still be careful. But the guide’s pacing makes room for that almost childlike joy of snow underfoot.
And yes, you can often make it back toward the ski resort without using the lift, depending on the day’s conditions. That keeps the route feeling like one continuous trek instead of a series of disconnected photo stops.
English-speaking local guide and a small group that actually helps
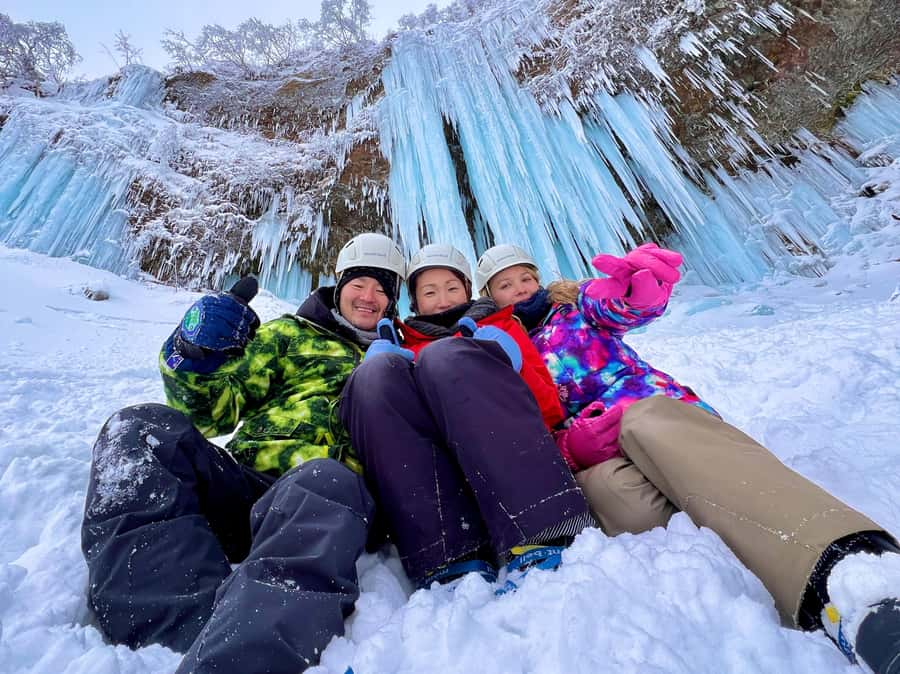
A big part of why this feels fun instead of stressful is the guide. You get an experienced local outdoor guide guiding you in English (and Japanese is available too). In winter trekking, communication matters. You want clear instructions for when to put on gear, how to step, and what to watch for on ice.
The group is small—limited to 5 participants. That size changes the vibe. You’re not stuck behind a crowd, and the guide can spot footing issues early. It also makes it easier to ask questions if you’re curious about the ice shapes or the route.
Two reviews highlight this kind of guidance and attitude. Pamela (Mexico) praised the guides as professional, kind, joyful, and helpful, and said the team kept the experience fun even with hard weather. Takashi (Japan) also noted that even when conditions weren’t ideal, everyone shared a good time.
One practical bonus: the guide takes photos during the tour and gives you the data for free on the day. That’s helpful because winter light and movement can make it hard to capture your group cleanly.
Weather reality: conditions can be tough, and the guides plan for it
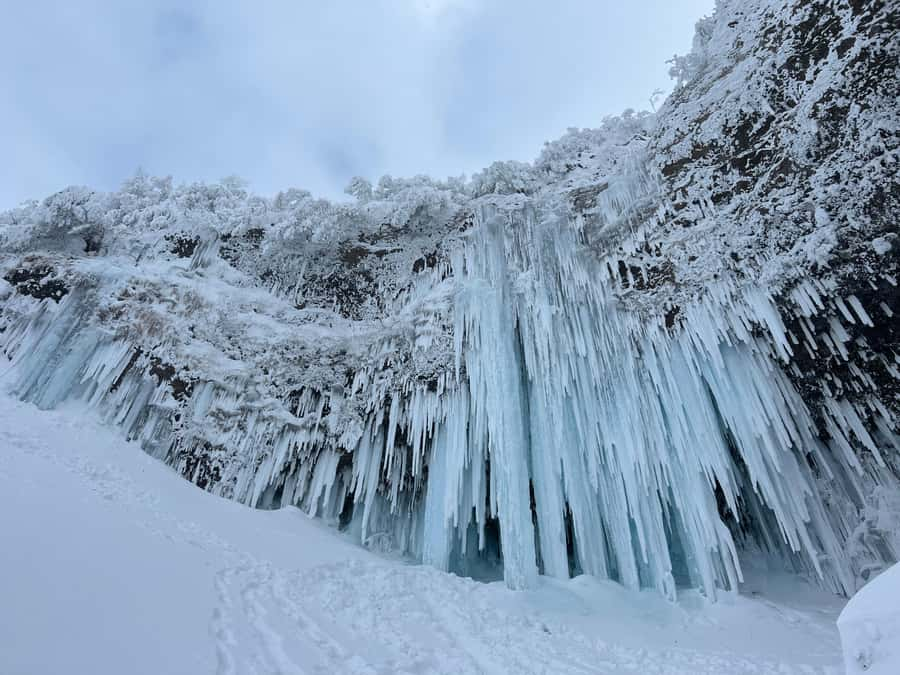
This is winter trekking in the mountains of northern Honshu. Weather can be messy, and snow can change minute to minute. The good news is that the experience is designed for actual winter conditions, not fair-weather hiking.
Pamela specifically mentioned having fun even with hard weather, which tells you the guides are prepared to keep the route enjoyable and safe. But remember: you still have to show up properly dressed. If you arrive in the wrong clothing or without the right setup, you can be refused entry.
So your best “weather strategy” is boring and effective: dress for cold wind, wear warm layers you can adjust, and keep gloves where you can actually use them. Sunglasses are included in the recommended kit for a reason—bright snow reflects light hard.
Price and value: what $129 covers, and why it’s not just a guide fee
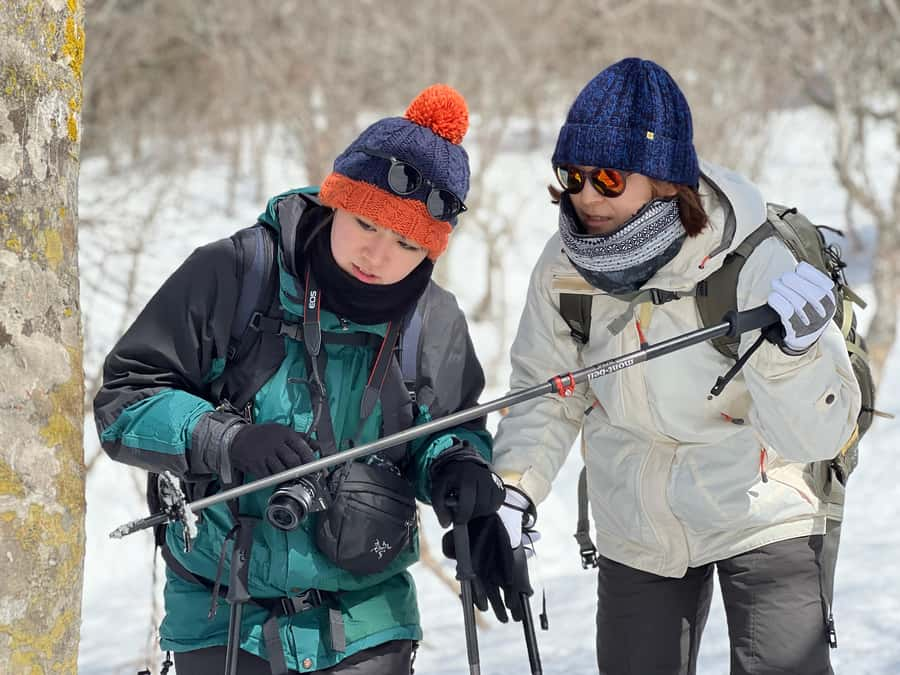
At $129 per person for about 5 hours, you’re paying for more than someone leading you to ice. You’re paying for the gear logistics and safety system built into the day.
Included items that affect real value:
- Essential gear rental (snowshoe, poles, light crampons, helmet, beacon)
- Lift fee
- Hot water for meal preparation
- A tent-type portable toilet brought for the group
- Photos taken by the guide and provided for free
- Insurance and consumption tax
When you add those up, the price starts to make sense. If you had to rent crampons, snowshoes, and poles yourself in Japan for a short trip, the total usually climbs fast. Here, you don’t have to hunt gear, and you get equipment that matches the tour’s specific terrain.
The biggest “value condition” is you showing up prepared to participate. This is priced for active trekking. If you’re not fit enough to handle steep ascents and descents, you won’t enjoy it, even if you can technically walk.
Who this snow trek is perfect for (and who should skip)
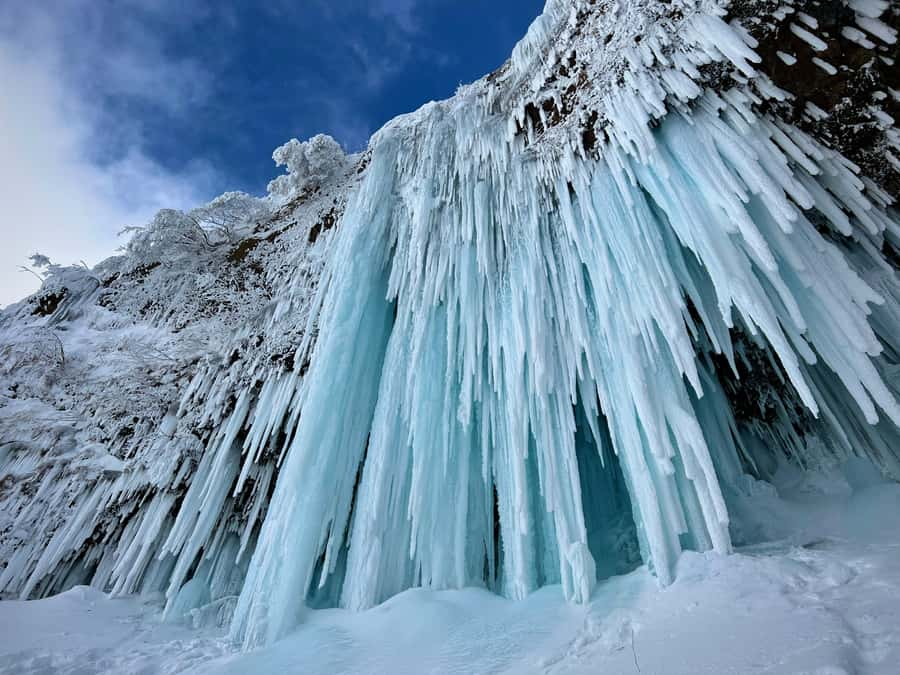
This activity is designed for people with snowshoe or winter trekking experience. The tour itself warns beginners to join a separate course called Ice monster Snow Hiking instead.
You also need to be able to:
- Carry a backpack
- Walk for more than four hours under your own power
- Handle some steep ascents and descents
That makes it ideal for travelers who already hike in winter or have tried snowshoeing before. If you’re the type who enjoys winter challenges and wants a deeper experience than a quick viewpoint, you’ll likely love this.
It’s not suitable for children under 10, pregnant women, people with heart problems, or those with low fitness. If you’re in any of those categories, it’s better to choose a different winter activity that matches your safety needs.
Packing list that keeps you comfortable on icy slopes
Bring the items they recommend, and treat them as non-negotiable for comfort.
Your core kit:
- Sunglasses and a hat (bright snow is no joke)
- Gloves and snow clothing
- Warm shoes that work in snow
- A daypack for your personal items and backup layers
- Food and drinks, since lunch needs your own meal prep
Also, bring trekking gear if you have it. Even if the tour provides key traction equipment, having your own comfortable winter setup can make the walk easier.
If you want a smoother lunch, bring something that responds well to hot water. Instant noodles are an easy option because you can make them quickly and warm up fast.
Should you book the Hyobaku icefall snow trek?
Book it if you want a true snow trekking experience in Zao, Yamagata, where you walk into the icefall zone rather than just watching from a distance. The combination of crampons, snowshoes, a small group, and a guide who handles English instruction makes this feel both adventurous and well managed.
Skip it if you’re looking for a light, beginner-friendly winter outing, or if you can’t handle more than four hours of active walking with steep sections. Also skip if you can’t dress properly for cold and ice conditions—this tour depends on your preparation.
If you’re a winter-hiker type and you enjoy that rare feeling of moving through fresh snow no one else has stepped on, this is the kind of day that sticks with you long after the cold fades.