REVIEW · GILI TRAWANGAN
Rinjani Trekking 2D1N Senaru crater rim
Book on Viator →Operated by Senaru Adventures · Bookable on Viator
Crater rim views come early on this trek. The Senaru crater rim experience is the headline: a forest climb from Senaru village up to 2,641m, then camping for sunset and sunrise. I like that the route feels beginner-friendly in structure, with clear checkpoints and time built in to catch your breath.
Two things I especially like are the planned breaks and the setting. You get a proper pause at Post 2 (Montong SATAS shelter, 1,500m) with tea and biscuits, then a bigger reset at Pos 3 (Mondokan Lolak, 2,000m) for lunch and time to regroup. It’s not rushed sightseeing on sore legs.
One drawback to consider: this is still real hiking and camping at altitude. You’ll start around 601m and climb to 2,641m, then sleep in a tent, so you’ll want a realistic fitness level and to be ready for cooler night air.
In This Review
- Key Highlights You’ll Care About
- From Lombok Pickup to a Comfortable Start in Senaru
- Day 1 in the Forest: Senaru Trek Center to Post 2 Montong SATAS
- Pos 3 Mondokan Lolak Lunch Reset at 2,000m
- The Crater Rim Climb: Reaching 2,641m for Sunset
- Camping at the Rim: Meals, Sleeping Gear, and Night Reality
- Day 2: Breakfast, Descent, and Car Transfer Back to Senaru
- Price and Value: Does $285 Add Up for This 2D1N Trek?
- Who This Trek Fits Best (Beginner-Friendly, But Not Lazy)
- Guides and Porters: The Human Part of a Volcano Trek
- Weather and Timing: What You Should Plan Around
- Should You Book This Senaru Crater Rim Trek?
- FAQ
- What does the 2D1N Senaru crater rim trek include?
- Where does the trek start and where do you camp?
- How long is the experience?
- What time does the trek meet and start?
- What are the main stops on day 1?
- What should I expect on the views at the crater rim?
- Is this trek suitable for beginners?
- What is not included in the price?
- What happens if the weather is bad?
Key Highlights You’ll Care About
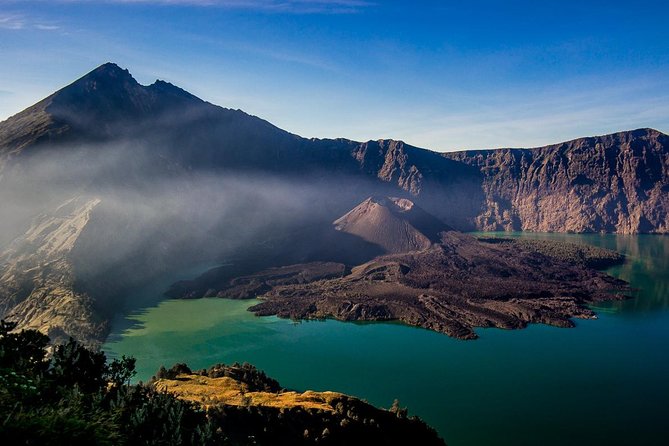
- Senaru crater rim camping for sunset over Bali’s Mount Agung and morning views at 2,641m
- Well-paced checkpoints at Montong SATAS shelter (1,500m) and Mondokan Lolak (2,000m)
- Guide + local porters included, plus all camping gear like tents, sleeping bags, and mats
- Meals handled with three meals a day, so you’re not budgeting trail food
- Private-group format, meaning it’s just your group during the trek
From Lombok Pickup to a Comfortable Start in Senaru
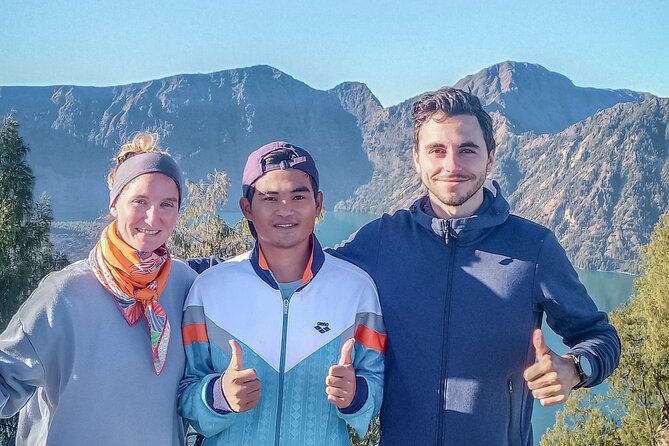
This trek starts the easy way for you: you don’t have to figure out your own ground transport. Day 0 is basically your setup day. If you’re arriving on Lombok, you’ll get pickup from the airport or other locations around the island, then you transfer into Senaru for an overnight stay.
That one night before the climb matters more than you’d think. By the time you register for the trek center the next morning, your body is in the right rhythm. You’re also not doing a long travel day, then immediately launching into a steep ascent. Senaru is at a low altitude compared to the crater rim, so you start the hike with less stress.
There’s also a cultural angle to staying in Senaru. People talk about the experience of being in/near the traditional village atmosphere of Senaru, and you may find homestay-style stays in the area. One example that comes up is Bukit Senaru homestay, which feels welcoming and very local. Even if your exact lodging varies, the point is the same: you’re not sleeping in a generic transit hotel before you hit the trail.
Your start time is set early (7:00am meeting time). The trek itself typically begins around 8:00am after registration at the Rinjani Trek Center Senaru. Translation: don’t plan a late breakfast the morning of departure.
Day 1 in the Forest: Senaru Trek Center to Post 2 Montong SATAS
Once you register, you start walking through dense tropical forest. This is a big part of why the Senaru route works for first-timers. The trail is still climbing, but you’re not staring at volcanic rock the whole time. Instead, you move under a canopy with lots of flora and plenty of bird life, plus butterflies you can spot if you slow down for a second.
The day is also structured. You head to the first major pause at Post 2 Montong SATAS shelter (1,500m). You stop there for a cup of tea and biscuits. That small detail is a big deal when you’re hiking. Tea isn’t just a treat; it’s warm, and it helps you reset mentally instead of counting minutes until the next leg.
Practical tip: treat these breaks like training. Use them to drink water, cool down, and then start again at a steady pace. If you go too fast early, the later climb to the rim feels harder than it needs to.
Also, since you’re in forest terrain, expect humidity and the chance of wet ground. Bring footwear you already trust. You don’t want to test new shoes on an active volcano trek.
Pos 3 Mondokan Lolak Lunch Reset at 2,000m
After Post 2, you continue trekking upward for about two hours to Pos 3 Mondokan Lolak (2,000m). This stop is your bigger lunch break, and it’s where the day starts feeling more “high altitude trek” than “easy morning walk.”
Lunch at Pos 3 is not just fuel. It’s your chance to check in with how your body is handling the climb. At this stage, you’ll often notice your breathing working a little harder. That’s normal. What matters is staying consistent and not forcing speed.
This is also where a good guide earns their pay. With local guides and porters included, you’ll have support for pacing and logistics. If you’re a beginner, you especially benefit from that: you can focus on stepping smart and keeping your rhythm rather than worrying about timing or supplies.
One more thing I like about this route: you’re not forced into a “survive the hardest part” mental mode immediately. The tea-and-biscuits stop at 1,500m makes the 2,000m lunch feel achievable, not brutal.
The Crater Rim Climb: Reaching 2,641m for Sunset
After lunch at Pos 3, you leave the post and push up to the Senaru crater rim at 2,641m. This climb takes about two hours. It’s shorter on paper than the day before, but by now your legs understand the altitude.
The reward hits when you get to the rim. The views are described as the most spectacular after the peak. When you arrive, you’ll have that classic crater-rim moment: the “I’m really up here” feeling, followed by staring because your brain can’t decide what to focus on first.
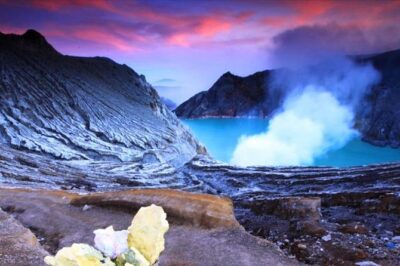
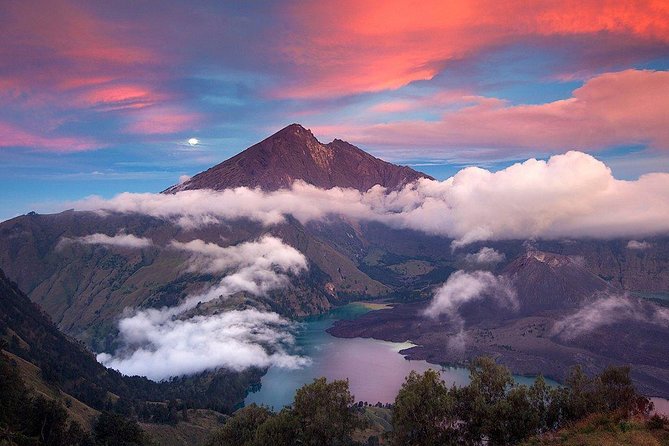
Sunset is the highlight. You’ll enjoy an incredible sunset looking toward Mount Agung in Bali. You may also notice smoke from a new volcano at the edge of the lake area. Even if you’re not a volcanology nerd, this is the kind of sight that makes Rinjani feel alive.
Then you camp for the night right on the crater rim. This is where the trek shifts from hiking trip to memory-making experience.
Practical note: bring a headlamp or small flashlight for after dark. The day ends beautifully, but the rim gets dark fast.
Camping at the Rim: Meals, Sleeping Gear, and Night Reality
Overnight is tent camping, not backpacking-in-remote-nature improvisation. Included equipment covers what you need to sleep: tents, sleeping bags, sleeping mats, plus a toilet tent and cooking gears. Meals are also included, with three meals daily across the trip.
So yes, comfort is part of the plan. But “included” doesn’t mean “hotel warm.” Sleeping at 2,641m can feel surprisingly cool, especially when wind moves across the rim. I’d treat the sleeping bag as essential and wear a dry layer to bed if you have one.
The toilet tent setup is also worth mentioning because it’s part of your expectations. You won’t have a private bathroom, but the fact that there’s a dedicated toilet tent means you’re not stuck with guessing where and how.
Food-wise, having meals handled reduces decision fatigue. On treks like this, you’ll be glad you’re not managing snacks and trying to calculate what you’ll need for energy.
And then there’s sunrise. The next morning begins with breakfast and a sunrise described as beautiful, which makes the overnight stay feel purposeful rather than just “we slept somewhere cold.”
Day 2: Breakfast, Descent, and Car Transfer Back to Senaru
Day 2 is the return. After sunrise and breakfast, you descend back to Senaru village. The main change here is physical, not scenic: your legs switch from climbing muscles to braking muscles.
Descent is often harder on knees and ankles than the climb feels. Use trekking poles if you have them (the listing doesn’t say poles are included), and take shorter steps on steep sections. A steady cadence beats big hero strides every time.
When you reach Senaru village, your transfer is handled by car. From there, you’ll be taken to your next destination. It’s a nice finish because you get recovery without having to coordinate transport after a two-day physical effort.
Price and Value: Does $285 Add Up for This 2D1N Trek?
At $285 per person, the value here comes from what’s included rather than what you personally carry.
Included items cover the heavy logistics:
- Mountain guide and local porters
- All camping gear (tent, sleeping bag, sleeping mat, toilet tent, cooking gear)
- All meals (three meals a day)
- One night accommodation in Senaru before the trek starts
- Transport pickup and return from Lombok locations including the airport, Mataram, Senggigi, Bangsal, or other locations in Lombok
- Rinjani entrance ticket (150,000 IDR per person)
Not included is mainly what you control:
- Personal expenses
- Tipping for guide and porters
For many people, the biggest hidden cost in multi-day treks is equipment and meal planning. This program basically removes that stress. You also get private-group format, so you’re not stuck with a random mix of paces and expectations during the climb.
If you want a practical way to think about it: you’re paying for a supported, organized two-day trek experience that includes gear, food, and transport. You still need to be fit enough for the ascent, but you’re not paying extra for the basics you’d otherwise need to arrange yourself.
Who This Trek Fits Best (Beginner-Friendly, But Not Lazy)
This trek is described as suitable for beginner hikers and people who want the views from Senaru crater rim. The day 1 pacing, with structured stops (1,500m tea break and 2,000m lunch), supports that beginner-friendly feel.
That said, “beginner-friendly” doesn’t mean “easy.” You’re going from about 601m to 2,641m. That’s a big vertical climb, even though each section is timed and supported.
It’s a great fit if you:
- Want a short trek (2 days 1 night on the trail, plus day 0 arrival)
- Want crater rim camping and sunrise/sunset, not just a viewpoint stop
- Like having a guide and porters managing the practical side
It’s not ideal if you:
- Have zero tolerance for overnight camping
- Know you struggle with altitude gain, even on shorter hikes
- Prefer long hikes with long stays and a slower pace rather than a tight 2D1N structure
Guides and Porters: The Human Part of a Volcano Trek
A trek like this lives and dies on the team. You get a mountain guide and local porters included, and that support changes how the hike feels day to day.
Good guides do two things. First, they manage pace so you don’t burn out early. Second, they keep the trip running smoothly when conditions change. With a route like this that climbs to a specific rim altitude and includes camp setup, “smoothly” is not a small detail.
There’s also real personality in the guide experience. One named guide that comes up is Yantoo, mentioned with appreciation for making the trek feel fun and worthwhile. That kind of guide energy matters because you’re spending a lot of hours together. A positive, clear guide makes the day feel less like work.
Porters matter too. Even when you hike with a daypack, you’re still moving through humid forest, then higher altitude terrain. Having porters handle the camping and cooking load makes the climb more realistic for first-timers.
Weather and Timing: What You Should Plan Around
This experience requires good weather. If it’s canceled due to poor weather, you’ll be offered a different date or a full refund. That’s important because volcano trekking lives and dies on visibility and trail safety.
You should also think about your timing expectations. Meeting time is set for 7:00am, and day 1 starts walking around 8:00am after registration. That means you’re building your day around the trail schedule, not around late coffee plans.
You’ll receive a mobile ticket, which keeps things simple. Still, treat your phone like it’s in airplane mode for real emergencies: keep it charged and consider any backup information you might need before heading out.
Should You Book This Senaru Crater Rim Trek?
I’d book it if you want a well-supported 2D1N Rinjani climb that hits the crater rim for sunset and sunrise, without making you build the logistics yourself. The mix of structured breaks, included camping gear, meals, and transport is strong value. Plus, the forest-to-rim rhythm is a smart way to experience Rinjani without doing an overwhelming multi-day ordeal.
I’d hesitate if camping at altitude is a deal-breaker for you, or if you know you struggle with big elevation gains. This trek is doable for beginners, but it still demands respect for the climb.
If you want your Rinjani experience to feel organized, scenic, and genuinely memorable at the rim, this Senaru 2D1N format is a solid choice.
FAQ
What does the 2D1N Senaru crater rim trek include?
It includes a mountain guide and local porters, all camping equipment (tents, sleeping bags, sleeping mats, toilet tent, cooking gears), all meals (three meals a day), one night accommodation in Senaru before the trek, pickup and return transport from Lombok locations, and the Mount Rinjani entrance ticket (150,000 IDR per person).
Where does the trek start and where do you camp?
The trek starts at Senaru village. On day 1, you hike up to the Senaru crater rim at about 2,641m and camp there for the night.
How long is the experience?
It runs for 3 days approximately, with day 0 being arrival and accommodation in Senaru, then 2 days of trekking (2 days 1 night on the trail).
What time does the trek meet and start?
The meeting time is 7:00am, and the trekking starts around 8:00am after registration.
What are the main stops on day 1?
Day 1 includes registration, then trekking through forest to Post 2 Montong SATAS shelter (1,500m) for tea and biscuits. After that you continue to Pos 3 Mondokan Lolak (2,000m) for a break and lunch, then continue up toward the crater rim.
What should I expect on the views at the crater rim?
You’ll enjoy sunset over Mount Agung in Bali, and you may also see smoke from a new volcano on the edge of the lake area. The next morning includes breakfast with sunrise views.
Is this trek suitable for beginners?
It’s described as suitable for beginner hikers and for people who mainly want to enjoy the crater rim views. It also notes moderate physical fitness level is required.
What is not included in the price?
Personal expenses and tipping for the guide and porters are not included.
What happens if the weather is bad?
The experience requires good weather. If it’s canceled due to poor weather, you’ll be offered a different date or a full refund. Cancellation is free, and you can cancel up to 24 hours in advance for a full refund.